With winter is upon us, my cooking strategy has changed from grilling outside to roasting inside (although here in Southern Cali any day is a grillin' day!). One of Matthew's favorite side dishes is Rosemary Roasted Potatoes. They are quite easy to make and the heat of your oven will warm up your house and your taste buds. For the recipe, you will need:
Preheat oven to 375 degrees.
Combine all ingredients, except the potatoes, in a glass bowl. Whisk until it is well combined.
 Cut potatoes in half. For larger sized potatoes, cut them in quarters. Using a rubber spatula, toss the potatoes with the oil mixture until they are well coated and the rosemary is well distributed.
 Place the potatoes in single layer on heavy baking sheet. Roast for 30 to 45 minutes, turning every 10 minutes. Sprinkle with a little more salt and pepper before serving.

Friday, September 30, 2005
Garlic and Rosemary Roasted Potatoes
Thursday, September 29, 2005
Wine Notes: Da Vinci 2004 Chianti
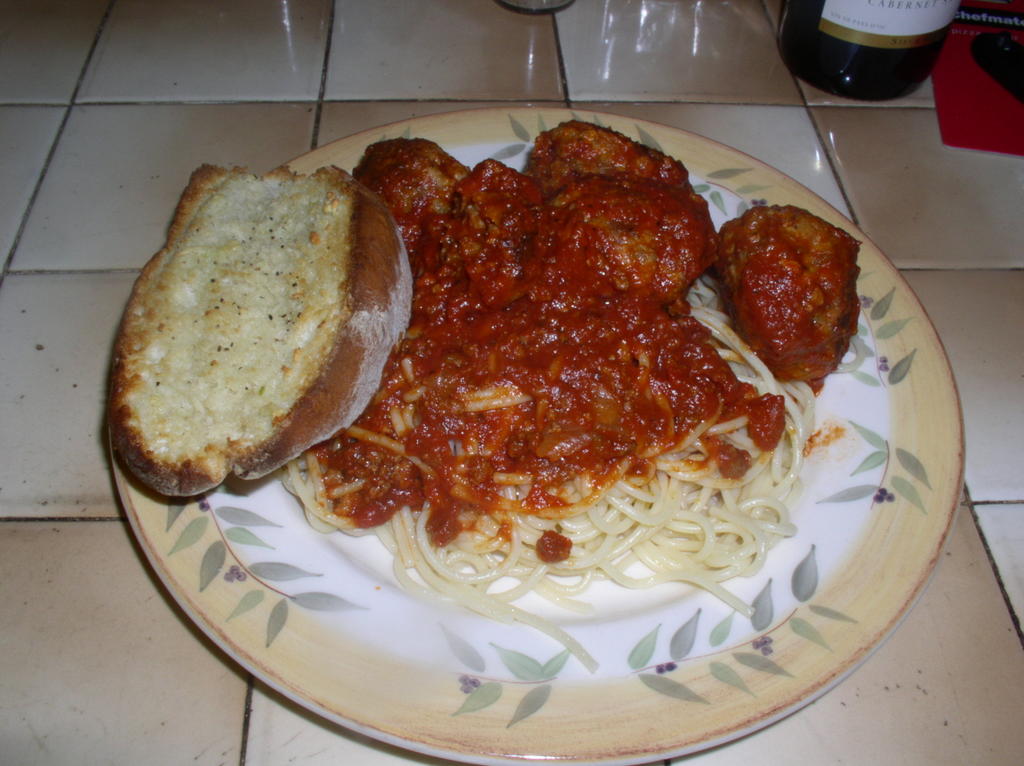
 I had this wine last Friday at our cooking club meeting. Our friend, Yvonne, brought this Chianti to compliment the Italian feast we had. For a 2004 vintage, the Chianti was quite smooth on the palate and it had a fruity backnote with just enough tannins to make you want to drink more. The wine paired up extremely well with our spaghetti and meatballs and it tasted delicious with pizza, too! For the price ($13 to $15), this is a great find and this wine should definitely be on your shopping list.
Winemakers Notes:
The Highest Rated Chianti under $15 in last 10 years from Wine Spectator. "Juicy, Fruity, Medium-bodied wine...a serious buy at this price."
To produce the DaVinci DOCG Chianti, the grapes were sourced from south facing hillside vineyards located in the territories of Vinci and Cerreto Guidi, on the western side of the Chianti region. The vineyards average in age from 15-20 years old and are comprised of 1,800 vines per acre. The soil posseses adequete calcium and nitorgen content and is comprised of moderate clay which allows for optimum drainage.
Taste Profile:
Color: Clear, ruby-red
Bouquet: Perfumes of cherries, fresh red friut accented by peppery notes
Palate: Well balanced and ripe with flavors of cherries and red fruit. Lively with soft, round tannins that linger throughout the finish
Suggested pairings: Delicious with all starters such as bruschetta and caprese salad, pastas and meat dishes
Serving temperature: Serve slightly below room temperature
I had this wine last Friday at our cooking club meeting. Our friend, Yvonne, brought this Chianti to compliment the Italian feast we had. For a 2004 vintage, the Chianti was quite smooth on the palate and it had a fruity backnote with just enough tannins to make you want to drink more. The wine paired up extremely well with our spaghetti and meatballs and it tasted delicious with pizza, too! For the price ($13 to $15), this is a great find and this wine should definitely be on your shopping list.
Winemakers Notes:
The Highest Rated Chianti under $15 in last 10 years from Wine Spectator. "Juicy, Fruity, Medium-bodied wine...a serious buy at this price."
To produce the DaVinci DOCG Chianti, the grapes were sourced from south facing hillside vineyards located in the territories of Vinci and Cerreto Guidi, on the western side of the Chianti region. The vineyards average in age from 15-20 years old and are comprised of 1,800 vines per acre. The soil posseses adequete calcium and nitorgen content and is comprised of moderate clay which allows for optimum drainage.
Taste Profile:
Color: Clear, ruby-red
Bouquet: Perfumes of cherries, fresh red friut accented by peppery notes
Palate: Well balanced and ripe with flavors of cherries and red fruit. Lively with soft, round tannins that linger throughout the finish
Suggested pairings: Delicious with all starters such as bruschetta and caprese salad, pastas and meat dishes
Serving temperature: Serve slightly below room temperature
Wednesday, September 28, 2005
Creamy Mac and Cheese

What is more comforting than mom's pot roast on a rainy Sunday afternoon? How about homemade macaroni and cheese? If you are like me, you probably grew up eating the Kraft mac and cheese with the powdery cheese sauce. And, I have to admit, as a kid it tasted pretty good. But later in my youth when money was scarce, I had to eat the imitation Kraft mac and cheese, which tasted like carboard with salty cheese. Now, as an adult(?), my taste buds are more sophisticated and I wanted to make homemade macaroni and cheese that would knock my socks off. I made my first homemade mac and cheese last year for a summer BBQ and it was beyond delicious. If you are aching for some good comfort food, try this recipe. It's so yummy I can't even describe how delicious it is! 4 Tbs butter 4 Tbs flour 2 cups warm milk Salt and freshly ground black pepper to taste 1/2 tsp Tabasco 12 oz macaroni elbows, cooked and drained 12 ounces grated Cheddar cheese (I prefer Tillamook medium) 4 ounces grated Gruyere cheese 1/4 cup bread crumbs
- Turn on the oven to 350 F.
- Make roux by melting the butter and adding the flour. Cook over low heat for three minutes, stirring constantly.
- Increase the heat to medium and add the warm milk to the roux. Keep stirring and use a whisk, if necessary, to make the sauce smooth. Cook until thickened, about 4 minutes.
- Season with salt, pepper and Tabasco.
- Mix in the grated cheeses into the sauce. Stir until the cheese is melted and sauce is smooth. Cover and set aside.
- Cook and drain elbow macaroni. Combine macaroni with the cheese sauce (bechamel).
- Grease a 3-quart casserole or baking pan and add the macaroni mixture. Sprinkle the top with remaining bread crumbs and bake for 20 to 30 minutes in a 350 degree oven, or until macaroni and cheese is bubbly and hot and the top is golden brown.
- Remove from the oven and allow to sit for 5 minutes before serving.
Monday, September 26, 2005
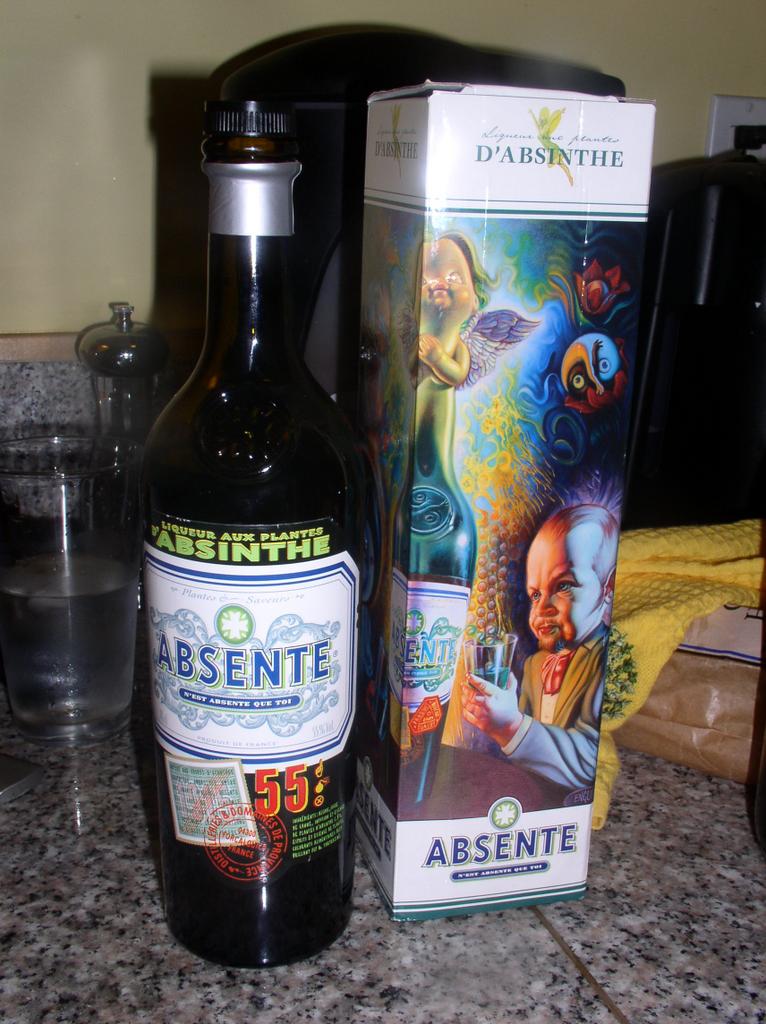
How to Serve Absinthe
The serving of absinthe is something of a ritual. It involves pouring water over lumps of sugar sitting on special spoons. The ritual arose because vintage absinthe was unsweetened and slightly too bitter for some palates, and the sugar needed to sweeten it would not dissolve in the liqueur's 68% to 72% alcohol content. We used a bottle of "Absente, Liqueur aux Plantes d'Absinthe" which came with its own spoon. My brother and his wife bought this delightful spirited hooch in Paris and they shared it with us last week.
 Step 1: Pour a measure of absinthe into a tall glass.
Step 2: Place a slotted absinthe spoon over the glass and place a sugar cube on it.
Step 3: Slowly pour 4 to 5 parts of iced water over the sugar and let it drip into the glass. The absinthe will turn from emerald green to a milky white.
Step 4: Sip slowly and imagine yourself in a Belle Epoque Parisian cafe.
Step 1: Pour a measure of absinthe into a tall glass.
Step 2: Place a slotted absinthe spoon over the glass and place a sugar cube on it.
Step 3: Slowly pour 4 to 5 parts of iced water over the sugar and let it drip into the glass. The absinthe will turn from emerald green to a milky white.
Step 4: Sip slowly and imagine yourself in a Belle Epoque Parisian cafe.
 Click here for a Brief History of Absinthe.
Friday, September 23, 2005
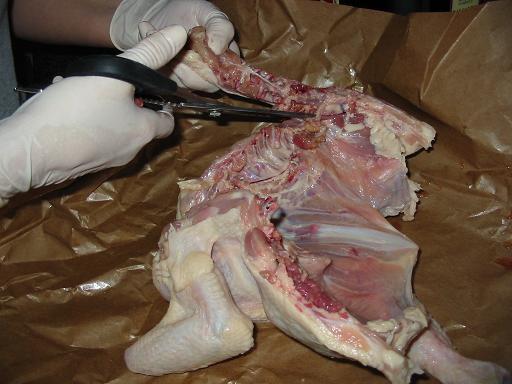
How to Butterfly a Chicken
 2. Using kitchen or poultry shears*, cut as close to the keel bone (backbone) as possible.
 3. Turn chicken around and using the tail as a guide, cut on the outside of the tail straight down the back of the chicken.
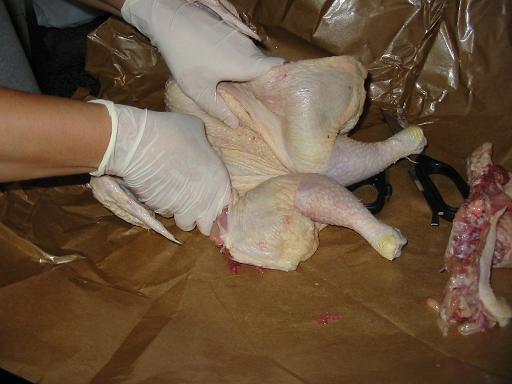
 4. Remove the keel bone, it will be about ½-inch wide and as long as the chicken.
 5. Turn chicken over and press firmly into the center of the breast.
 6. The chicken will flatten out and will open like a book.
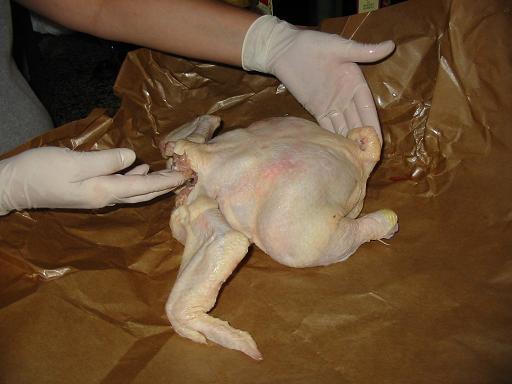 7. Twist the wing tips so that the tip is under the upper wing.*The Messermeister Utility Take Apart Shears do this job beautifully.
 Butterflied Chicken is Quick and Easy!
 Photographs courtesy of Elizabeth and Gretchen, GirlAtTheGrill.com, c. 2005
Wednesday, September 21, 2005
Experiment Recipe #2
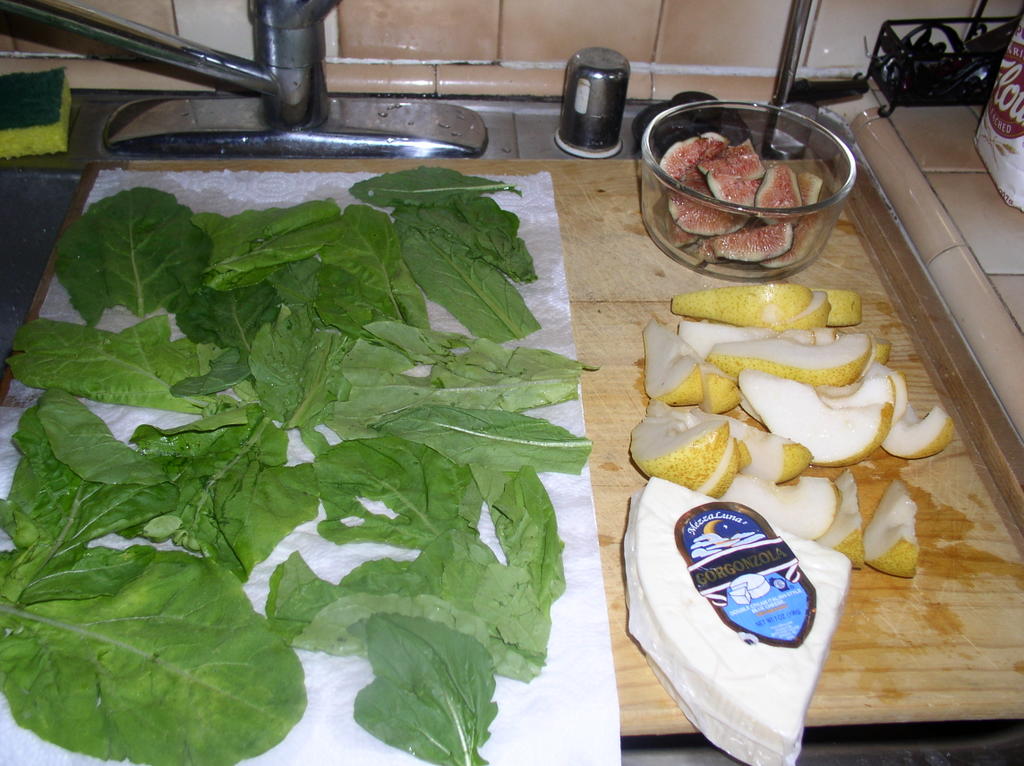 For the ingredients I got a package of ready-made pizza dough at Trader Joe's, 1/4 lb. arugula, 2 pears, 4 ripe figs, toasted walnuts and about 1/2 cup crumbled gorgonzala cheese.
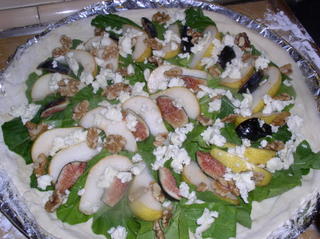 I rolled out the dough and lightly brushed it with garlic-olive oil. I then spread out the arugula (washed and dried), sliced pears, sliced figs, nuts and topped it off with the crumbled cheese. I baked it in a 450 F for 5 minutes then lowered to 375 for an additional 14 minutes, until the crust browns a little.
 My husband did not like the pizza at all and only ate one slice. I ate one and a half. I think the pear was too ripe and perhaps mozzarella cheese would have been better. I did like the arugula flavor, though. I may try another pizza with arugula, tomatoes, riccota and garlic. Anyhoo, at least the pizza looked pretty. :)
Tuesday, September 20, 2005
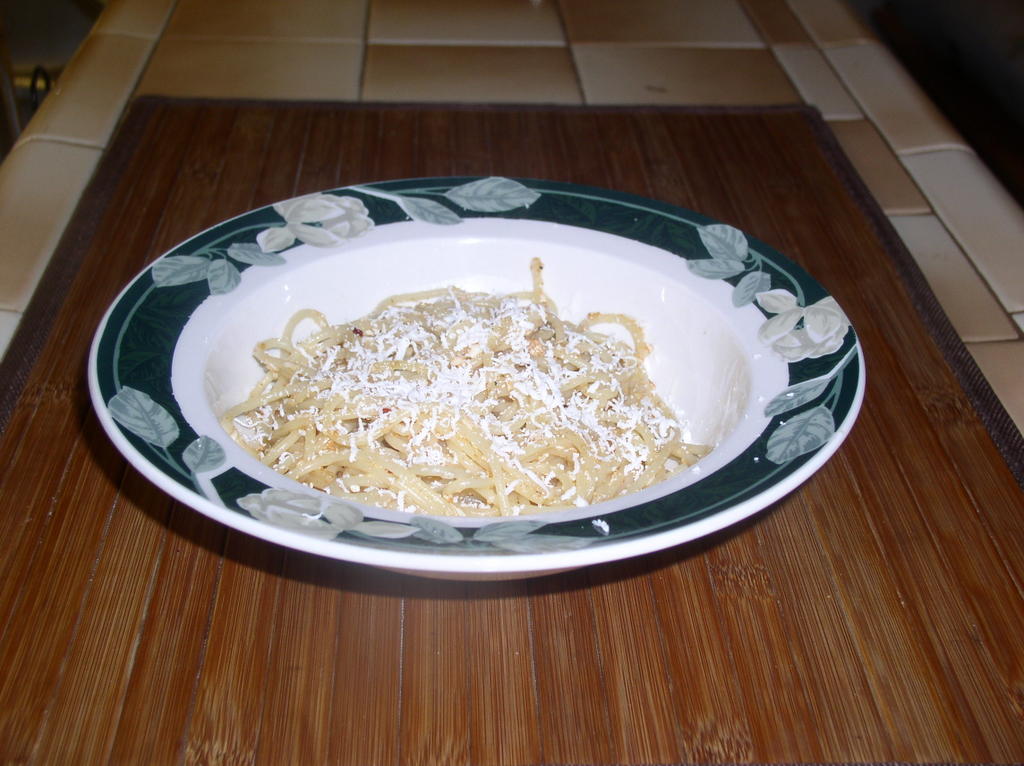
Spaghetti with Mizithra
 If I have one weakness when I diet, it is pasta. Fussili, spaghetti, penne, angel hair, you name it, I love it all. But there is one pasta dish that I miss ever since The Old Spaghetti Factory closed its doors in San Diego in January 2005. They had a great yet simple dish called Spaghetti with Browned Butter and Mizithra Cheese. OSF states that "Homer lived on this toothsome treat...while composing the Iliad." If that's true, then I better start composing my great epic poem. This spaghetti has a sauce of browned butter, garlic and mizithra cheese, which is a hard goat cheese. Talk about simple yet intense flavor. I looked up the recipe online and I was suprised how close it came to the actual dish. So if you're craving spaghetti, try this recipe.
For the spaghetti you will need: (serves 6)
If I have one weakness when I diet, it is pasta. Fussili, spaghetti, penne, angel hair, you name it, I love it all. But there is one pasta dish that I miss ever since The Old Spaghetti Factory closed its doors in San Diego in January 2005. They had a great yet simple dish called Spaghetti with Browned Butter and Mizithra Cheese. OSF states that "Homer lived on this toothsome treat...while composing the Iliad." If that's true, then I better start composing my great epic poem. This spaghetti has a sauce of browned butter, garlic and mizithra cheese, which is a hard goat cheese. Talk about simple yet intense flavor. I looked up the recipe online and I was suprised how close it came to the actual dish. So if you're craving spaghetti, try this recipe.
For the spaghetti you will need: (serves 6)
- 1/4 c Olive oil
- 2 Garlic cloves, minced
- 4 TBSP. unsalted butter
- 1 lb Spaghetti, cooked/drained
- 1/2 c Parmesan, freshly grated
- 1/2 c Mizithra cheese, freshly grated
- Salt and pepper to taste
- 1/4 c Parsley, chopped for garnish
Friday, September 16, 2005
T.G.I.Flan!
Flan is a custard-like creamy dessert consisting of eggs and milk and thickened by the heat of an oven. I'm sure you've had custard before. Maybe you've had your grandma's custard pie or flan at a Mexican restaurant...perhaps tasted a heavenly Creme Brulee at the local bistro. But if you've never had flan before then I think it's about time you made it for yourself.
Thanks to Cooking up Custard for inspiring me to make my first flan. I spent the evening with my mom to learn how to make the dessert...and, wow, did it came out fantastic! The flan was creamy and the caramel that it creates was sweet and nutty and so gooey.
To make flan, you will need:
 First, turn on the oven to 350* F. Get out a casserole or a 1-1/2 quart oven-proof round dish.
Next, in a blender add the eggs, the can of sweetened condensed milk and a can of milk (use the can of sweetened condensed milk as measurment). Add the vanilla and a pinch of salt. Blend on high for 30 seconds, then on low for 2 more minutes. Set aside.
First, turn on the oven to 350* F. Get out a casserole or a 1-1/2 quart oven-proof round dish.
Next, in a blender add the eggs, the can of sweetened condensed milk and a can of milk (use the can of sweetened condensed milk as measurment). Add the vanilla and a pinch of salt. Blend on high for 30 seconds, then on low for 2 more minutes. Set aside.
 Next, lightly moisten the casserole dish with tap water.
Add the sugar to a small sauce pan and place it over medium-high heat and cook it, sitirring constantly. Do not step away from the stove or else the sugar will burn and do not touch the sugar once it begins to melt. It is very hot!
Next, lightly moisten the casserole dish with tap water.
Add the sugar to a small sauce pan and place it over medium-high heat and cook it, sitirring constantly. Do not step away from the stove or else the sugar will burn and do not touch the sugar once it begins to melt. It is very hot!
 Keep stirring the sugar until it gets to a dark, brown color but do not let it burn.
 Turn off heat and immediately add the caramel to the bottom of the casserole. Swirl it around to cover the bottom.
 Now add the egg mixture from the blender to the casserole. Bake it in the middle of the oven for 45 minutes to 1 hour at 350 F. Your flan should be done when it’s lightly colored and firm to the touch but not solid. To double check, stick the blade of your knife in the center of the flan halfway down; the blade should come out clean. Carefully remove the flan from the oven and let it cool for about 30 minutes.
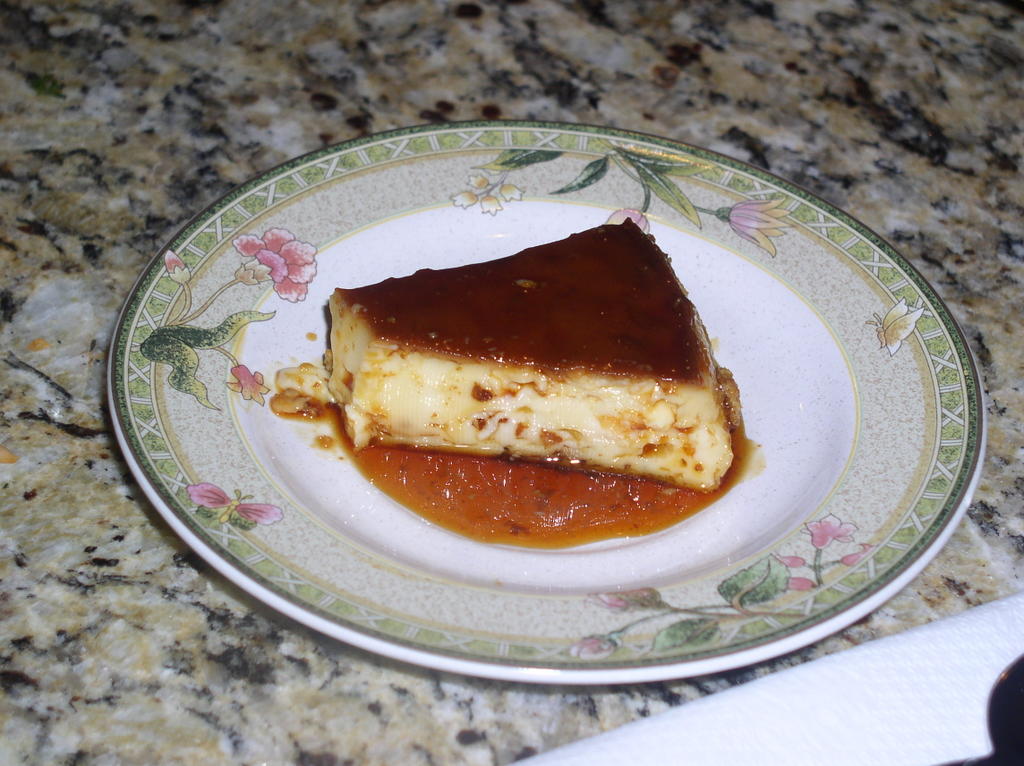
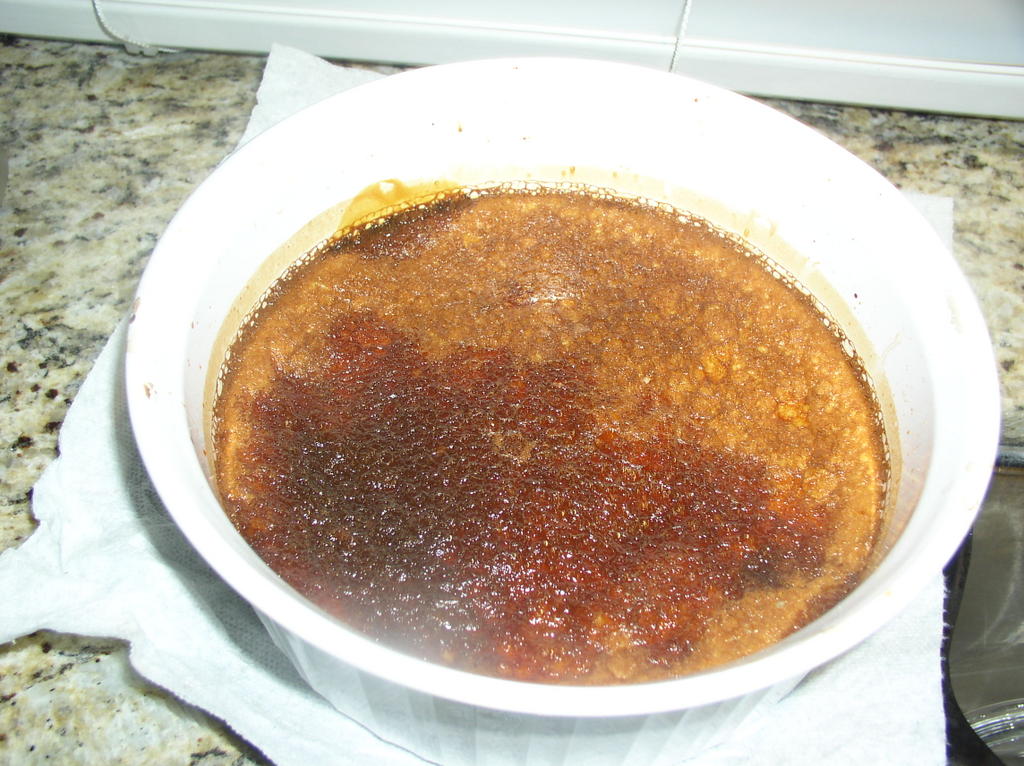 Cover and place it in the refrigerator for 4 hours or overnight. When you are ready to serve, run a thin knife around the edges of the flan to loosen. Invert the flan onto your serving dish and voila!
Serve it in slices and drizzle caramel over it. Mmmm, I can't wait to to try it again!
Cover and place it in the refrigerator for 4 hours or overnight. When you are ready to serve, run a thin knife around the edges of the flan to loosen. Invert the flan onto your serving dish and voila!
Serve it in slices and drizzle caramel over it. Mmmm, I can't wait to to try it again!
Thursday, September 15, 2005
Beef Stroganoff
- 1 1/2 pounds beef tenderloin fillet
- Salt and pepper
- 3 tablespoons butter, divided
- 2 tablespoons all-purpose flour
- 2 cups beef consomme, available on soup aisle
- 2 teaspoons prepared Dijon style mustard
- 1/4 cup sour cream, eyeball it
- 1 tablespoon extra-virgin olive oil or vegetable oil, 1 turn of the pan in a slow stream
- 1/2 small onion, sliced
- 1/3 cup coarsely chopped cornichons
- 1 pound extra wide egg noodles, cooked to package directions
- Chopped parsley leaves, garnish
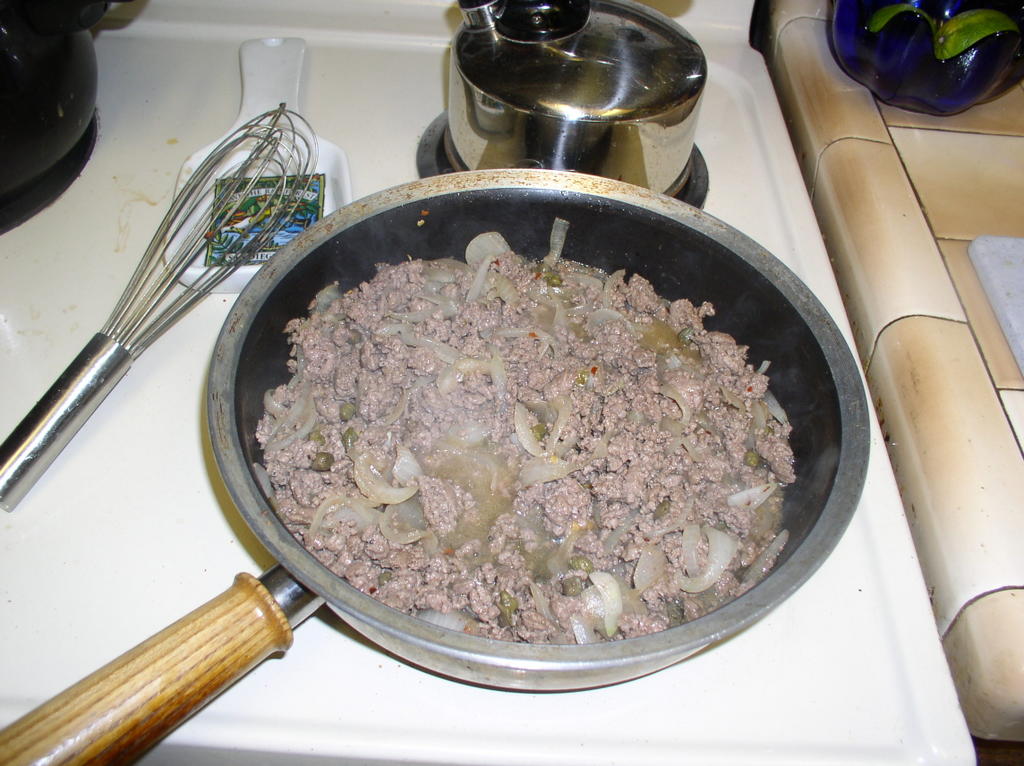
 Meanwhile, heat a second skillet over high heat. Add 1 tablespoon oil and 1 tablespoon butter, then add the onion and cook over high heat for about 3 minutes then add the meat and brown on both sides, 3 to 4 minutes total. Add the chopped cornichons (or capers) and stir to combine. Turn off heat.
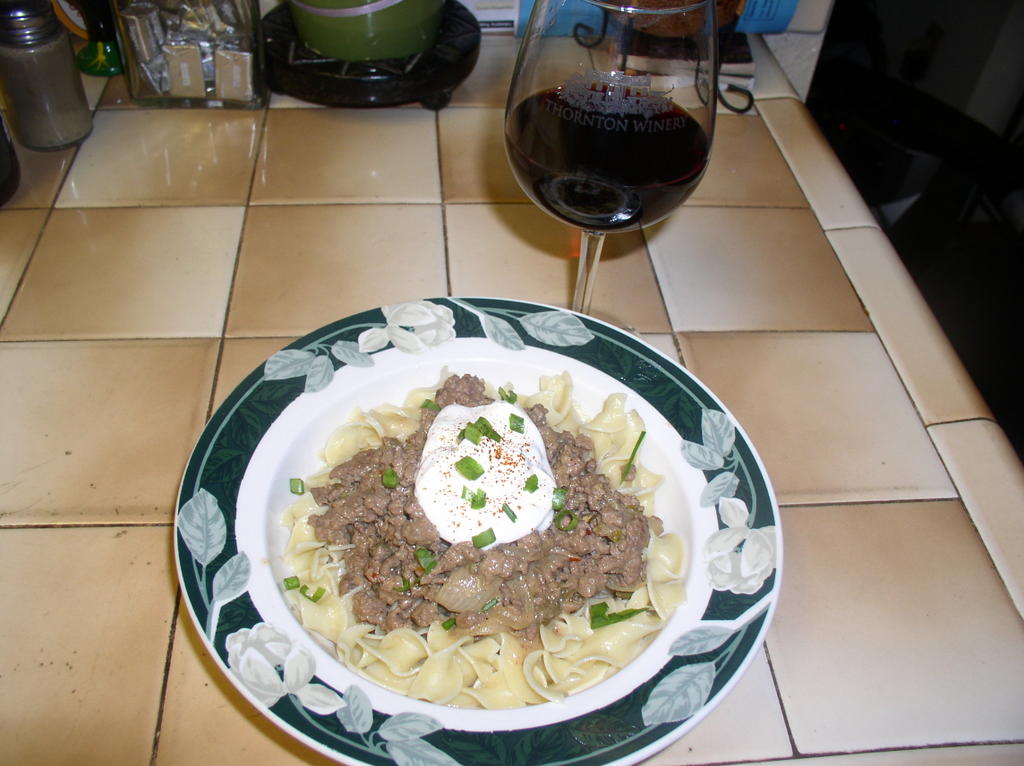
 Remove sauce from heat and add it to the skillet with the meat and onions and stir to combine.
Arrange egg noodles on a plate and top with Beef Stroganoff and parsley.
Remove sauce from heat and add it to the skillet with the meat and onions and stir to combine.
Arrange egg noodles on a plate and top with Beef Stroganoff and parsley.
Recipe courtesy Rachael Ray, 30 Minute Meals
Wednesday, September 14, 2005
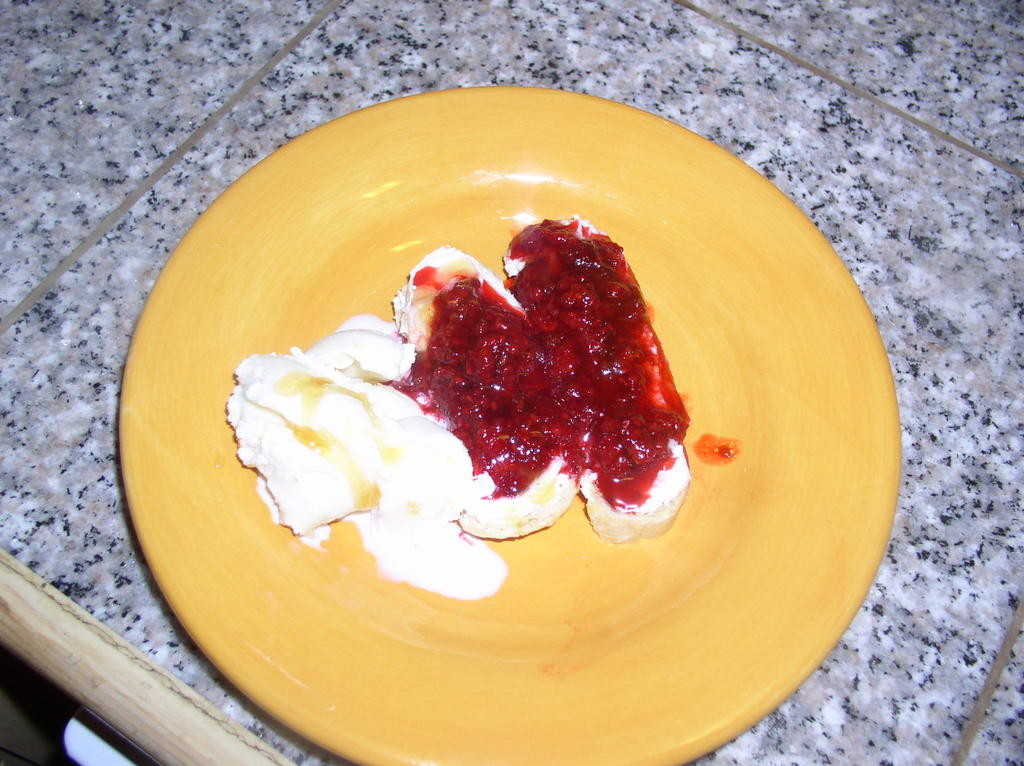
Really Easy Dessert
- 8 slices of crostini bread (or thinly slice day-old French bread)
- 1 cup frozen and thawed Raspberries
- 1 TSP. Balsamic vinegar
- 1 TBSP. Sugar
- Mascarpone Cheese
- Ginger Ice Cream (optional)
- Honey (optional)
 Meanwhile, lightly toast your day-old bread or get your crostini out and place two slices per plate. Give each slice a good smear of Mascarpone cheese. If you can't find Mascarpone, you can use regular cream cheese.
Top each crostini with the raspberry mixture, which should be syrupy by now. Serve with Ginger ice cream and drizzle a little honey over the crostini and ice cream.
Meanwhile, lightly toast your day-old bread or get your crostini out and place two slices per plate. Give each slice a good smear of Mascarpone cheese. If you can't find Mascarpone, you can use regular cream cheese.
Top each crostini with the raspberry mixture, which should be syrupy by now. Serve with Ginger ice cream and drizzle a little honey over the crostini and ice cream.
Monday, September 12, 2005
Easy Risotto
- Approximately 2 pints stock (chicken, fish or vegetable as appropriate)
- 1 tablespoon olive oil
- 3 shallots or 2 medium onions finely chopped
- 2 cloves garlic, finely chopped
- 1/2 head celery, finely chopped
- 14 ounces arborio rice
- Sea salt and freshly ground black pepper
- 2 wine glasses dry white vermouth or dry white wine
- 2 1/2 ounces butter
- 3 1/2 ounces freshly grated Parmesan
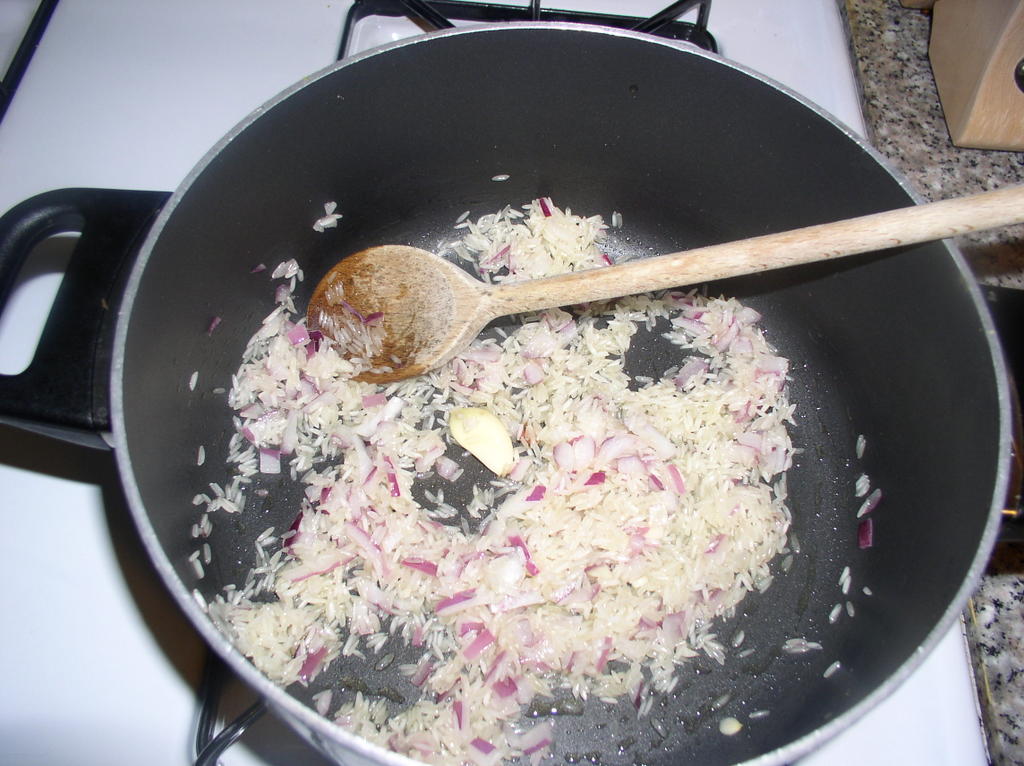 Stage 2. The rice will now begin to fry, so keep stirring it. After a minute it will look slightly translucent having absorbed all the flavors from the vegetables. Add the vermouth or wine and keep stirring -- it will smell fantastic as it sizzles around the rice. Any harsh alcohol flavors will evaporate and leave the rice with a tasty essence.
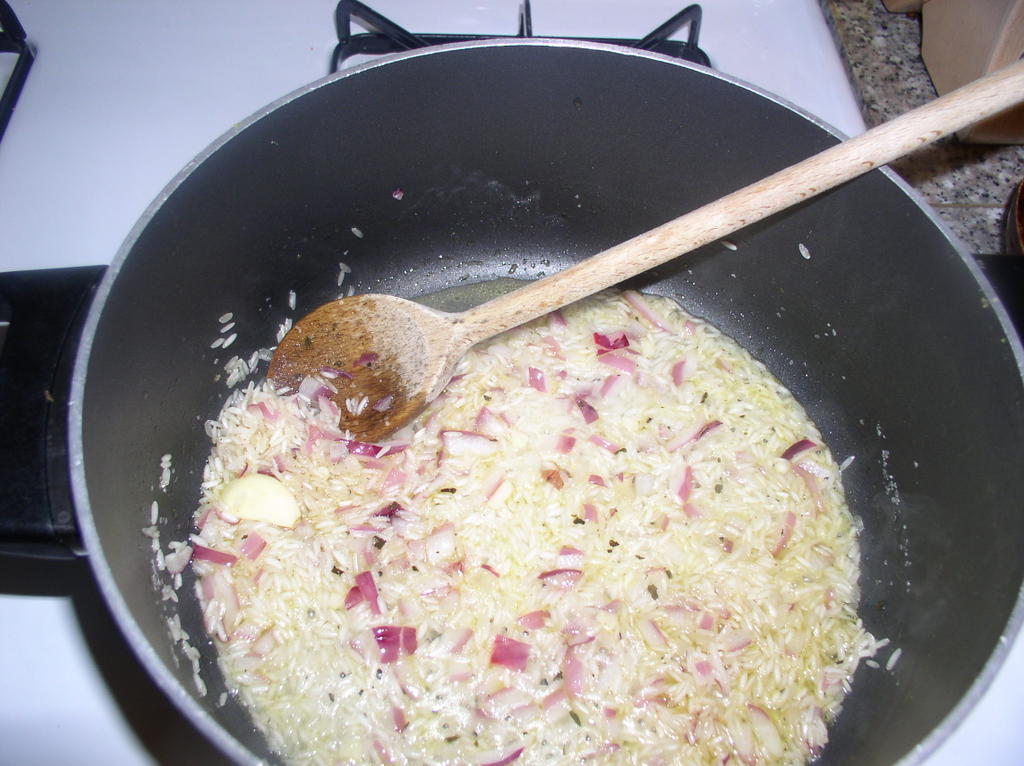 Stage 3. Once the vermouth or wine has cooked into the rice, add your first ladle of hot stock and a good pinch of salt. Turn down the heat to a highish simmer so the rice doesn't cook too quickly on the outside. Keep adding ladles of stock, stirring and allowing each ladle of liquid to be absorbed before adding the next. This will take around 15 minutes. Taste the rice -- is it cooked? Carry on adding stock until the rice is soft but with a slight bite. Don't forget to carefully check the seasoning.
 Stage 4. Remove from the heat and add the butter and Parmesan, if using. Stir gently. Place lid on pan and allow to sit for 2 to 3 minutes. This is the most important part of making the risotto as this is when it becomes outrageously creamy and oozy like it should be. Eat as soon as possible while the risotto retains its perfect texture.

Sunday, September 11, 2005
Italian Sausage Meatballs
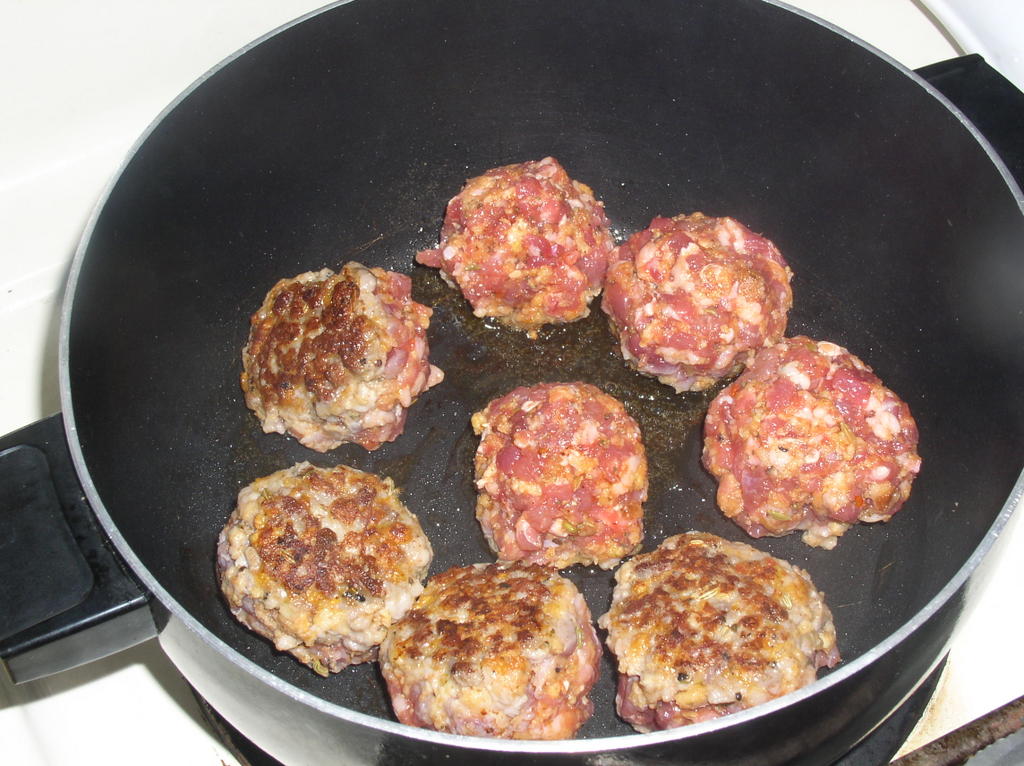 Next, line a baking pan with aluminum foil and lightly spray with PAM or olive oil. Place the meatballs in the pan and bake in the hot oven for 15 minutes, or until cooked through.
 While the meatballs are baking, start to boil a large pot of water for the spaghetti. Make sure to season the water with a large dash of kosher salt. Once the water boils, add your pasta (1/2 lb for 2 people, 1 lb for 4 people) and cook based on package directions.
 Place the of meat sauce (or your favorite pasta sauce) in another sauce pan and start to simmer it on low.
Take the meatballs out of the oven and add them to the simmering sauce and simmer for another 10 to 15 minutes.
Your pasta should be done by now, make sure to drain it well. Once drained, place the pasta back into the same pot it was cooked in and add about a teaspoon of olive oil to keep it separated. Now you are ready to serve. Place a mound of spaghetti and top with your meat sauce and two meatballs. Garlic bread goes well with this meal and so does Lambrusco wine. Believe me, this will be your favorite Sunday meal!
Thursday, September 08, 2005
Protein Smoothie
 In a large, wide mouth cup (the hand blender comes with one) add 1/3 cup frozen strawberries, slightly thawed, 1/3 cup raspberries, slightly thawed, 1/3 cup non-fat yogurt, 1/3 cup low-sugar juice like apple juice, OJ, or you can substitute with soymilk, 1 scoop of strawberry protein powder, and 2 packets of Splenda sugar. Then blend with your mixer. If the mixture is too thick, add more juice or soymilk.
 I used strawberries and raspberries that were frozen. I thawed them down slightly on my microwave for 1 minute. Serve and enjoy!
Wednesday, September 07, 2005
Open Faced Tuna Salad Sami
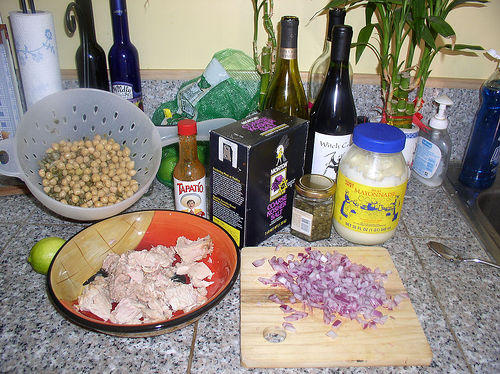
1/2 cup chopped red onion
2 cans of Albacore Tuna (in water)
1 can of garbanzo beans, rinsed and drained
2 TBSP. capers, rinsed and drained
1 TBSP. hot sauce (optional)
About 1/4 cup Mayo (you can substitue Light Olive Oil instead of Mayo)
1 TSP. Mustard
The juice of one lemon
2 TBSP. grated Parmesan cheese
1/2 TSP. Salt
1/2 TSP. Pepper
***
1 loaf of sourdough bread, halved
Mayo or olive oil
Gruyere Cheese or Parmigiano Reggiano, grated
1. Pre-heat oven to 400 farenheit.
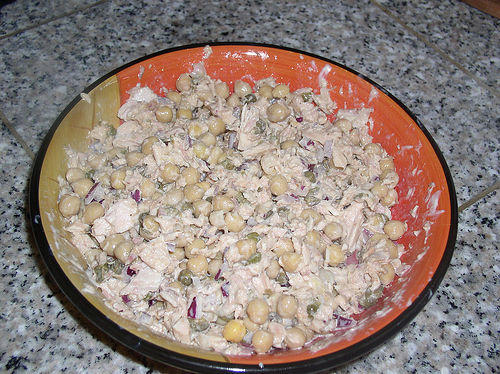
2. I mixed the first 11 ingredients until a slight creamy consistancy. You want the consistancy to be a little looser than a regular tuna salad. Place the mixture in the fridge for about an hour for all the flavors to develop.
 3. Brush the sourdough halves with a little mayo or olive oil. If the bread is too thick, scoop out a little bit of the bread to make a bread boat.
4. Divide the tuna mixture and top each bread half with it. Top off each one with grated cheese. The cheese will hold the tuna salad together.
3. Brush the sourdough halves with a little mayo or olive oil. If the bread is too thick, scoop out a little bit of the bread to make a bread boat.
4. Divide the tuna mixture and top each bread half with it. Top off each one with grated cheese. The cheese will hold the tuna salad together.
 5. Bake the sandwiches in a baking sheet for 8 to 10 minutes, or until the cheese melts and the sandwich is warmed through.
6. Cut the bread in thick slices and serve with a salad. YUM!
5. Bake the sandwiches in a baking sheet for 8 to 10 minutes, or until the cheese melts and the sandwich is warmed through.
6. Cut the bread in thick slices and serve with a salad. YUM!

Tuesday, September 06, 2005
Pizza Sauce 101
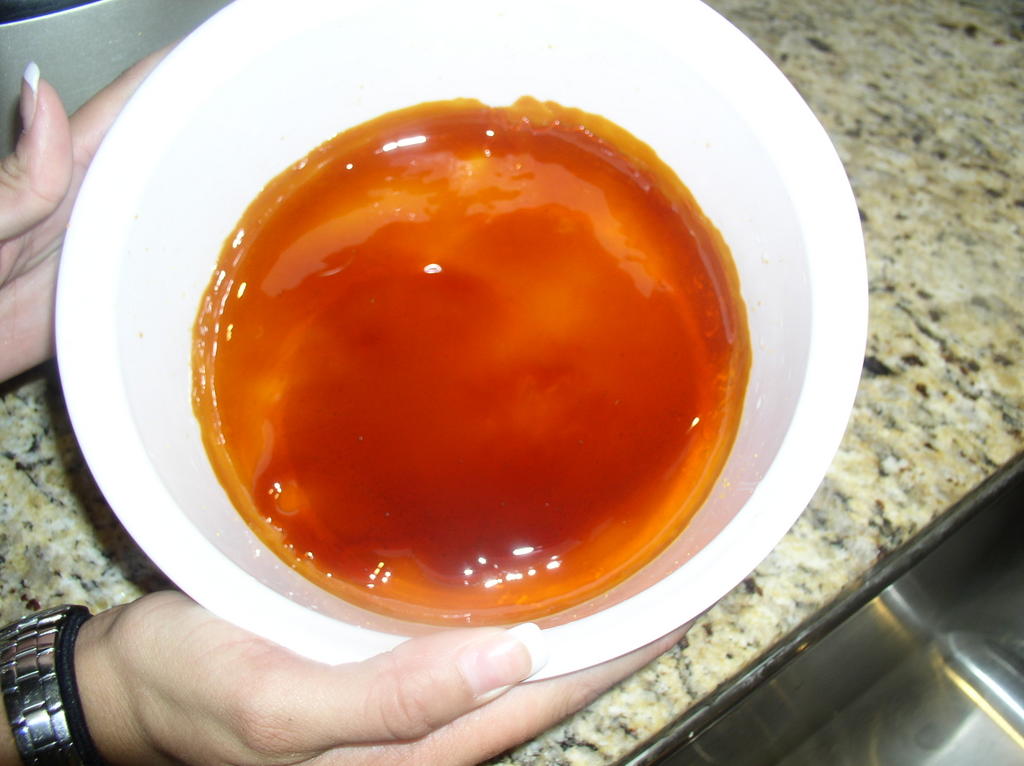
 Then I added a container (about a pint) of halved Sugar Plum tomatoes, 1/4 teaspoon kosher salt, 1/4 teaspoon fresh ground black pepper, 1/2 teaspoon oregano, 1/4 teaspoon dried basil, and a dash of sugar. I turned the heat to medium-high and cooked the tomatoes for about 10 minutes more. Then I added 2 julienned basil leaves and let it cook in for another 2 minutes.
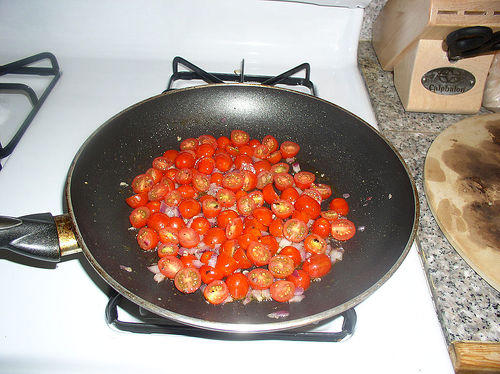 YOUR SAUCE IS DONE. Once the sauce cooled, I placed it in a food processor and processed it until smooth, but still a little chunky.
 Next, I rolled out the pizza dough and placed it on a pizza stone. You can use a regular pan; just make sure it's well oiled. I topped off my pizza with the cooled pizza sauce, about 1/4 cup of cubed fresh mozzarella, a nice helping of a mixed shredded cheese, pepperoni, and more shredded cheese again. I baked it at 450 F. for about 14 minutes, or until the crust turns golden brown and the cheese begins to melt. Mmmmm, I just got hungry again just thinking about the pizza!
 MANGA!
Monday, September 05, 2005
Experiment Recipe #1
 I then seasoned chicken tenders with a store bought poultry seasoning.
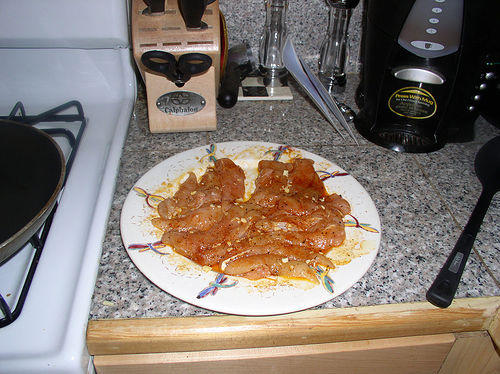 I cooked the chicken in a large skillet, about 5 minutes per side. Set aside and cover to keep warm.
To make the pesto, I grinded about 1/3 cup blanched almonds in the food processor. I then added about 8 oz thawed peas, 1 garlic clove, salt & pepper and squeezed in about a tablespoon of lemon juice. I processed it more then started to drizzle about 1/4 to 1/3 of a cup of olive oil until it gets to a creamy consistance. If the pesto is too thick, add a little of the pasta water to thin it out.
I cooked the chicken in a large skillet, about 5 minutes per side. Set aside and cover to keep warm.
To make the pesto, I grinded about 1/3 cup blanched almonds in the food processor. I then added about 8 oz thawed peas, 1 garlic clove, salt & pepper and squeezed in about a tablespoon of lemon juice. I processed it more then started to drizzle about 1/4 to 1/3 of a cup of olive oil until it gets to a creamy consistance. If the pesto is too thick, add a little of the pasta water to thin it out.
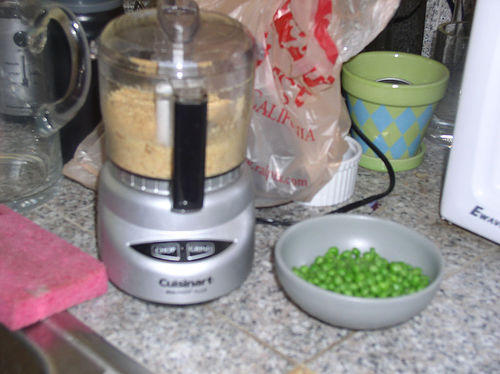 When the water boils, I added about a half pound of penne pasta. I cook to package almost al-dente, then I added 8 oz of frozen peas. I cooked them both together until the pasta was al-dente. I drained the pasta and peas and put it back in the same pot. I then drizzled a little bit of olive oil and added the pea-pesto to the pasta and combined it all together.
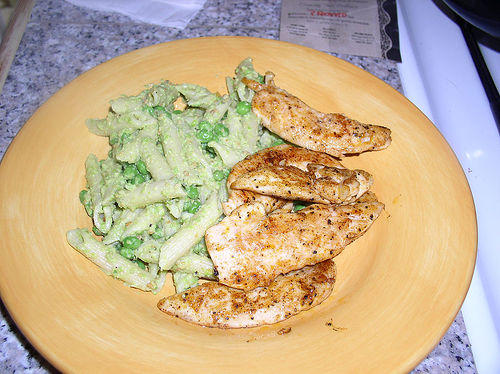 I plated about 4 tenders per plate with a side of the Penne with Pea-Pesto. The pasta seemed to be missing something. The taste was OK but not great. My husband suggested I add crumbled bacon to the pasta next time. Perhaps where I went wrong is that I should have added more peas to the processor to make the pesto more creamy. The pesto did seem a little gritty. Over all, it was an OK dish, but not the greatest. Once the real recipe is available online I'll post it here.