Monday, December 31, 2007

The Perfect Tortilla (Española)

There are a few dishes that I can say I'm an expert on. One of them is, of course, ceviche. Another one is the perfect rib eye steak, and there's always my scrumptious jambalaya. So I figured that if I want to increase my cooking repertoire, I have to get another Diva signature dish under my belt. So, after several tries, I have finally conquered the tortilla Española. So my friend, give this a try. The best thing about this recipe is that you can make it the day before or even the morning of, and it will be fantastic.

INGREDIENTS (Serves 6 - 8 as an appetizer)

  • Olive oil
  • 1 large yellow onion, chopped
  • 1 small green bell pepper or half of a large one, thinly sliced into 2" pieces
  • 1 small red bell pepper or half of a large one, thinly sliced into 2" pieces
  • 3 to 4 garlic cloves, finely chopped
  • 6 large Idaho potatoes, peeled and cut into 1/2" chunks
  • 6 large eggs or 5 XL eggs
  • Kosher salt
  • Ground black pepper
DIRECTIONS

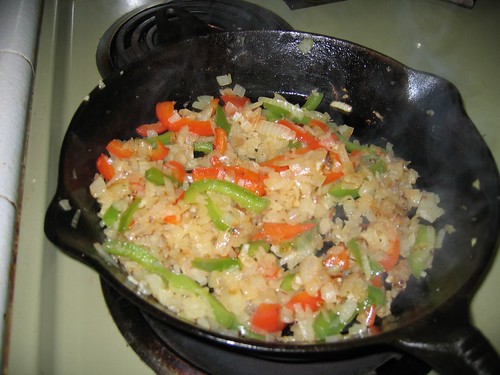
In a cast iron skillet, heat 3 tablespoons of olive oil on medium-high heat. Add chopped onions and cook for 4 minutes. Lower heat to medium-low and add bell peppers (green and red) and chopped garlic, 1/4 teaspoon salt and a few grinds of black pepper, and cook slowly for 10 more minutes. Set aside in a bowl.

Wipe the skillet and add about 1/2 cup of olive oil and heat on medium-high. Once the olive oil starts to shimmer a little, add all the diced potatoes and 1/4 teaspoon of salt. 
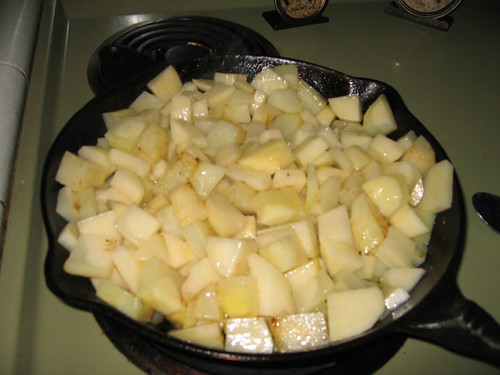
Toss for a two minutes then lower heat to medium-low. Put a lid on skillet or cover with the skillet with a plate and let potatoes cook for 15 minutes--just remember to keep tossing every 5 minutes or so. You want the potatoes to cook through yet not be mushy. Drain the potatoes on a colander and set aside.

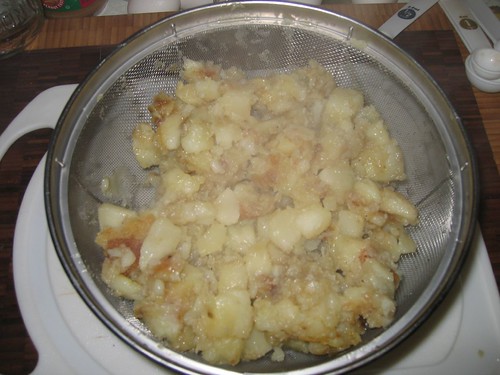
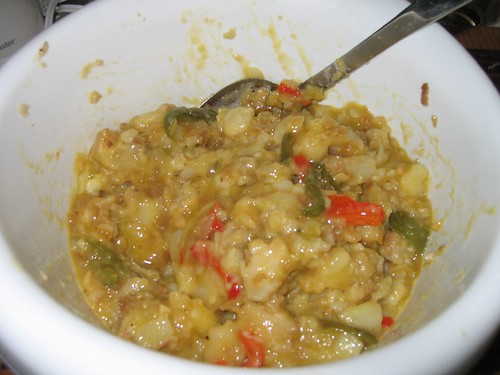
In a separate bowl, lightly beat the eggs with 1/2 teaspoon of salt and a bit more black pepper. Mix potatoes, onions and peppers lightly, until well combined and set aside.

In a 10 inch non-stick skillet, add 1 teaspoon olive oil on medium-high heat. Add the potato/egg mixture and pat down. Let cook for 3 minutes then lower heat to medium-low again and cover. Let it cook for about 15 minutes, checking the sides to make sure it doesn't get burnt.

Place a plate over the top of skillet and flip it over (see movie below).

Cook the tortilla on the other side also on medium-low for another 10 minutes. Once tortilla is done, slide it into to your serving plate and let it cool down to room-temperature. The tortilla tastes best at room temperature and with a side of aioli. Buen provecho!

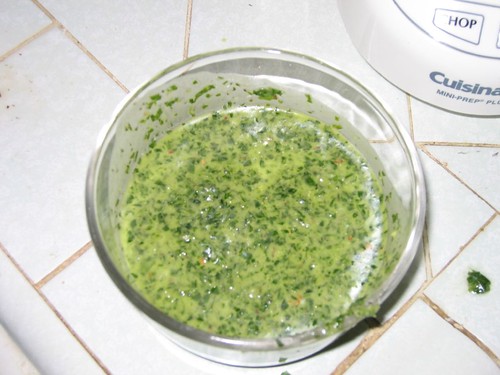
Diva's Amazing (and super easy) Aioli Sauce

  • 3 garlic cloves, finely minced
  • The juice of half of a lemon
  • 1/2 teaspoon Dijon mustard
  • 1/2 cup Best Foods Mayo
  • Salt and pepper to taste
DIRECTIONS

Mix all ingredients in a small bowl and place in fridge for a few hours for flavors to marry. Serve at room temperature with the tortilla.

Friday, December 21, 2007

Super Easy Peanut Butter Cookies

As you all know, I'm not a good baker, so when I see recipe that only involves three ingredients I totally have to go for it. I'm not a big peanut butter fan (unless I eat it with bananas), but I did like these cookies. And if you're a fan of the Ben & Jerry's Chunky Monkey Ice Cream, crumble some of these cookies for a peanut butter kick!

INGREDIENTS (makes about 1 dozen)

  • 3/4 cup sugar
  • 1 large egg
  • 1 cup peanut butter (crunchy or smooth)
DIRECTIONS

Combine sugar and egg in mixing bowl, stirring till smooth. Add peanut butter and mix in thoroughly. Roll into walnut-sized balls. Place the balls on ungreased cookie sheets at least 2" apart.

Flatten with the tines of a fork. Turn 90 degrees and use fork again to create cross hatches.

Bake 10 minutes at 375F (or till done). Let cool in pan for 1 minute before removing to cooling rack.

Sunday, December 16, 2007

Potato-Crusted Salmon Fillet

As the holidays approach, Matt and I have been eating lots of cookies and cakes and breads and we've been going to many holiday parties. So we haven't been really eating very healthy and we've been loading up on carbs. In an effort to eat healthy, I found this recipe. I liked it because it's protein rich and it has just a bit of carbos with the potatoes. Plus, salmon is my favorite fish. A light-oaky chardonnay goes wonderful with this dish.

INGREDIENTS (serves 2)

FOR THE FISH
  • 3/4 lb salmon fillet with skin on
  • 1/2 teaspoon freshly ground white pepper
  • 1/4 teaspoon salt
  • 2 fresh sprigs thyme, leaves stripped from stems
  • 1 medium-sized russet potato
  • 2 cloves garlic
  • 2 Tablespoon olive oil
FOR THE SAUCE
  • 1 Tablespoon butter
  • 1 Tablespoon flour
  • 1 cup milk
  • 3 Tablespoon Dijon mustard
  • salt and white pepper
DIRECTIONS

Cut the salmon fillet vertically into two strips, one for each serving. Remove the pin bones from the fish with a pair of needle-nose pliers, or by hand if you can get a good grip. Place the strips skin side down and season with the pepper, salt, and thyme.

Peel the potato and slice as thin as possible (the should be flexible and translucent) with a mandoline or sharp knife. Cut the cloves of garlic in half lengthwise, score the cut surfaces with a knife, and rub garlic over the potato slices. Cover the surface of the salmon with a layer of the potato slices. Add a second layer, draping it from the top over the sides of the fish.

For the sauce: Melt butter in a small saucepan over a medium flame. Once it is melted and bubbling, add the flour and stir thoroughly until a uniform paste is formed. Continue cooking until the roux just starts to brown. Add a quarter of the milk, and whisk to incorporate. Repeat three more times until all the milk has been added. Lower the flame to prevent boiling. Cook, stirring a couple of times, for five minutes, then whisk in the mustard. Taste, and add salt and pepper as needed.

Heat a large skillet over a medium flame. Once the pan is hot, add the olive oil. It should shimmer, and begin to just barely smoke. Place the fish potato side down in the pan. Be careful not to bend the fish. Cook for two minutes. Once a crispy crust is formed, carefully turn the fish over so that the skin side is down. The potato crust should be a lovely golden brown.

Continue to cook until the skin becomes crisp and the fish is medium rare to medium. This should take about four or five minutes, depending on the thickness of the fillet. A small knife tip in the side of the fish can be used to check doneness.

To serve, place the fish potato-side up and drizzle some of the Dijon sauce on the side. Serve with a side of sauteed spinach and sauteed baby carrots.

Sunday, December 09, 2007

T-Bone Steak

I am a master at cooking rib-eye steaks, so when I bought the biggest T-bone Steak (on sale) that I've ever seen, I said to myself, "bring it on!"

As always, I first looked for recipes in my cookbooks, but surprisingly there weren't any interesting recipes. So I made my own wet rub for the steak and served chimichurri on the side and, oh my goodness, it was perfection.

In case you didn't know already, chimichurri is a pesto-like sauce that originated in Argentina. It's bright green in color and a bit pungent and tangy to the tongue. This is an excellent sauce to serve on the side of steaks. I think you can also marinate beef in this jolly green juice. Que bueno!

INGREDIENTS (serves 2)

DIVA'S RUB

  • 1 T-bone Steak, about 1/2 pound (or a bit more) and 1" thick--one of these was enough for Matt and I, but you can double the recipe if you want to make 2 steaks.
  • Olive oil
  • 1 teaspoon kosher salt
  • 1/2 teaspoon fresh ground pepper
  • 1/4 teaspoon garlic powder (not salt)
  • 1/4 teaspoon paprika
CHIMICHURRI
  • 1 bunch of fresh flat leaf parsley, washed, stemmed, and dried
  • 3 to 4 cloves of garlic, peeled
  • 2 tablespoons minced onion
  • 3 tablespoons distilled white vinegar or more to taste
  • 2 tablespoons water
  • 1/2 teaspoon coarse salt (kosher or sea)
  • 1/2 teaspoon dried oregano
  • 1/2 to 1 teaspoon hot pepper flakes to taste
  • 1/2 teaspoon freshly ground black pepper
  • 1/3 cup extra virgin olive oil
DIRECTIONS

For the steak: rinse steak in cold water and pat dry. Drizzle about 1/2 teaspoon of olive oil all over the steak. In a small bowl combine the remaining rub ingredients and mix to combine. Generously sprinkle the rub all over the steak. Cover steak with plastic wrap and let it marinate in fridge for 1 to 2 hours. Take the steak out of the fridge 30 minutes before you're ready to cook it to bring it to room temperature.

For the chimichurri: finely chop the parsley and garlic in a food processor. Add the onion, vinegar, water, salt, oregano, pepper flakes, and black pepper and process in brief bursts until the salt crystals are dissolved. Add the oil in a thin stream. Do not over process; the chimichurri should be fairly coarse. Correct the seasoning, adding salt or vinegar to taste.

Pre-heat oven to 400 degrees.

In an oven proof pan or cast-iron skillet add 1/2 teaspoon olive oil and heat on medium-high. When the oil is hot, place your steak on pan. DO NOT MOVE IT! Let is sear for exactly 4 minutes. 
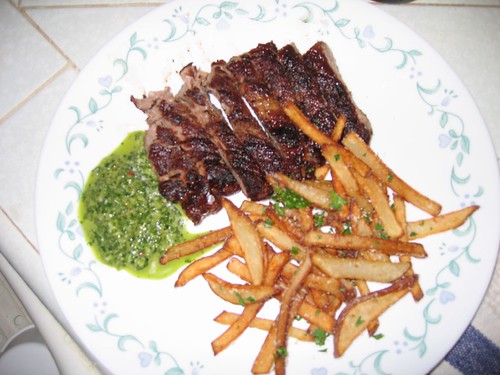
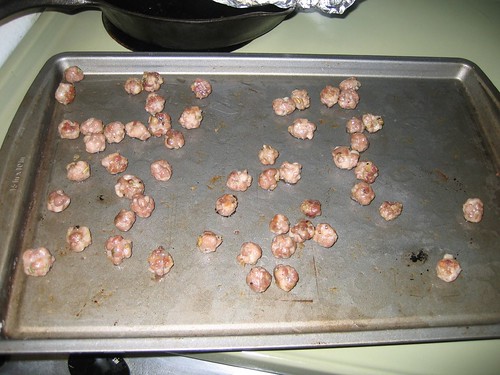
Turn over and sear for 2 minutes more. With your oven-mittens on, carefully place the pan in oven and let it finish cooking. Bake 5 minutes for medium-rare, up to 10 minutes for medium-well. Don't go longer than 10 minutes.

Transfer the steak to a cutting board and let the steak rest for EXACTLY 5 minutes. Cut out the "T" bone and with a sharp knife, carve the beef into broad thin slices, holding the knife blade at a 45 degree angle to the top of the meat. Serve at once with chimichurri on the side. Baked potatoes or shoestring potatoes go extremely well with this dish.

Tuesday, December 04, 2007

Lussekatter (Swedish St. Lucia Buns)

Lussekatter
Matthew has been on a baking kick lately. Yesterday he made (by accident) a brioche loaf, which was excellent after he sliced it and made it into French toast (recipe coming soon). So we have been looking for new bread recipes that are not very common for us, and this one caught my eye: Lussekatter, or St. Lucia Buns, which are traditional breads served in most Swedish homes on December 13th. These are moist, tasty and very yellow buns. I have no idea who St. Lucia was, or why Sweden celebrates this day--because I think St. Lucia is Italian--but I figured since Matt's family is part Scandinavian we'd give it a try. By the way, "lussekatter" translates to "Lucia cats." Meow!

INGREDIENTS (makes 12 buns)

  • 1/3 cup milk
  • 1/4 cup butter
  • 1/4 cup warm water
  • 1 package yeast
  • 1/4 cup sugar
  • 1 egg
  • 1/2 teaspoon salt
  • 1/4 teaspoon saffron
  • 2 and 3/4 cups flour
  • vegetable oil
  • 1 egg
  • 1 tablespoon water
  • Raisins
DIRECTIONS

Place milk and butter in a small saucepan. Heat on medium until the butter melts.

In a large bowl mix the warm water and yeast and let stand 60 seconds. Add the warm milk and butter mixture. Then add the egg, sugar, salt, and saffron.

Add 1-1/2 cups of flour. Mix well. Add more flour gradually until the dough is stiff. Knead the dough on a floured surface for 5 to 10 minutes. Coat the bowl with a little vegetable oil and put in your dough ball. Cover with a towel and let the dough rise until it is doubled in size.

Preheat oven to 350 degrees.

Punch down the dough and divide it into 12 sections. Roll each section into a rope. Cross two ropes in the middle and curl the ends into circles (see diagram). how to make a lussekatter
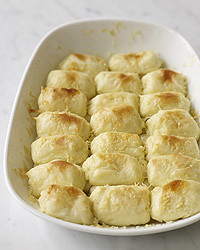
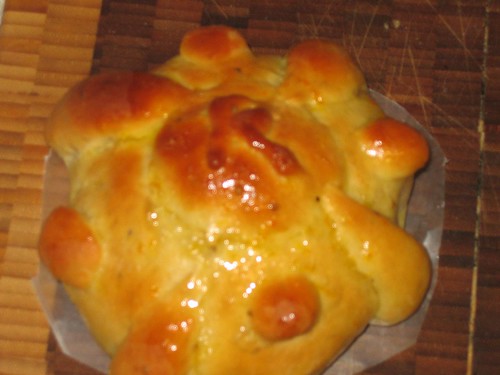
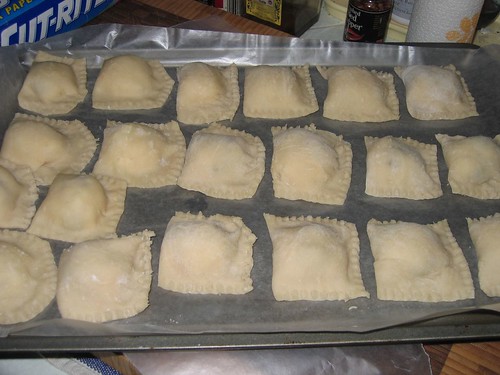
Carefully place the buns on a greased cookie sheet, cover, and let rise until they are doubled in size. Mix and egg and water and brush the tops of the buns. Decorate with raisins on each end (see diagram) and bake at 350°F for 15 to 20 minutes or until golden brown.

Tuesday, November 20, 2007

Pizza Margherita, Sort Of

I just love buying ready-made pizza dough. I really love the pizza dough that Mona Lisa sells in their deli in Little Italy (SD), but Trader Joe's pizza dough comes in a close second. The reason I love to use pizza dough is because I can make it as thin or thick as I want. I personally love thin crusts with crusty edges...yummy. The traditional pizza margherita has tomato sauce, basil, fresh mozzarella and a Parmesan cheese, however since I had a pint of ricotta in the fridge I decided to go with that instead of fresh mozzarella. When making pizza, make sure you take the dough out of the fridge 30 minutes before you shape it because room-temperature dough will be easier to work with.

INGREDIENTS (makes one pizza)

  • Store bough pizza dough,
  • 1/2 cup crushed tomatoes (use San Marzano tomatoes, if possible)
  • 1/2 tablespoon extra-virgin olive oil
  • Salt and freshly, ground black pepper
  • Several fresh basil leaves (about 10), if they are very big you can coarsely chopped them
  • 1/4 cup freshly grated Parmigiano-Reggiano
  • 1/2 cup ricotta cheese
  • 1/3 cup grated mozzarella cheese
DIRECTIONS

Preheat oven to 500 degrees F and, if you have one, place a pizza stone on the bottom rack of the oven.

Form dough into a 12-inch pizza round or rectangle to 1/2" thick or thinner. Place on a pizza peel or sheet pan.

In the bowl of a food processor, combine tomatoes, olive oil, and salt and freshly ground black pepper to taste and process until smooth.

Pour sauce over pizza and smooth to spread evenly, leaving a 1/2-inch border along the edges of the dough. Sprinkle basil leaves on top of sauce and then top with Parmigiano-Reggiano. Finally, drop teaspoonfuls of ricotta then sprinkle mozzarella and bake for about 8 to 10 minutes, or until cheese is bubbling and the edges are golden brown. It's so easy and so good!

    Tuesday, November 13, 2007

    Gnocchi Parisienne

    picture from Food and Wine magazine
    So, as some of you may know, I have a difficult time making gnocchi or dumplings. Actually, anything that involved making a light pastry with mashed potatoes. So, when I saw this ridiculously easy recipe for gnocchi without using mashed potatoes, I just had to try it. And you know what, they were delish! I took this recipe straight of my my Food & Wine magazine and I didn't change a thing...except that I used a combination of different cheeses.

    INGREDIENTS

    • 1 cup water
    • 1 teaspoon salt
    • 1/4 teaspoon freshly grated nutmeg
    • 3 tablespoons unsalted butter, cut into tablespoons
    • 1 cup all-purpose flour
    • 3 large eggs
    • 1/4 cup plus 2 tablespoons freshly grated Parmigiano-Reggiano, Gruyère or Asiago cheese
    DIRECTIONS
    1. In a small saucepan, combine the water, salt and nutmeg with 2 tablespoons of the butter and bring to a boil over high heat. As soon as the water boils, add the flour all at once and beat the dough with a wooden spoon until it is thick and comes away from the side of the pan. Cook, stirring to dry out the dough, about 30 seconds. Transfer the dough to a medium bowl and let cool slightly, about 5 minutes.
    2. Beat 1 egg into the dough until incorporated. Beat in 1/4 cup of the cheese and another egg until blended, then beat in the last egg until the dough is very smooth.
    3. Preheat the oven to 350°. Bring a large pot of salted water to a boil. Set a bowl of ice water near the stove. With a large spatula, transfer the dough to a resealable plastic bag, pressing it into one corner. Cut off the tip of the bag; the opening should be about 1/2 inch long.
    4. Reduce the heat to maintain a gentle simmer. Carefully hold the bag over the water and press out the dough, using a small sharp knife to cut it into 1 1/2-inch lengths before it drops into the pot (see Note). Simmer the gnocchi for 3 minutes. With a slotted spoon, transfer the gnocchi to the ice water bath to stop the cooking. Transfer the gnocchi to paper towels and pat dry.
    5. Grease a 9-by-12-inch baking dish with the remaining 1 tablespoon of butter. Arrange the gnocchi in the dish and sprinkle with the remaining 2 tablespoons of cheese. Bake until puffed, about 25 minutes. Preheat the broiler. Broil the gnocchi 6 inches from the heat for 1 to 2 minutes, or until browned. Serve right away with the meatballs in tomato sauce. Bon appetit!
    6. this is how mine looked!

    Thursday, November 08, 2007

    Meatballs in Tomato Sauce, French Style

    I saw this recipe in Food and Wine magazine and when I realized Chef Jacques Pépin created it, I had to try it. But of course, being the Virgo that I am, I gave it a few of my own touches. The meatballs are quite easy to make and the tomato sauce is so wonderful and flavorful you will be surprised how easy it is. You can make the entire meal in about 40 minutes or less and make sure you have a bottle of Beaujolais Nouveau open and ready for your meal!

    INGREDIENTS

    MEATBALLS

    • 1/2 pound ground sirloin
    • 1/4 pound Italian bulk sausage
    • 1/4 cup breadcrumbs
    • 1 egg
    • 1 tablespoon grated onion
    • 1 garlic clove, minced
    • 1/4 teaspoon dried thyme
    • 1 teaspoon salt
    • 1/4 teaspoon freshly ground black pepper
    SAUCE
    • 2 tablespoons olive oil
    • 2 garlic cloves, minced
    • 1/2 cup minced onion
    • 1/2 teaspoon dried thyme
    • 1/2 teaspoon dried oregano
    • One 28-ounce can diced tomatoes with their liquid
    • 1/3 cup pitted green olives, coarsely chopped
    • Salt and freshly ground pepper
    DIRECTIONS

    Pre-heat oven to 400 degrees.

    MAKE THE MEATBALLS: In a large bowl, mix all of meatball ingredients with your hands until blended, but do not overwork meat. Form the mixture into 16 meatballs and flatten slightly.

    Arrange the meatballs on a nonstick cookie sheet and bake 5 minutes. Turn over and bake another 6 to 7 minutes until firm but not hard. Transfer the meatballs to a large plate.

    MAKE THE SAUCE: In a medium saucepan, heat the olive oil. Add the garlic, onion, thyme and oregano and cook over moderate heat until softened, about 4 minutes. Add the tomatoes, cover and cook over moderate heat for 6 minutes, stirring occasionally. Using an immersion blender, puree the sauce until slightly chunky; alternatively, puree the sauce in blender and return the sauce to the saucepan.

    In amall saucepan, cover the olives with water and bring to a boil over high heat; drain well. 
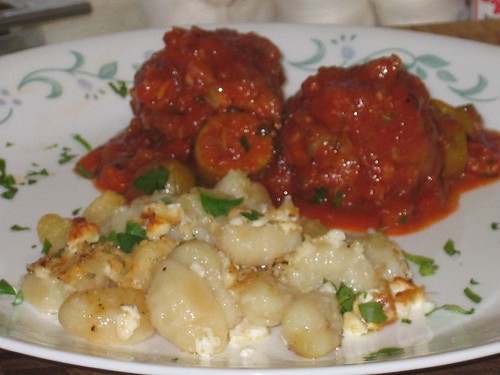
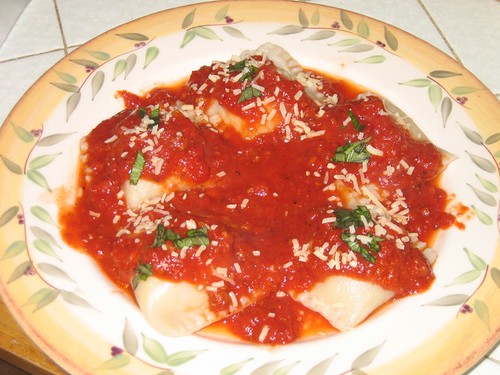
Add the olives to the tomato sauce, season with salt and pepper and bring to a simmer. Add the meatballs and simmer 5 more minutes or until heated through and serve. You can serve the meatballs with Gnocchi Parisienne (recipe coming soon) or spaghetti.

    Sunday, November 04, 2007

    Pasta de Sardine

    On weeknights when both Matt and I get home late from work, I turn to this super easy pasta to make for dinner. I came up with this recipe after I saw a can of Moroccan sardines in chili oil at my new favorite grocery store, North Park Produce. You can make this in about 15 minutes and the taste is not so fishy as you may think. I was quite surprised that both of us ate up the entire dish!

    INGREDIENTS

    • 8 ounces dry fettuccine pasta
    • 1 tablespoon olive oil
    • 1 medium red onion, thinly sliced
    • 2 cloves garlic, finely minced
    • 1 lemon, juiced
    • 1 (3.75 ounce) can sardines in chili oil, drained (reserve 1 teaspoon chili oil)
    • 1 cup jarred marinara sauce
    • 1 pinch red pepper flakes
    • 2 tablespoons fresh flat leaf parsley, finely chopped
    • 1/4 cup freshly grated Parmesan cheese
    DIRECTIONS

    Bring a large pot of lightly salted water to a boil. Add pasta, and cook for about 8 minutes, or until almost tender.

    While the pasta is cooking, heat olive oil plus reserved chili oil in a large skillet over medium heat. Add the onion, and cook for 4 minutes until soft, then add the garlic and cook until fragrant, about 60 seconds. Stir in the marinara sauce and bring to a simmer. Then stir in the sardines, red pepper flakes and reduce heat to low, and simmer until the pasta is ready.

    When the pasta is almost done, drain, and add it to the sardine sauce. 
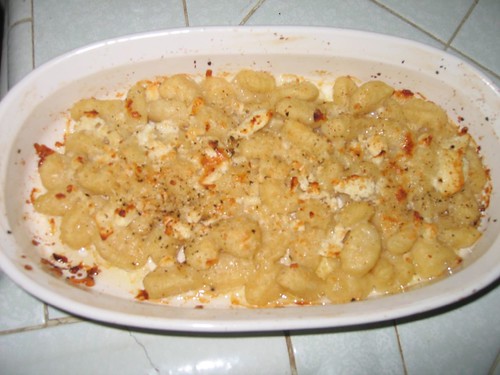
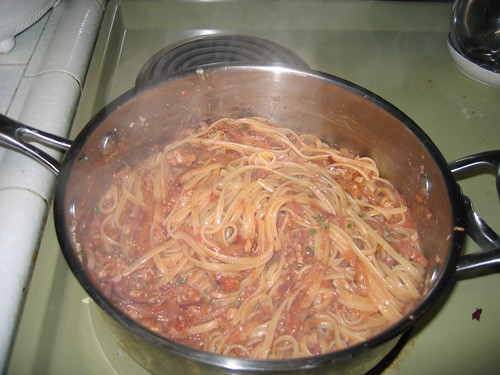
Stir, cover, and turn the heat off. Let stand for a few minutes to absorb the flavors of the sauce. Squeeze juice from the lemon over the pasta and the parsley and mix to combine. Divide onto serving plates, and top with grated Parmesan cheese.

    Thursday, November 01, 2007

    Pan de Muerto - Day of the Dead Bread

    The Day of the Dead is a Mexican tradition inherited from the rituals that were once practiced by the Aztecs, Toltecas, Chichimecas and Mayan people. According to tradition, during the 1st and 2nd day of November, souls of the dead return to their homes on Earth to share with their living relatives the foods that were placed in their altars. The most common food placed in altars, or tombs, is the Pan de Muerto or Day of the Dead bread.

    The Pan de Muerto is sweet bread flavored with anise seeds, orange peel and sugar. The bread is often shaped into a large round, to symbolize the tomb or grave, with a smaller round on top, which symbolizes the head of the dead relative, and the lateral decorations, symbolizes the bones. I'm not entirely sure why the breads are shaped like this, but lately some fancy bakeries have been shaping them into skulls and even animal shapes, for the dead family pets. You can decorate the breads with colored sugars or gel food coloring, if you want. The best part is that you get to eat the bread, and believe me it's surprisingly good, although I'm not a big anise fan.

    My husband, Matt, made these lovely breads and we're putting them in the altar of my brother, Robert, and my uncle Manuel, my abuelito, Tomas, and Lindsey's mom, Barbara.

    INGREDIENTS (makes 4 to 6 loaves)

    Dough

    • 1/4 cup butter
    • 1/4 cup milk
    • 1/4 cup warm water (110 degrees F/45 degrees C)
    • 3 cups all-purpose flour
    • 1 1/4 teaspoons active dry yeast
    • 1/2 teaspoon salt
    • 2 teaspoons anise seed
    • 1/4 cup white sugar
    • 2 eggs, beaten
    • 2 teaspoons orange zest
    Glaze
    • 1/4 cup white sugar
    • 1/4 cup orange juice
    • 1 tablespoon orange zest
    • 2 tablespoons white sugar, for sprinkling
    DIRECTIONS

    Heat the milk and the butter together in a medium saucepan, until the butter melts. Remove from the heat and add them warm water. The mixture should be around 110 degrees F.

    In a large bowl combine 1 cup of the flour, yeast, salt, anise seed and 1/4 cup of the sugar. Beat in the warm milk mixture then add the eggs and orange zest and beat until well combined. Stir in 1/2 cup of flour and continue adding more flour until the dough is soft.

    Turn the dough out onto a lightly floured surface and knead until smooth and elastic. Place the dough into a lightly greased bowl cover with plastic wrap and let rise in a warm place until doubled in size. This will take about 1 to 2 hours. Punch the dough down and shape it into 4 to 6 round loaves with a round knob on top and smaller ropes going down laterally (see picture). 
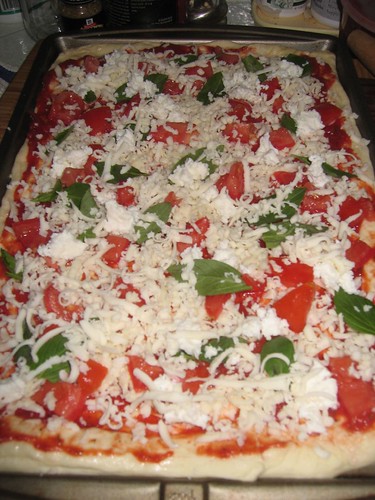
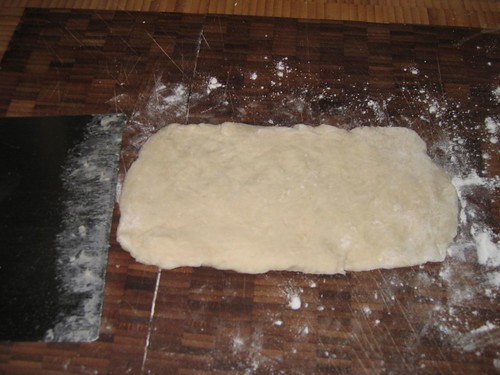
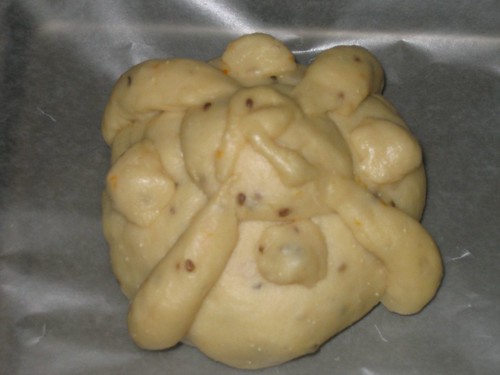
Place dough onto a baking sheet, loosely cover with plastic wrap and let rise in a warm place for about 30 minutes or until just about doubled in size.

    Bake in a preheated 350 degrees F oven for about 30 to 40 minutes. Remove from oven let cool slightly then brush with glaze.

    To make glaze: In a small saucepan combine the 1/4 cup sugar, orange juice and orange zest. Bring to a boil over medium heat and boil for 2 minutes. Brush over top of bread while still warm. Sprinkle glazed bread with white sugar.

    Tuesday, October 30, 2007

    Asian Steak and Noodle Salad

    Mise-en-place is my new favorite culinary term. I never knew that that's what I did pretty much every time I cooked; basically it means to have all your ingredients chopped and ready to go before you even begin to cook, this way your cooking is more enjoyable and you can finish fast. Mise-en-place is specially necessary when cooking any type of Asian dishes, as most of them are cooked quickly. You can lallygag a little with this recipe as the salad tastes better at room temperature or even cold. Mmmm....

    INGREDIENTS (Serves 2)

    For steak

    • 2 tablespoons Asian fish sauce
    • 1 tablespoons finely chopped peeled fresh ginger
    • 2 garlic cloves, finely chopped
    • 1 tablespoons soy sauce
    • 1 tablespoons sugar
    • 1 lb flank steak
    For salad
    • 1/4 cup fresh lime juice
    • 3 tablespoons water
    • 3 tablespoons sugar
    • 3 tablespoons Asian fish sauce
    • 1 teaspoon dried hot red-pepper flakes
    • 1 thinly sliced shallot
    • 8 oz dried vermicelli rice-stick noodles
    • 1 medium Granny Smith apples
    • Baby lettuce salad mix (enough for two portions)
    • About 6 fresh mint leaves, torn into pieces if large
    • About 6 fresh Thai basil leaves, torn into pieces if large
    • 1/4 cup salted roasted peanuts, chopped
    DIRECTIONS

    Marinate and grill steak: Whisk together fish sauce, ginger, garlic, soy sauce, and sugar in a small bowl until sugar is dissolved. Pour marinade into a large sealable plastic bag. Pat steak dry and place in bag, then press out excess air and seal bag. Turn bag over 2 or 3 times to coat meat, then place in a shallow dish (in case of leaks) and chill at least 4 hours and up to 8. Bring steak to room temperature 30 minutes before grilling.

    Prepare grill for cooking over medium-hot charcoal (moderate heat for gas). Remove steak from marinade (discard marinade) and pat dry with paper towels. Grill, uncovered unless using a gas grill, over direct heat, turning over once, until medium-rare, 12 to 14 minutes total. Note: I cooked my steak over the stove to medium rare.

    Transfer steak to a cutting board and let stand, uncovered, about 15 minutes.

    Assemble salad while steak rests: Whisk together lime juice, water, sugar, fish sauce, and red-pepper flakes in a bowl until sugar is dissolved, then stir in shallots.

    Cook noodles in a 5-quart pot of boiling salted water until just tender, 4 to 5 minutes. Drain in a colander, then rinse under cold water and drain well. Transfer to a bowl and toss with 2 tablespoons of dressing. Working around core of each apple, cut thin slices (about 1/8 inch thick) with slicer, then stack slices. Cut slices lengthwise into 1/4-inch-wide matchsticks.

    Combine apples, greens, mint and basil in a large bowl. Add 1/4 cup of dressing and toss well to coat.

    Thinly slice steak across the grain.

    Arrange noodles on a large platter and mound greens on top of noodles. Arrange steak slices on greens and sprinkle with peanuts. Serve at room temperature with remaining dressing on the side. Modified recipe from Gourmet, June 2006

    Saturday, October 27, 2007

    Sausage and Ricotta Ravioli

    I decided to give homemade ravioli a try again. Since I don't have a pasta machine, the easy Carpi pasta is more appetizing to me because I only need two ingredients: flour and hot water. The trick to this pasta is to roll out pretty thin and to work quickly because the pasta tends to dry out fast. Anyhoo, I created this recipe and it was delish! I used homemade meat sauce and it only made the meal more fabulous. Thick, sliced garlic bread is a must for this dish.

    INGREDIENTS (Makes about 24 ravioli)

    • 1/4 lb. bulk Italian sausage
    Dough:
    • 2 1/2 cups all-purpose flour, plus more for dusting
    • 1 cup very hot water, or more or less depending on the humidity
    Filling:
    • 3/4 cup whole milk ricotta
    • 1 egg
    • 1/2 cup pre-cooked mini sausage meatballs
    • 1/4 cup grated Parmesan
    • 1/4 teaspoon freshly ground black pepper
    Sauce:
    • Homemade meat sauce or your favorite jarred pasta sauce
    DIRECTIONS

    Pre-heat oven to 350 degrees.

    Form mini meatballs with the bulk sausage, about the size of a pearl. You'll get about 40 to 50 mini-meatballs. Place them in an ungreased cookie sheet and bake for 5 minutes, then turn meatballs over and bake another 4 to 5 minutes. Let cool and set aside in refrigerator.

    For the dough: In a large bowl combine the flour and the water; I used 1 cup + 2 tablespoons hot water because it was 72 degrees with 7% humidity here in San Diego. If you're in a very humid area, you may want to use slightly less than a cup. Using a wooden spoon, stir to combine into a large ball. Cover with plastic wrap and let sit for 10 minutes.

    For the filling: Combine all the ingredients in a medium bowl and gently stir to combine.

    To form the ravioli, cut the dough into 4 evenly sized pieces. The dough should be slightly sticky. Add extra flour as necessary for rolling, but use only a little as necessary. Form each piece into a 2 by 6-inch rectangle. Recover the dough with the plastic wrap.

    Lightly dust the work surface and a rolling pin. Working with 1 piece of dough at a time, roll the dough into a 4 by 15-inch rectangle. Place 5 rounded tablespoons of filling about 1-inch apart down the center of the dough. Fold the dough over the filling. Press down around the edges of each of the ravioli with your fingertips. Cut the ravioli into small squares and press down around the edges again with your fingertips to seal, or use a ravioli cutter to make life easier. Place the finished ravioli on a baking tray and continue forming the remaining ravioli.

    Bring a large pot of salted water to a boil over high heat. Add half the ravioli and cook until the ravioli float stirring occasionally, about 3 to 4 minutes. Drain into a large bowl and cook the remaining ravioli. Serve ravioli with spoonfuls of pasta sauce and enjoy the goodness.

    Wednesday, October 24, 2007

    Chipotle Mashed Sweet Potatoes

    I got this recipe from my friend, Kerry, who is a culinary genius. I slightly tweaked her original recipe because I didn't want the potatoes to be too sweet. All I have to say is, Wow. These mashed potatoes were delicious. My husband totally ate them up and I went for seconds. The chipotle peppers give these potatoes a kick and the nutmeg a slight fruity flavor. Yummy!

    INGREDIENTS (makes about 2 cups of mashed potatoes)

    • 1 sweet potato, peeled and cut into 1/2" thick slices
    • 1 Idaho potato, peeled and cut into 1/2" thick slices
    • 1 tablespoon brown sugar
    • 1 chipotle pepper in adobo, chopped fine (about 1 tablespoon)
    • 2 tablespoons butter
    • 1/4 cup whole milk, divided
    • A couple of rasps of freshly grated nutmeg, or a pinch of ground nutmeg
    • Salt and pepper, to taste
    DIRECTIONS

    Place potatoes into a large pot filled with cold water and bring to a boil. Simmer until potatoes are fork tender (mashable), about 15 minutes.

    In the mean time, place brown sugar, chipotle pepper, butter, nutmeg and half of the milk into a bowl. 
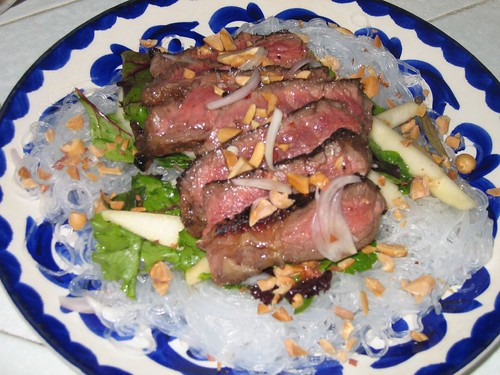
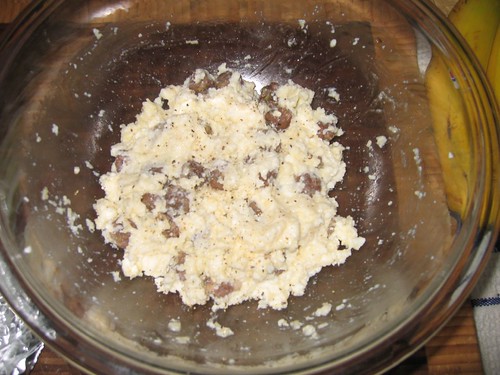
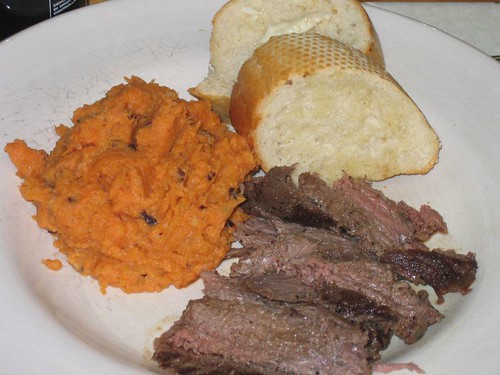
Add the cooked potatoes and mash away. If potatoes look too dry, add the remaining milk and salt and pepper to taste and mash a bit more. Serve as a side dish to a nice medium-rare steak and enjoy!

    Monday, October 22, 2007

    Fried Ravioli

    I've been stuck in the house since Monday due to the raging wild fires here in San Diego. The air quality is extremely bad and since I suffer from allergies, I'm being safe and staying in. What does this mean? It means I've been watching Food Network non-stop. I caught an episode of Everyday Italian with Giada and she made these super delish raviolis. I loved them, and so did my husband. This one is a keeper!

    INGREDIENTS (Makes 24 ravioli)

    • Oil, for frying
    • 1 cup buttermilk
    • 1 cup seasoned Italian-style bread crumbs
    • 1 box store-bought cheese ravioli (about 24 ravioli)
    • Freshly grated Parmesan
    • 1/2 cup store bought marinara sauce, heated, for dipping
    DIRECTIONS

    Pour enough olive oil into a large frying pan to reach a depth of 2 inches. Heat the oil over medium heat until a deep-fry thermometer registers 325 degrees F.

    While the oil is heating, put the buttermilk and the bread crumbs in separate shallow bowls. Working in batches, dip ravioli in buttermilk to coat completely. Allow the excess buttermilk to drip back into the bowl. Dredge ravioli in the bread crumbs. Place the ravioli on a baking sheet, and continue with the remaining ravioli.

    When the oil is hot, fry the ravioli in batches, turning occasionally, until golden brown, about 2 minutes. Using a slotted spoon, transfer the fried ravioli to paper towels to drain.

    Sprinkle the fried ravioli with Parmesan and serve with a bowl of warmed marinara sauce for dipping.

    Mexican Churros

    If you haven't heard yet, San Diego is on fire again. Authorities are saying that this is the worst fire in San Diego history. Thank goodness our friends and family are OK so far; however my mom and step dad may have to be evacuated soon. Many of us didn't go to work today as its raining ash and the air quality is extremely bad, so we're all staying indoors. Matt and I live about 5 miles east of the beach, so we're not affected. Hopefully the winds will die down soon and the fires will be able to be somewhat contained.

    Since I've been home all day today, I decided to make churros. I'm sure many of you are familiar with churros which is a very typical and popular Mexican street vendor food. I love these little fried pieces of dough, but of course they don't taste the same as the homemade ones you buy on the streets in Mexico. The dough is very easy and you can also use the dough to make funnel cakes. Nice, huh?

    INGREDIENTS (Makes one dozen churros)

    • Oil for frying
    • 2 tablespoons butter
    • 1-1/2 teaspoon sugar
    • 1/2 cup water
    • 1/2 Cup flour
    • 1 egg
    • Cinnamon-sugar: mix 1/2 cup granulated sugar with 1 1/2 tablespoons ground cinnamon. Stir or shake it thoroughly to blend it well. Store airtight at room temperature.
    DIRECTIONS

    In a small saucepan, bring butter, sugar and water to a boil. Add flour all at once, stirring vigorously with a wooden spoon. Cook until mixture forms a ball. Remove from heat and cool 10 minutes.

    Add egg, beat until smooth and shiny. Spoon dough into pastry bag fitted with a large star tip. Pipe dough into 4" strips onto a baking sheet lined with wax paper. Freeze 10-20 minutes or until paper can be peeled off. Do not freeze solid.

    In the meantime, in a large cast iron or Dutch oven pan with high sides, heat 2 inches of vegetable or canola oil to 375 degrees. Add 3 to 4 churros at a time and fry until golden. Cook them about 1 minute and turn them over with a slotted spoon. 
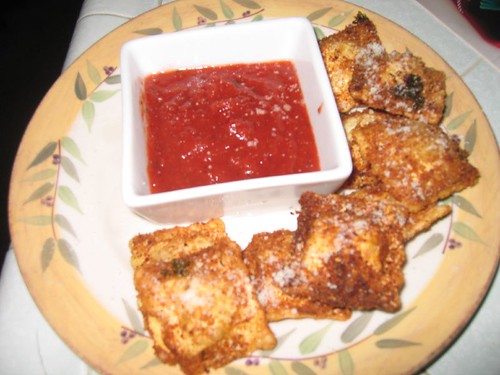
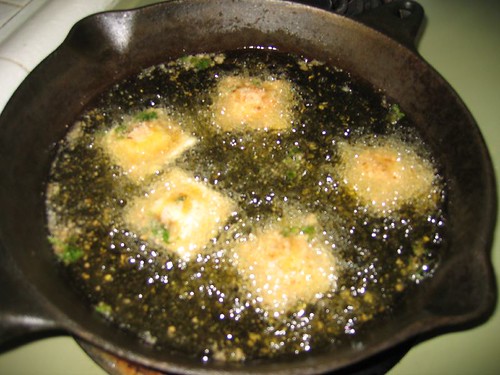
Cook an additional minute or two. You're looking for that nice golden brown color. Drain on paper towels and generously sprinkle with cinnamon-sugar. Serve warm.

    Thursday, October 18, 2007

    Super Easy Banana Cream Pie

    My husband hates, hates bananas. I have no idea why, but to me bananas are the perfect food. One of the reasons I've been able to maintain my weight is because I eat one banana for breakfast every day. You just can't deny the power of the banana! I wanted to make a banana cream pie, but all the recipes were too complicated with making the dough from scratch, etc., and you all know I don't like to bake. Plus, I knew that my husband wouldn't eat any of it, so I was also looking for a smaller sized pie recipe. I found this super easy recipe that uses a 6oz. pie crust which, yeah, it's still quite big for one person, but most of the ingredients are sugar free! Anyhoo, this pie sure did satisfy my sweet tooth!

    INGREDIENTS

    • 2 medium ripe bananas, sliced
    • 1 ready-to-use Nilla Wafer pie crust (6 oz.)
    • 2-1/2 cups cold fat-free milk
    • 2 pkg. (4-serving size each) JELL-O Vanilla Flavor Sugar Free Instant Pudding
    • 2 cups thawed COOL WHIP FREE Whipped Topping , divided
    DIRECTIONS

    PLACE half of the banana slices on bottom of crust. Set remaining banana slices aside.

    POUR milk into large bowl. Add dry pudding mixes. Beat with wire whisk 2 min. or until well blended. Gently stir in 1 cup of the whipped topping. Spoon half of the pudding mixture into crust. Top with remaining banana slices; cover with remaining pudding mixture.

    REFRIGERATE 3 hours or until set. Serve topped with the remaining 1 cup whipped topping.

    Thursday, October 04, 2007

    Dark Chocolate Cupcakes

    dark chocolate cupcake
    Sometimes America's Test Kitchen has some good recipes on their shows on PBS (here in San Diego). I did try their Cincinnati Chili recipe once and it was quite good. Now, these cupcakes are something else: They are yummy and so chocolaty, but you definitely need time to make them. Truthfully, halfway through the process I wished I just would have bought a boxed cupcake mix to make my life easier; but they are worth it. The buttercream frosting recipe below is also from ATK, but your favorite frosting will work, too.

    INGREDIENTS (Makes 12 cupcakes)

    • 8 tablespoons unsalted butter, cut into 4 pieces
    • 2 ounces bittersweet chocolate, chopped
    • 1/2 cup Dutch-processed cocoa (I used Hershey's Dutch Processed Cocoa)
    • 3/4 cup unbleached all-purpose flour
    • 1/2 teaspoon baking soda
    • 3/4 teaspoon baking powder
    • 2 large eggs
    • 3/4 cup sugar
    • 1 teaspoon vanilla extract
    • 1/2 teaspoon table salt
    • 1/2 cup sour cream (4 ounces)
    DIRECTIONS
    1. Adjust oven rack to lower-middle position; heat oven to 350 degrees. Line standard-sized muffin pan (cups have 1/2-cup capacity) with baking-cup liners.
    2. Combine butter, chocolate, and cocoa in medium heatproof bowl. Set bowl over saucepan containing barely simmering water; heat mixture until butter and chocolate are melted and whisk until smooth and combined. Set aside to cool until just warm to the touch.
    3. Whisk flour, baking soda, and baking powder in small bowl to combine.
    4. Whisk eggs in second medium bowl to combine; add sugar, vanilla, and salt and whisk until fully incorporated. Add cooled chocolate mixture and whisk until combined. Sift about one-third of flour mixture over chocolate mixture and whisk until combined; whisk in sour cream until combined, then sift remaining flour mixture over and whisk until batter is homogenous and thick.
    5. Divide batter evenly among muffin pan cups. Bake until skewer inserted into center of cupcakes comes out clean, 18 to 20 minutes.
    6. Cool cupcakes in muffin pan on wire rack until cool enough to handle, about 15 minutes. Carefully lift each cupcake from muffin pan and set on wire rack. Cool to room temperature before icing, about 30 minutes. (To frost: Mound about 2 tablespoons icing on center of each cupcake. Using small icing spatula or butter knife, spread icing to edge of cupcake, leaving slight mound in center.)

    Easy Vanilla Bean Buttercream

    The frosting can be made ahead and refrigerated, but it must stand at room temperature to soften before use. Mixing times are increased by 50% if you use a handheld mixer.

    INGREDIENTS (Makes about 1 ½ cups, enough to frost 12 cupcakes)

    • 10 tablespoons unsalted butter, softened
    • ½ vanilla bean, halved lengthwise
    • 1 ¼ cup confectioners’ sugar
    • Pinch table salt
    • ½ teaspoon vanilla extract
    • 1 tablespoon heavy cream
    DIRECTIONS

    In standing mixer fitted with whisk attachment, beat butter at medium-high speed until smooth, about 20 seconds. Using paring knife, scrape seeds from vanilla bean onto butter and beat mixture at medium-high speed to combine, about 15 seconds. Add confectioners’ sugar and salt; beat at medium-low speed until most of sugar is moistened, about 45 seconds. Scrape down bowl and beat at medium speed until mixture is fully combined, about 15 seconds; scrape bowl and add vanilla extract and heavy cream, and beat at medium speed until incorporated, about 10 seconds, then increase speed to medium-high and beat until light and fluffy, about 4 minutes, scraping down bowl once or twice.

    Recipe courtesy of Americas Test Kitchen.

    Tuesday, October 02, 2007

    Fried Dill Pickles

    Yes, my friend, you read that right...fried pickles. If you've ever been to Louisiana, especially the Bayou, you've probably had the greatest bar food ever invented: fried pickles. If you've never had these, then this is the type of food you want to eat on a Sunday evening after your football team--in my case it's the Chargers--loses miserably to the KC Chiefs or Green Bay because it makes you forget about the agony your team just faced. And if you're from Minnesota and are a Viking's fan, then you know what I'm talking about. Ugh! Anyway, PBR or Golden light are awesome with these fried pickles; but a spendy Heineken will work too.

    INGREDIENTS (makes enough to relief your agony)

    • 1 cup all-purpose flour
    • 1/4 cup cornstarch
    • 1 teaspoon baking powder
    • 1/4 teaspoon salt
    • 1 cup ice water
    • 1 egg yolk
    • 2 tablespoons dill pickle juice
    • 4 cups drained dill pickle slices, well drained and patted dry
    • vegetable oil for frying
    • Ranch dressing for dipping (optional)
    DIRECTIONS

    1. In a large bowl, combine the flour, cornstarch, baking powder, and salt. Make a well in the center. All at once, add the water, egg yolk, and pickle juice. Stir the mixture with a wire whisk to make a smooth batter. Cover the bowl and refrigerate for 30 minutes.
    2. In a deep fryer or large saucepan, heat at least 2 inches of oil to 375º F. In batches, dip pickle slices in the batter, lightly and evenly coating them. Without crowding, place coated slices in the hot oil. Fry until golden and crisp, 1 1/2 to 2 minutes. Drain on paper towels and serve immediately with side of ranch dressing as dipping sauce, if you wish.
    Recipe courstesy of Pickle Packers International, Inc.

    Monday, October 01, 2007

    Jim Blaha's Margaritas

    Blaharita
    My father-in-law, Jim Blaha, makes an awesome margarita-on-the-rocks, or a Blaharita, as I like to call them. One evening while I was in Minnesota visiting them, I saw his "secret" recipe on the counter and immediately my spy instincts took over and I took a picture of the recipe. Anyhoo, I got his secret recipe, but later I found out that his recipe was a modification of the Applebee's margarita recipe! Nevertheless, this margarita is quite tasty and will most definitely get you schnokered.

    INGREDIENTS

    • 1 1/4 oz. 1800 Tequila
    • 3/4 oz. Grand Marnier
    • 3/4 oz. Cointreau
    • 1 oz. simple syrup
    • 1 oz. fresh lime juice
    • 4 oz. sweet and sour mix
    DIRECTIONS

    Salt the rim of your margarita glass; add ice into the glass.

    In a cocktail shaker filled with ice, combine tequila, Grand Marnier, Cointreau, simple syrup, lime juice and sweet and sour mix and give it a good 10 second shake. Strain into your margarita glass and garnish with lime wheel. Salud! Jim Blaha's secret recipe

    Sunday, September 30, 2007

    Cannolis

    Inside Mike's Pastry Shop in the North End
    Every time I visit Boston, I always make sure I stop by at the North End. When we were there earlier this year, I made sure I took my husband to Mike's Pastry shop. It's probably the most famous Italian bakery in Boston. There are plenty of pastry shops in the North End, but this place just makes the best cannolis. They have both ricotta filling and custard filling. To tell you the truth, the ricotta is the best--so make sure you tell them you want the ricotta filling. Anyhoo, the recipe is very simple if you just buy already made cannoli shells (easily available at most supermarkets or Italian delis) and just make the filling. These cannolis make a great accompaniment to a steaming cup of hot cappuccino.

    INGREDIENTS

    • Ready made cannoli shells (12 pack)
    • 1 lb. fresh ricotta (2 cups)
    • 1/4 - 1/2 cup confectioners sugar (to taste)
    • 1/8 teaspoon cinnamon
    • 1/4 teaspoon pure vanilla extract
    • 1/2 cup mini chocolate chips
    • Special equipment: pastry bag or a make-shift ziploc pastry bag
    DIRECTIONS

    Make filling: Beat together ricotta, confectioner's sugar, vanilla extract and cinnamon in a bowl with an electric mixer at medium speed 1 minute (do not overbeat). Chill filling for 15 - 20 minutes.

    Spoon filling into pastry bag and pipe some into one end of a cannoli shell, filling shell halfway, then pipe into other end. Repeat with remaining shells. Garnish with chocolate chips and sprinkle confectioner’s sugar over the cannolis.