Showing posts with label homemade. Show all posts

Saturday, August 08, 2009

Sopa Marquis

My mother-in-law, Kay, is in town visiting me this weekend and I, of course, had to make something special for her to eat. After I made my homemade chicken broth last week, I froze half of it and made this soup for Kay. It's a Yucatan soup and it's like Mexico's version of the best chicken soup for the soul. I'm sure you can make this soup with store bought chicken broth, but believe me this soup is superb with the homemade stuff.

INGREDIENTS

  • Homemade Chicken Broth
  • 8 stalks celery-large outer and pale inner stalks mixes, cut on the diagonal into 1/2-inch slices (about 3 cups)
  • 4 carrots, peeled and cut on the diagonal into 1/2-inch slices (about 2 cups)
  • 1 pound fideos (thin egg noodles) or angel hair pasta
  • 1 tablespoon olive oil
  • 2 Hass avocados, pitted, peeled, and cut into 1/2-inch cubes
  • 1/2 cup freshly chopped cilantro leaves
  • 1 lime, juiced
  • 1 lime, cut into wedges
DIRECTIONS

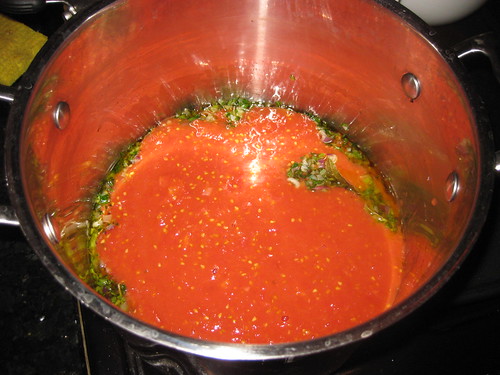
Make the broth and strain it. Pluck the chicken pieces out and set them aside until they are cool enough to handle.

When the chicken is cool, pull off the skin and discard, then shred the meat coarsely, getting rid of any fat, gristle, etc. as you go. Set the chicken meat aside.

Heat a large pot of salted water to a boil.

Bring the strained broth, celery, and carrots to a boil in a large pot on medium heat. Taste the broth and add salt and pepper, if necessary. Adjust the heat so the broth is simmering and cook until the vegetables are tender but not mushy, about 10 minutes.

Meanwhile, stir the fideos into the boiling water, crushing each handful to break the noodles up as you go. Cook until tender but with a little bit of a bite, about 4 minutes. Drain the noodles and put them in a bowl. Add the olive oil and toss well.

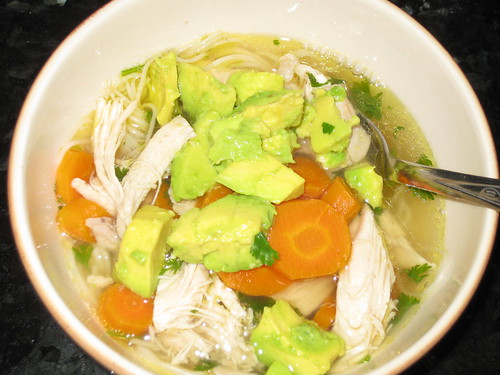
When the vegetables are tender, stir the shredded chicken, avocado, cilantro and lime juice into the soup. Bring the pot of soup to the table, along with the noodles and lime wedges. Spoon some of the noodles into each bowl and ladle some of the soup over them. (Stir the soup with a ladle so you're sure to get some of each ingredient into each bowl.) Pass the lime wedges separately.

Thursday, August 06, 2009

Tomato Chutney

Our two little tomato vines are still producing fruit. I was very surprised because I thought the season was over. Anyway, I didn't want the tomatoes to rot on the vine so I made this super simple and delicious tomato chutney. I got the recipe from a UK website but I changed it up and didn't add the red chili it asked for or the cardamon seeds. Instead, I substituted with a good pinch of red pepper flakes. How easy is this, you ask? I got up at 6am, started the chutney at 6:30 and it was done by 7:30am. I was able to cool it and jar it and store it in the fridge and still left for work on time!

INGREDIENTS

  • 1 cup red onions, finely sliced
  • 2 cups tomatoes, chopped
  • 1 garlic clove, minced
  • 1/4 tsp. fresh ginger, peeled and chopped
  • 1/2 cup brown sugar
  • 1 ounce red wine vinegar
  • Pinch of red pepper flakes
  • Pinch paprika
  • 1/4 tsp. coarse salt
DIRECTIONS

Place all the ingredients into a large heavy-bottomed pan and bring to a gentle simmer, stirring frequently. Simmer for 1 hr, then bring to a gentle boil so that the mixture turns dark, jammy and shiny. Place into sterilized jars and allow to cool before covering. Will keep for 6 weeks.

Saturday, August 01, 2009

Homemade Chicken Broth, Latina Style

I'm into my 30th week of pregnancy and it is increasingly becoming very uncomfortable for me to sleep. So I find myself waking up at 6 or 6:30am during the weekdays and weekends. Can you believe that? I used to be the sleep-in queen, and now I'm up early enough to do laundry, grocery shop and watch the new episode of Viva Daisy on Food Network all before 10AM! Daisy Martinez from Viva Daisy made this chicken broth and I just had to try it. I followed her directions almost to a "T", the only difference is that I cut my garlic head in half and just added it along with a bunch of cilantro, without placing them in a cheesecloth. The Latina part of this broth is the annatto seeds, the cilantro, and the ham hock which gives this broth a very homemade, almost umami type of taste, just like my abuelita used to make.

INGREDIENTS

  • 1 (5-pound) chicken, cut into 10 pieces or 5 pounds chicken backs, wings, necks and gizzards
  • 2 large Spanish onions (about 2 pounds), left whole and unpeeled
  • 1 large red bell pepper, cored, seeded, and cut into quarters
  • 1 large head garlic
  • 1 large bunch fresh cilantro
  • 2 teaspoons black peppercorns
  • 2 bay leaves
  • 1/2 teaspoons achiote (annatto) seeds
  • 1 ham hock
DIRECTIONS

Put the chicken, onions, and red pepper in a large stockpot. Rinse the garlic heads in cold water, then peel off the papery skin. Break the garlic head into individual cloves. Rinse and cut the roots off the cilantro. Cut a piece of cheesecloth the size of a kitchen towel. Put the garlic cloves, peppercorns, bay leaves, achiote seeds and cilantro on the cheesecloth, bring the ends together to make a little pouch, and tie the loosely with kitchen twine. Give the pouch a couple of good whacks with your kitchen mallet, and add it to the pot. Add enough cold water to cover the chicken by at least 2 to 3 inches. Drop in the ham hock, if using. Bring to a boil over medium-high heat, skimming foam off of the top as it forms. When the water comes to a boil, adjust the heat so the broth cooks at a steady, but not rolling boil. Cook for 30 minutes.

Check to make sure the breasts are cooked through, then remove them from the pan. Cook 15 minutes more, then remove the legs and thighs. Set the chicken aside to make another chicken dish. (If you're using backs, necks, wings, etc., you don't have to remove anything.) Leave the backs, necks and wings in to further flavor the broth.

Cook for 1 hour. Set a strainer over a large bowl and line the strainer with a couple of layers of cheesecloth. Carefully strain the broth through the cheesecloth. (Ladling it is the easiest and safest way.) Add salt, to taste, and let cool before refrigerating.

Tuesday, June 16, 2009

Homemade Tomato Sauce

Our tomato plants are producing so much fruit that I've ran out of ideas what to do with them. I am getting a little tired of tomato salads! But I finally decided to make tomato sauce. These tomatoes are not "ideal" for sauce because they are sweeter than your Roma tomato, and their skins are very thin. I found that I prefer the tomato sauce these tomatoes produced because the sauce came out slightly sweet, slightly tangy and I didn't have to seed any of the tomatoes.

INGREDIENTS (makes about 6 cups)

  • 15 to 20 small to medium ripe and sweet tomatoes
  • 2 tablespoons olive oil
  • 1/2 cup finely diced onion (I used spring onions from our garden)
  • 2 garlic cloves, minced
  • 4 tablespoons fresh parsley, finely chopped (I used Italian parsley from our garden)
  • 1 teaspoon fresh oregano, finely chopped (I used Greek oregano from our garden)
  • 3 fresh sage leaves, finely minced (I also used fresh from our garden)
  • 2 teaspoons coarse salt
  • 1/4 teaspoon ground black pepper
  • 1/4 cup white wine
DIRECTIONS

First cut a small "x" at the bottom of each tomato. Place them in a large pot of boiling water and boil for 30 to 45 seconds to loosen skin. Immediately remove tomatoes and place them in an ice-bath. When cool enough to handle, peel off skin.

Working in batches, place the peeled tomatoes in a blender and blend for 10 seconds. Set tomato sauce aside.

In a large pot heat olive oil on medium heat. Add the onion and cook for 5 minutes. Add the garlic, parsley, oregano and sage and gently cook for another 5 minutes. Raise heat to medium-high and add the blended tomato sauce, white wine, one teaspoon salt and1/4 teaspoon pepper. Simmer for 30 minutes, stirring occasionally. Taste for seasoning and add the remaining teaspoon of salt, if needed.

Let sauce cool to room temperature. Place in the fridge overnight. You can jar it in plastic containers and freeze or use immediately in your favorite recipe using tomato sauce.

Monday, May 18, 2009

Homemade Turkey Breakfast Sausage Patties

I'm blaming my father-in-law, Jim, for my love of making sausage. I just find it really cool that I can make all sorts of sausages, use different spices and come up with my own combination. These turkey patties were completely something I made up and I have to tell you, they were a success at the Mother's Day brunch I had. Every single patty was gone! I went back and forth with how much salt to use, but finally decided to use the ratio of 1 tablespoon per every 2.5 of ground turkey. I also used water to try to make the patties juicier since turkey is a pretty lean meat. Next time, I may use apple sauce instead.


INGREDIENTS (makes 24 patties)

  • 2.5 pounds ground turkey
  • 1 tablespoon coarse salt
  • 3 tsp. fennel seeds
  • 1/2 tsp. caraway seeds
  • 2 tsp. ground black pepper
  • 1 tablespoon dried parsley flakes
  • 3 garlic cloves, finely minced
  • 1 to 2 tsp. red pepper flakes, depending on how how you want it
  • 2 tablespoons maple syrup (I used Minnesota maple syrup)
  • 1/2 cup water
DIRECTIONS

In a small skillet, add the fennel and caraway seeds. Heat on med-low and toast until fragrant, about 5 minutes. Then place seeds in grinder or mortar and pestle, and give it a grind. It's OK if you still have a few whole seeds.

In a large bowl add the turkey, ground fennel and caraway seeds, salt, black pepper, parsley flakes, minced garlic, red pepper flakes and maple syrup. Using your hands, mix the sausage mixture pretty well until well combined. Let it sit 15 minutes. Then add the water and using your hands again, mix to combine. Place sausage mixture in a container with a tightly fitting lid or in a freezer bag and let it rest in the fridge overnight.

Next morning, form 24 balls and flatten each into 3" patties in diameter. 
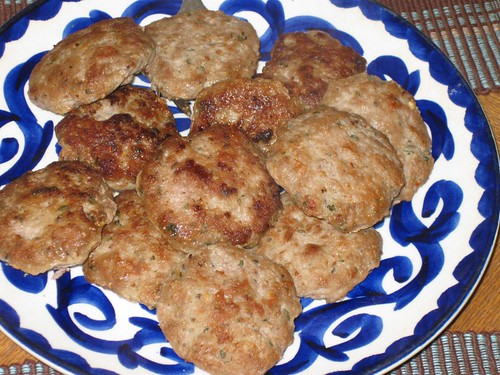
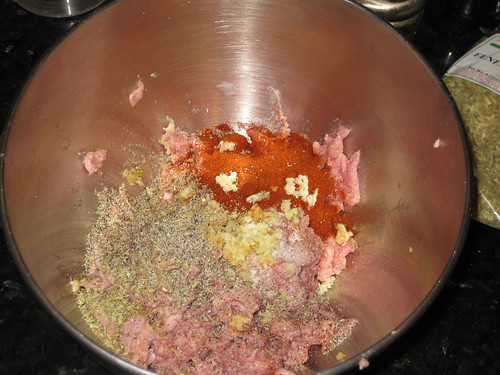
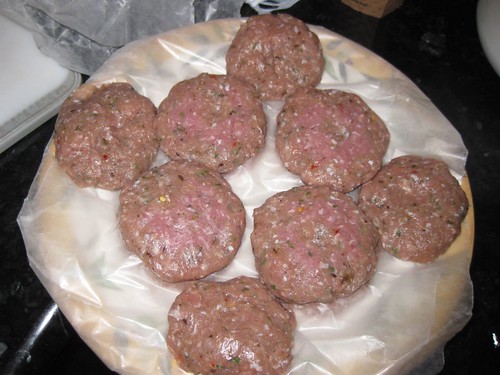
Make a small impression in the middle of each patty. Fry in a large skillet with a bit of oil over medium high heat for 3 to 4 minutes aside, or until done.

If you're not going to use up all the sausage mixture, you can form the patties and freeze them flat. After they are frozen, put them in a freezer bag and can be frozen up to 2 months.

Tuesday, May 05, 2009

Wine Making at Home, Part I: Primary Fermentation

On Sunday, May 3rd, I began my wine making journey. Since my husband and I both dream of one day owning a winery and make our own wine, I figured I better learn the process. I've decided to start by using a wine making kit that came with the juice and additives. Eventually I will move on to using my own grape juice that I crushed, but before I get ahead of myself I wanted to start at the very beginning.

I bought this kit from Midwest Homebrewing and Wine Making Supplies in St. Louis Park, MN. They had the best price for the kit that came with everything: primary fermenter, carboy, hydrometer, floor corker, wine kit and 24 wine bottles and a few other necessary items. Additionally, the Vintner's Reserve Merlot wine kit that came with my purchase only takes 14 days to ferment and the wine can be ready to drink by 28 days (but they recommend aging for 3 to 6 months). So I figured, in 5 months my baby will be born so what a great way to celebrate by giving out wine instead of cigars!

The steps below are directly from the Vintner's Reserve instructions. One of the main things that they keep telling any novice or expert wine maker is sanitize, sanitize, sanitize. By making sure all your equipment is sanitized, your wine will come out great and there is less chance of your wine spoiling.

After I cleaned and sanitized the primary fermenter, the lid, spoon, hydrometer and test jar, thermometer and wine thief, I added 2 liters of hot water (all the water used is spring water) to the bottom of the primary fermenter along with a packet of bentonite and stirred well so that there were no clumps.

Then I added the grape juice that came with the kit. I added 2 additional liters of warm water to the empty wine juice bag to rinse it out and poured that into the fermenter. Then I topped the fermenter with additional cool, spring water to reach the 23 liter mark (6 gallons).

I took a sample of the juice and used my hydrometer and test jar to test the specific gravity. The gravity measures the sugar level and it's a way to figure out when your wine is fermented and ready to bottle. Mine read 1.070, which I is good because I was looking for 1.070 to 1.085.

Then I sprinkled the oak chips and stirred them to just under the surface of the liquid.

By now, the wine juice cooled down a little and I needed it to be between 18 to 24 Celsius. I had to wait about an hour to let it cool a little because mine was at 25 Celsius.

Lastly, I sprinkled the package of yeast that also came with the kit, but I didn't stir. I just let it float on the surface. I tightly covered the primary fermenter with the lid and fermentation should begin within 24 to 48 hours. I will start my secondary fermentation in 5 to 7 days! Wish me luck.

Sunday, May 03, 2009

Simple Organic Salad

This was my lunch today, and I have to tell you, it was awesome. I went to the Hillcrest farmer's market today and I bought organic, farm fresh mesclun mix (the lettuces that Matt planted are not ready yet) and I made this simple salad today. I guess I was also inspired by Chef Alice Waters because she is a strong advocate for farmer's markets and for sound and sustainable agriculture and I just LOVED her food at Chez Panisse when I was lucky enough to visit last November. The tomatoes are from our garden and they were vine-ripe, and I used one of my fav cheeses, Winey Goat, because this cheese has a rich but smooth goat flavor and an aromatic nose of wine. Wow, I never knew sustainable agriculture would be so good.

INGREDIENTS (1 serving)

  • 1 teaspoon red vine vinegar
  • 1 tablespoon good extra virgin olive oil
  • A nice handful of organic mesclun mix or your favorite lettuces
  • 6 cherry tomatoes, preferably from your garden
  • a few shavings of Winey Goat cheese or Parmigiano-Reggiano
  • Coarse salt and freshly ground pepper
DIRECTIONS

In a bowl add the vinegar and a pinch of salt and whisk a little. Add the olive oil and keep whisking to combine. Add the mesclun mix, the tomatoes and a few grinds of fresh ground pepper (I added another tiny pinch of salt, too) and gently toss to coat the salad with the vinaigrette. Place on serving plate then top with cheese shavings and enjoy. This tastes great with a lightly grilled (or toasted) piece of crusty French bread.

Tuesday, April 28, 2009

French Bread

I do not know what it is, but I'm in a homemade kick right now. Perhaps it's the pregnancy hormones; maybe it's my motherly love coming out; or I'm just bored. What ever it is, I've decided to start making more homemade foods, such as bread. I even made homemade sausage last week. So, depending on how my experiments come out, I may just start doing more "from scratch" cooking.

I found the French bread recipe in Suite101.com and basically, it's simple, it's easy and you only need 5 ingredients. The only hard part (if you want to call it hard) is the waiting and the kneading. This recipe is for 2 large loaves, but I made three medium loaves instead. This recipe makes a lot of bread, so just be warned. Next time, I may just make a lot of demi breads and give out as gifts.

INGREDIENTS (makes 2 large loaves)

  • 2 packages dry yeast
  • 2-1/2 cups warm water
  • 1 tsp. sugar
  • 6 cups all purpose flour
  • 1-1/2 tsp. kosher salt + more for sprinkling
DIRECTIONS

Make sure water temperature is 110 to 115 degrees F. Place water in a large bowl and sprinkle with yeast and sugar. Let stand for 5 minutes until yeast dissolves and starts to bubble. Stir in 2 cups flour and salt. Cover and let rise for 1/2 hour.

Then gradually stir in enough of the remaining flour to make a soft dough. 
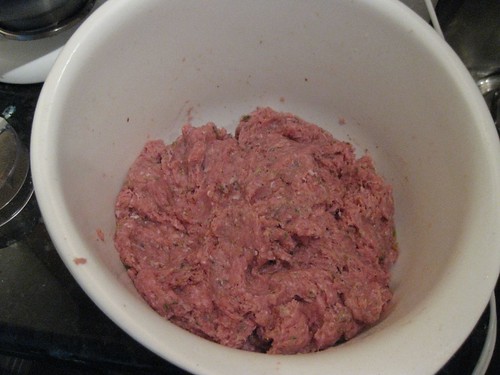
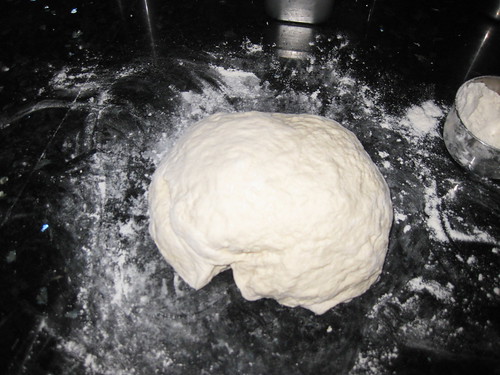
Turn the dough out onto a floured surface and knead for 10 minutes. (Knead by pressing on the dough, then folding over and pressing with the heel of your hand.) Then clean the large mixing bowl, spray with oil (I used olive oil), and place the dough in the bowl. Turn it in the bowl so the dough is greased (this prevents the top from cracking as it rises).

Cover the dough and let rise at room temperature for about 2-1/2 hours, until doubled in bulk. With your fist, punch down the dough. Divide in half and place one half on a lightly floured surface.

Using a rolling pin, roll dough to a 12x6" rectangle. Starting with the 12" side, roll up tightly. Seal seams and edges by pinching. Repeat with remaining dough.

Grease a cookie sheet and sprinkle with cornmeal. Place loaves on prepared sheet. Cover and let rise at room temperature until doubled, about 1 hour.

Preheat oven to 425 degrees F. Spray the loaves with a bit of water, then using a blade, made a few slashes across the top of each loaf. Sprinkle a little bit of salt over each loaf. Bake at 425 degrees F for 25-30 minutes until loaves are golden brown. Remove from cookie sheet and let cool on wire rack.

Sunday, April 26, 2009

Sausage and Broccoli Rabe

I made this super easy meal using my homemade Italian sausage. It's ridiculously easy and the broccoli rabe adds a nice mild bitter flavor that marries well with the sausage. You can use your favorite bulk sausage with this recipe; and don't forget to serve nice crusty bread on the side to sop it all up.

INGREDIENTS (serves 4)

  • 1 large bundle broccoli rabe, about 1 1/4-1 1/2 pounds
  • Salt
  • 2 tablespoons extra virgin olive oil
  • 1 pound bulk Italian hot or sweet sausage
DIRECTIONS

Trim ends of the broccoli rabe and cut into 3-inch pieces. Bring 2 inches water to a boil in a high sided skillet. Salt the water. Add the broccoli rabe and simmer 10 minutes, drain. Return skillet to the stove and heat olive oil over medium-high heat. Add sausage, brown and crumble 6-7 minutes. Add the broccoli rabe and stir to combine.

Thursday, April 23, 2009

Homemade Sweet Italian Sausage

I have been getting spoiled by my husband lately. Maybe it's because I'm carrying his child; perhaps because I'm very emotional right now; or it could be that he's just an Amazon.com addict and he loves to buy stuff from there. Anyway, he got me the food grinder attachment to my awesome Kitchenaid stand mixer and, of course, I just had to use it immediately. I decided to go the easy route and make homemade sausage, this time sober! The recipe below is a tweak between Alton Brown's recipe and a recipe by John D. Lee on HubPages.com. You can omit the paprika, but I like it because it gives the sausage a slight reddish hue.

INGREDIENTS

  • 2 pounds lean pork butt (2-1/2 pounds with bone), diced into 1/4-inch pieces
  • 1-1/2 tsp. salt
  • 1-1/2 tsp. fennel seed (up to 1 Tbsp. depending on how much fennel seed you like in your sausage. I used 1 tablespoon.)
  • 1 tsp. sweet paprika
  • 2 cloves finely minced fresh garlic
  • 1/2 tsp. sugar
  • 1-1/2 tsp black pepper
  • 1 Tbsp. chopped parsley leaves
DIRECTIONS

Using your food grinder, grind the pork. Set aside.

Toast fennel seed in medium sized, heavy saute pan over medium heat, constantly moving seeds around in pan until they start to turn light brown, about 5 minutes. Set aside to cool. Once cool, grind seeds and combine with salt, pepper, paprika, sugar, garlic and chopped parsley in medium mixing bowl. Add pork and blend thoroughly. Refrigerate for 1 hour.

Use this Italian sausage in your favorite spaghetti sauce, or instead of ground beef in lasagna. I used this sausage for broccoli rabe and sausage. Truly delish! I'll post recipe soon.

This can be stuffed inside sausage casings and grilled as well. Sausage casings can be found at most Italian grocery stores. Get a little funnel and shove the meat into the tubes; but don't push too hard, as it can be frustrating to rupture the casings as you get close to a finished sausage. When your sausage is the length that you want, twist off the ends and tie them in knots. Store in refrigerator for use within 2 to 3 days or freeze for up to 3 months.