Tuesday, December 19, 2006

Outrageous Brownies

The Barefoot Contessa has done it again! After I first saw her make these brownies on her food network show, I just couldn't believe the amount of chocolate she put in this recipe. The brownies just looked so unbelievably scrumptious and divine. Nowadays, the contessa sells the brownie mix at fine food stores, but it's really not the same. One thing to keep in mind, though, is to NOT OVERBAKE the brownies. That's the key to the perfect brownie. These are perfect brownies for those chocoholics out there...and you know who you are!

INGREDIENTS (makes 20 large brownies)

  • 1 pound unsalted butter
  • 1 pound plus 12 ounces semisweet chocolate chips
  • 6 ounces bitter chocolate
  • 6 extra-large eggs
  • 3 tablespoons instant coffee granules
  • 2 tablespoons pure vanilla extract
  • 2 1/4 cups sugar
  • 1 1/4 cups all-purpose flour
  • 1 tablespoon baking powder
  • 1 teaspoon salt
  • 3 cups chopped walnuts
Preheat the oven to 350 degrees F.

Butter and flour a 12 x 18 x 1-inch baking sheet.

Melt together the butter, 1 pound of the chocolate chips, and the bitter chocolate in a medium bowl over simmering water. Allow to cool slightly. In a large bowl, stir (do not beat) together the eggs, coffee granules, vanilla, and sugar. Stir the warm chocolate mixture into the egg mixture and allow cooling to room temperature.

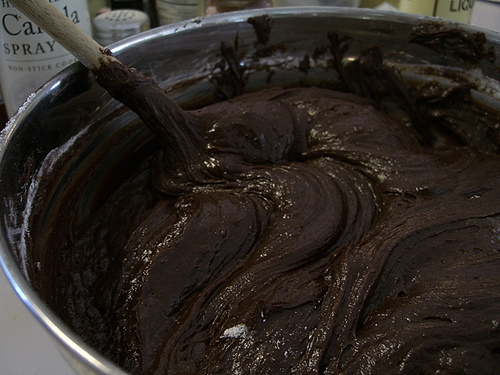
In a medium bowl, sift together 1 cup of flour, the baking powder, and salt. Add to the cooled chocolate mixture. Toss the walnuts and 12 ounces of chocolate chips in a medium bowl with 1/4 cup flour, and then add them to the chocolate batter. Pour onto the baking sheet.

Bake for 20 minutes, then rap the baking sheet against the oven self to force the air to escape from between the pan and the brownie dough. Bake for about 15 minutes, until a toothpick comes out clean. Do not over bake! Allow to cool thoroughly, refrigerate, and cut into 20 large squares.

Notes: Flouring the chips and walnuts keeps them for sinking to the bottom. It is very important to allow the batter to cool well before adding the chocolate chips, or the chips will melt and ruin the brownies. This recipe can be baked up to a week in advance, wrapped in plastic, and refrigerated.

Outrageous Brownies (c) 1999 by Ina Garten

Saturday, December 16, 2006

Smoked Salmon on Bagels

awesome smoked salmon on poppy seed bagels
I love the weekends because that's usually the only time when either Matthew or I get to cook breakfast. One of our all-time favorite breakfast, though, is smoked salmon on bagels. Since smoked salmon is a little expensive, we usually only make this on special occassions, but it's definitely worth it. Mmmm...

INGREDIENTS (makes 2)

  • 4 oz Smoked Salmon
  • 2 bagels (egg, plain or poppy seed)toasted, split in half
  • 3 oz cream cheese, softened
  • 4 tomato slices (optional)
  • 4 red onion slices
  • 1 tablespoon capers, drained
DIRECTIONS

1. Spread cream cheese evenly over 4 bagel halves.

2. Top bagel halves with salmon slices.

3. Add tomato and onion slices and sprinkle capers on top of each bagel half. Eat immediately with a hot cup of joe or a mimosa!

Thursday, December 14, 2006

Persimmon Pudding

Persimmon Pudding
Around Thanksgiving and Christmas time, persimmons go on sale like crazy here in Southern California. If you've never had these delightful fruits, you should give them a try. They look like tomatoes, but taste like apple, pumpkin and kiwi fruit combined...well, that's what I think. Anyhoo, after watching Charles Dickens A Christmas Carol, Matthew and I wanted to make plum pudding for Christmas but after we realized all the steps and ingredients it takes to make it, we decided on a simpler pudding...and this pudding is quite easy; however check the pudding after 55 minutes because some ovens tend to get hotter than others.

INGREDIENTS (serves 8)

  • Ripe persimmons, Hachiya or Fuyu (enough to make 2 cups of persimmon pulp)
  • 3 cups milk
  • 2 cups sugar
  • 2 eggs
  • 2 cups all-purpose flour
  • 1 teaspoon baking soda
  • 1 teaspoon baking powder
  • 1 teaspoon vanilla extract
  • Dash of cinnamon
  • 1/2 cup chopped nuts (optional)
  • Fresh, whipped cream
DIRECTIONS

Heat the oven to 350 degrees.

Remove the skin and seeds from the persimmons and puree the pulp in a blender or food processor. In a large bowl, combine the pulp, milk, sugar, eggs, flour, baking soda, baking powder, vanilla extract, and cinnamon until well mixed. Stir in the chopped nuts, if desired. Pour the mixture into an ungreased 9- by 13-inch baking pan and bake for 70 minutes or until a knife inserted into the center comes out clean. Serve warm with whipped cream.

Tuesday, December 12, 2006

Croque Monsieur

Ooh, winter is here and this is when my food cravings go into frenzy. I tend to crave hot, gooey, carbo-loaded food during this time of the year. Recently, my husband has been on a baking kick, making such things as biscotti, poppy-seed muffins, and sugar cookies. But, what I crave the most is the simplest thing, soup and sandwiches. Last week we had the American staple of tomato soup and grilled cheese sandwiches, but tonight we are going French. This sandwich, croque monsieur, is a favorite Parisian sandwich. It's quite simple and quite divine. The sandwich itself is very indulgent, so I think Minestrone or even mushroom soup would go well with this. Bon appetit!

INGREDIENTS (makes 4 sandwiches)

  • 8 slices of good white bread
  • 8 slices of ham (the good kind)
  • 2 cups grated Gruyere cheese
  • Butter, room temperature
  • 1/2 cup Crème fraîche*
  • Good Dijon mustard (optional)**
Pre-heat oven to 350F degrees.
  1. In a small bowl, combine 1/2 cup of grated Gruyere cheese and 1/2 cup crème fraiche. Set aside.
  2. On 4 slices of bread spread the butter thinly on both sides.
  3. Sprinkle about 2 tablespoon of the grated cheese, then lay 2 slices of ham on each bread, and then spread the crème fraiche mixture on top of ham, about 2 tablespoons per sandwich.
  4. Cover with the second slice of buttered bread. **Here, you can spread a little mustard on each slice to give your sandwiches more flavors
  5. Place the sandwiches on a baking sheet and sprinkle remaining grated cheese on top of each sandwich.
  6. Bake in the oven for 15 to 20 minutes, or until cheese is melted and bubbly and a little brown.

How to Make Crème Fraîche

Usually you can find crème fraîche is most big supermarkets in the US and at Trader Joe's. But but just in case you are unable to find it, a substitute for crème fraîche can be produced by adding 1–2 tablespoon of cultured buttermilk to two cups of pasteurized (not ultra-pasteurized) heavy cream [heavy cream has a fat content between 36% and 40%] and letting the mixture stand at room temperature (leave the container ajar, and place on a high shelf in a warm part of the kitchen or on top of the refrigerator) for 8 - 24 hours until thick; to develop a fuller flavor, allow the mixture to sit an additional 12 hours.

Tuesday, December 05, 2006

Classic Pecan Pie

pecan pie
My step-mom, Elaine, makes the best pecan pie ever! I look forward to Thanksgiving every year for two reasons: to be with my family, and to have a piece of Elaine's famous pecan pie. Also, as Elaine said, "be sure to follow the suggestion for preheating the cookie sheet--it helps keep the bottom of the pie from being undercooked..."

INGREDIENTS

  • 3 eggs
  • 1 cup sugar
  • 1 cup Karo® Light OR Dark Corn Syrup
  • 2 tablespoons butter OR margarine, melted
  • 1 teaspoon vanilla extract
  • 1-1/2 cups (6 ounces) pecans
  • 1 (9-inch) unbaked or frozen** deep-dish pie crust
DIRECTIONS

Preheat oven to 350°F.

Beat eggs slightly with fork in medium bowl. Add sugar, Karo® Corn Syrup, butter and vanilla; stir until blended. Stir in pecans. Place pie dough in pie pan. Pour pecan filling into pie crust.

Bake 55 to 60 minutes or until knife inserted halfway between center and edge comes out clean. Cool on wire rack.

**To use prepared frozen pie crust: Place cookie sheet in oven and preheat oven as directed. Pour filling into frozen crust and bake on preheated cookie sheet.

TIPS: Pie is done when center reaches 200°F. Tap center surface of pie lightly - it should spring back when done. For easy clean up, spray pie pan with cooking spray before placing pie crust in pan. If pie crust is overbrowning, cover edges with foil.

Thursday, November 30, 2006

Buttermilk Pie

Kay's Impossible Buttermilk Pie
This pie is so delicious (and also very sweet) and it boggles my mind on how easy and fast it is to make. Matthew's mom, Kay, whipped this up when we had our "dress-rehearsal" Thanksgiving dinner in Minnesota last month. Apparently buttermilk pies are a traditional Southern delicacy. If you want to make an authentic Buttermilk Pie, check out the recipe here. But this version is almost as good and, to me, it tastes best when it's still warm.

INGREDIENTS (serves 6)

  • 1 1/2 cup sugar
  • 1/2 cup Bisquick mix
  • 1 cup buttermilk
  • 1 stick butter (melted)
  • 1 teaspoon vanilla
  • 3 eggs
DIRECTIONS
  1. Heat oven to 350 degrees F. Grease a 9 inch pie plate.
  2. Beat together white sugar, buttermilk, baking mix, melted butter, vanilla, and eggs until smooth. Pour filling into pie plate.
  3. Bake until knife inserted in center comes out clean, about 30 to 35 minutes. Cool 5 minutes.

Wednesday, November 29, 2006

Coconut Cupcakes

Yummy coconut cupcakes
Like fashion, my taste in Food Network shows changes with the seasons. For a while there, I was a 30 Minute Meals fan, but now Rachel Ray is just driving me crazy. Seriously, is it just me or does she seem like she's drinking way too much coffee now, or perhaps is addicted to some sort of stimulant? Hmm, I dunno, but now my current fav is The Barefoot Contessa. Perhaps because Ina Garten, the contessa herself, seems more approachable and, even though her food takes longer than 30 minutes to make, her food--and specially desserts--just look so crazy divine! Below is the Barefoot Contessa's cupcake recipe. If you're too lazy to make it, you can now buy the baking mix online or at Cooks of Crocus Hill.

INGREDIENTS

  • 3/4 pound (3 sticks) unsalted butter, room temperature
  • 2 cups sugar
  • 5 extra-large eggs at room temperature
  • 1 ½ teaspoons pure vanilla extract
  • 1 ½ teaspoons pure almond extract
  • 3 cups flour
  • 1 teaspoon baking powder
  • ½ teaspoon baking soda
  • ½ teaspoon kosher salt
  • 1 cup buttermilk
  • 14 ounces sweetened, shredded coconut
For the frosting: Check out the recipe here.

DIRECTIONS

Preheat the oven to 325 degrees F.

In the bowl of an electric mixer fitted with the paddle attachment, cream the butter and sugar on high speed until light and fluffy, about 5 minutes. With the mixer on low speed, add the eggs, 1 at a time, scraping down the bowl after each addition. Add the vanilla and almond extracts and mix well.

In a separate bowl, sift together the flour, baking powder, baking soda, and salt. In 3 parts, alternately add the dry ingredients and the buttermilk to the batter, beginning and ending with the dry. Mix until just combined. Fold in half of the coconut (about 7 ounces).

Line a muffin pan with paper liners. Fill each liner to the top with batter. TIP: Use an ice-cream scoop to neatly and evenly fill the cupcake tin. Bake for 25 to 35 minutes, until the tops are brown and a toothpick comes out clean. Allow to cool in the pan for 15 minutes. Remove to a baking rack and cool completely.

Meanwhile, make the frosting. In the bowl of an electric mixer fitted with the paddle attachment, on low speed, cream together the cream cheese, butter, and vanilla and almond extracts. Add the confectioners' sugar and mix until smooth. Frost the cupcakes and sprinkle with the remaining coconut.

Sunday, November 26, 2006

Easy Greek Salad

YAY! Our camera was found at Matt's Bar in Minneapolis, home of the "Juicy Lucy." Anyhoo, sorry I haven't posted any new recipes, but all my pics are on that darn tootin' camera. Once it's back here with its mama, I'll put up a whole bunch of new recipes I learned while I was in Minnesota. In the meantime, here is a super easy and very good Greek salad. And I bet if you look in your fridge right now, you may just have all the ingredients to make it...go on, go look.

INGREDIENTS

  • 3 tablespoons extra virgin olive oil
  • 1½ tablespoons lemon juice
  • 1 clove garlic, minced
  • ½ teaspoon dried oregano
  • ¼ teaspoon sea salt or kosher salt
  • ¼ teaspoon freshly ground black pepper, and extra for garnish
  • 3 tomatoes, cut into wedges
  • ¼ red onion, sliced into rings
  • ½ cucumber, sliced into thick half-moons
  • ½ green bell pepper, julienned
  • 4 oz (120g) feta cheese, cut into small cubes
  • 16 kalamata olives
DIRECTIONS

Place the olive oil, lemon juice, garlic, salt, pepper and oregano in a small jar with a screw-top lid and shake to combine.

Place the salad ingredients in a large bowl. Pour the dressing over the salad and toss gently to combine just before serving. Garnish with a little freshly ground black pepper.

Wednesday, November 22, 2006

Oldie but goodie: Brussel Sprouts with Bacon and Apples

My husband and I were in Minnesota recently and, due to some miscommunication and probably a little too much to drink, we misplaced our awesome camera. So I don't have any pictures of some really good dishes we had. However, I am making my famous brussel sprout side dish for Thanksgiving. Here is the recipe again from my post back in November of 2005. Oh, and we found the camera, we just have to get it shipped to us now. Doh!

INGREDIENTS (serves 4)

  • 4 slices bacon, cut into 1/2-inch pieces
  • 1 pint (about 10) sprouts, ends trimmed and halved
  • Coarse salt and ground black pepper
  • 1 small apple, cored and cut into 1/4-inch slices, each slice halved crosswise
  • 1 teaspoon apple cider vinegar
  • A big pinch of brown sugar (optional)
  1. Preheat oven to 400°. Arrange bacon in a single layer on a large rimmed baking sheet. Bake until browned, 8 minutes. Add Brussels sprouts in a single layer; sprinkle with salt and pepper. Roast until they begin to brown, about 10 minutes.
  2. Remove from oven, and toss in apple and large pinch of brown sugar. Return to oven; roast until Brussels sprouts are browned and tender and apple has softened, about 8 to 10 more minutes.
  3. Toss vegetables with vinegar, additional salt, if necessary, and serve immediately.

Thursday, November 16, 2006

Caramelized Onion Tart

caramelized onion tart
During the fall season, I tend to crave savory dishes. And one of my favorite types of savory food is in pizza or tart form. Here is a great onion tart that will definitely tickle your senses. And remember, you do not have use the ingredients below--you can customize in many different ways; add mushrooms or olives; swap out the cheese for a different variety; add sun-dried or oven roasted tomatoes; just do whatever appeals to you!

INGREDIENTS

  • 2 Tbsp olive oil
  • 2 Tbsp butter
  • 2 large yellow onions sliced into ¼" slices
  • 2 Tbsp chopped fresh thyme
  • 2 cloves garlic, minced
  • ½ cup ricotta cheese at room temperature
  • ½ cup cream cheese at room temperature
  • 1 sheet puff pastry, defrosted frozen sheet, keep chilled until ready to use
  • ¼ cup blue cheese or gorgonzola cheese
  • ¼ cup currants
DIRECTIONS

Preheat oven to 375° F

Heat olive oil and butter in large saucepan over medium heat. When hot, add onions and sauté until onions start to lightly caramelize, about 10 to 12 minutes. Add chopped thyme and garlic. Continue sautéing until onions are more golden and caramelized, about 8 minutes more. Season with salt and pepper to taste. Set aside and let cool.

In a bowl, mix ricotta and cream cheese together until smooth. Set aside.

Remove puff pastry from refrigerator and quickly roll out into 9"x13" rectangle. With sharp knife or pizza wheel trim all edges to ensure it can spring during baking. With a sharp knife score a line about 1/2" from edge all around border of pastry, making sure not to cut all the way through. This allows the border to puff.

Spread the cheese mixture evenly between the score lines. Cover with the onion mixture, again spreading evenly between the score lines. Sprinkle the blue cheese and currants over the onions.

Bake at 375° F for about 25 - 35 minutes, until puff pastry is golden on top and crispy and golden on the bottom. Remove from oven and cut into 2' squares. Eat it while hot, or at room temperature.

Monday, November 13, 2006

Stuffed Red Bell Peppers

Diva's stuffed red bell peppers

Every time I cook rice for my husband and myself, I always end up with leftovers and it usually ends up in the refrigerator, forgotten like the Where's the Beef lady from the 80's. Yesterday, however, I used up some left over rice and made these delicious stuffed red bell peppers. The original recipe I found used paprika as a spice, but I decided to go more on the Mediterranean side using cinnamon and other exotic spices. And you know what? It worked! They came out very tasty. Also, I used 1 cup tomato sauce and 1-1/4 cup Prego traditional sauce. Manga!

INGREDIENTS (makes 2 large stuffed peppers)

  • 1/2 pound ground beef
  • 1 tablespoon olive oil
  • 1 cup chopped onion
  • 2 garlic cloves, finely chopped
  • 2 tablespoons chopped fresh parsley
  • 2 large, red bell peppers
  • 1 bay leaf
  • 1/2 cup cooked white rice
  • 1/2 tsp. chili powder
  • 1 teaspoon kosher salt, divided
  • 1/2 teaspoon ground black pepper, divided
  • 1 egg
  • 1/4 teaspoon cinnamon
  • 1/8 teaspoon nutmeg
  • 1/8 teaspoon ground clove
  • 2-1/4 cup jarred tomato sauce
DIRECTIONS

Cut off top 1/2 inch of peppers and reserve. Scoop seeds from cavities. Discard stems and chop pepper tops. Heat oil in heavy large skillet over medium-high heat. Add onions and bay leaf and sauté for 2 minutes. Add parsley, garlic, 1/2 teaspoon salt, 1/4 teaspoon black pepper and chopped red bell pepper pieces and sauté until onions soften, about 6 more minutes. Add the 1/2 cup of cooked rice and mix to combine. Turn off heat and let cool for 10 minutes. Remove the bay leaf.

In a large bowl add the ground beef. Mix in 1 egg, and remaining 1/2 teaspoon salt, 1/4 teaspoon pepper, 1/2 teaspoon chili powder, 1/4 teaspoon cinnamon, and 1/8 teaspoon each of nutmeg and ground cloves. Mix in 1/4 cup tomato sauce, then the cooled onion mixture.

Fill pepper cavities with beef mixture. Stand filled peppers in single layer in heavy large pot. Pour remaining 2 cups tomato sauce around peppers. Bring sauce to boil over medium-high heat. Reduce heat to low, cover pot and simmer 20 minutes. Spoon some sauce over each pepper. Cover; cook until peppers are tender and filling is cooked through and firm, about more 20 minutes (40 minutes total cooking time). A spicy California zinfandel goes wonderful with this dish.

Wednesday, November 08, 2006

Hot Buttered Rumsfeld

hot and butteredAs you may have heard, US Defense Secretary Donald Rumsfeld is stepping down. This, of course didn't come as a big surprise after the GOP didn't do so good at the polls on Tuesday. One of my spies in the capital told me that right after el presidente Bush announced Rumsfeld's resignation, el Rummy texted one of the senior pages in the White House. The text message read: brng me 1-hot butrd rum NOW :'( Hmm, okay, I'm making this up, but it could've happened.

INGREDIENTS (10 to 12 cocktails, or 2 big ones for Rumsfeld himself)

  • 1 stick unsalted butter, softened
  • 2 cups light brown sugar
  • 1 teaspoon ground cinnamon
  • 1/2 teaspoon grated nutmeg
  • Pinch ground cloves
  • Pinch salt
  • Bottle dark rum
  • Boiling water
DIRECTIONS

In a bowl, cream together the butter, sugar, cinnamon, nutmeg, cloves, and salt. Refrigerate until almost firm. Spoon about 2 tablespoons of the butter mixture into 12 small mugs. Pour about 3 ounces of rum into each mug (filling about halfway). Top with boiling water (to fill the remaining half), stir well, serve immediately, and waive your arms in the air like you just don't care!

Monday, November 06, 2006

Spaghetti and Meatballs

Oh my goodness, have you ever had a carb craving so bad that you'd think you'd go crazy? Hmm, maybe it's just me. These carb crazes do tend to happen to me once a month (I wonder why?) and this month I just had to have spaghetti and meatballs. Below is my modified version from Rachel Ray's 30 Minute Meals. If you don't want humungous meatballs, you can make them into 8, 1-1/2 inch balls, if you prefer! Enjoy.

INGREDIENTS (serves 4)

  • 1 pound ground sirloin
  • 1 tablespoon of grated onion + the juic3
  • 1 small to medium yellow onion, finely chopped
  • 6 cloves garlic, chopped, divided
  • 1 egg
  • 1/2 to 2/3 cup Italian bread crumbs, a couple of overflowing handfuls
  • 1/2 cup grated Parmigiano-Reggiano, plus some to pass at table
  • 1/4 teaspoon ground allspice or nutmeg
  • 2 tablespoons capers, drained and chopped
  • 1 tablespoon chopped sage leaves, 4 to 6 sprigs
  • A couple generous handfuls flat-leaf parsley, chopped, divided
  • Salt and pepper
  • 3 tablespoons extra-virgin olive oil, plus some for drizzling
  • 1 pound spaghetti
  • 3 slices of bacon, chopped
  • 12 baby Portobello caps, (crimini mushrooms), chopped
  • 1/2 cup dry red wine
  • 1 cup, (8 ounces), beef stock
  • 1 (28-ounce), can crushed tomatoes, San Marzano if available
DIRECTIONS

Preheat 400 degrees F. Place a large pot of water over high heat and bring to a boil.

Mix meat with the grated onion, 3 cloves chopped garlic, egg, bread crumbs, cheese, allspice, capers, sage, a handful of the chopped parsley, salt and pepper and a healthy drizzle of extra-virgin olive oil. Mix meat, score the meat into 4 sections and make 4 large meatballs. Arrange the meatballs on a nonstick cookie sheet and roast 15 minutes until firm but not hard.

Drop spaghetti in salted boiling water to cook off. Drain.

Add another tablespoon of extra-virgin olive oil to the skillet and the bacon. Cook 3 to 4 minutes then add the remaining garlic and mushrooms to the pan and cook 5 minutes. Season the mushrooms with salt and pepper. Add remaining chopped onion and deglaze the pan with wine, cook off 1 minute, add in stock and whisk up remaining drippings. Stir in the tomatoes and season sauce with salt and pepper, if necessary. Stir in parsley. Simmer 5 minutes.

Toss pasta with half the sauce.

Remove balls from oven and add to remaining sauce and turn to coat. Serve meatballs, 1 per person, along side pasta. Spoon any remaining sauce over the pasta. Pass extra cheese at the table.

Friday, November 03, 2006

Apple Pie with Warm Custard Sauce

Yummers! Apple Pie with warm custard sauce
You will never look at apple pie the same again after you try a slice with this warm custard sauce. I know most of us Americans are used to eating our apple pies a-la-mode (with vanilla ice-cream) but while we were in London last month we had a slice of unbelievable apple pie with warm custard sauce. Yes, you heard me right...custard sauce! We had this delightful treat at The Crown in Bromley, which is owned by our good friends, Jerry & Vanessa Malone. However, you can find this dessert in most pubs & restaurants in London. And remember, the key is that the custard sauce has to be warm!

INGREDIENTS

  • 1 apple pie, preferably homemade or from Marie Callender's
  • A jar of caramel sauce, heated (follow instructions on jar)
  • 1-1/2 cups whole milk
  • 1 vanilla bean, split and seeded
  • 5 egg yolks
  • 1/4 cup sugar
  • 1/2 teaspoon vanilla extract
DIRECTIONS

Bring milk, vanilla bean, and scraped seeds to a simmer in a saucepan. In a medium bowl, whisk together egg yolks and sugar until light and lemon-colored. Slowly add hot milk to egg mixture, whisking continuously--you do not want scrambled eggs! Return to the saucepan, and cook over low heat, stirring constantly, until mixture coats a spoon. Strain through a fine sieve. Add vanilla extract and set aside. You can also chill the sauce and reheat it when ready to serve.

Have your caramel sauce heated and ready to go. Place a slice of warm apple pie onto a serving plate and pour about 1 tablespoon of caramel sauce over the apple pie. Make sure the caramel sauce gets evenly distributed. Then take your warm custard sauce and pour the custard sauce on the plate around the pie. It's a slice of heaven!

Monday, October 30, 2006

Irish Coffee

Authentic Irish Coffee
We had incredible weather during our travels to Ireland earlier this month. Most days were in the low 60's farenheit and it rarely rained. But, on our last couple of days in the Emerald Isle, it finally did rain and it got cooler...so what do you drink when it's raining outside? Irish coffee, of course. And yes, you have to use authentic Irish whiskey for this. Jameson is probably the best one; however you can also use Irish Mist--which I prefer. Make sure the coffee is strong and hot (like my husband, hee hee) and that you use real fresh whipped cream, not the canned type. Cheers!

INGREDIENTS (makes 1 delicious serving)

  • 1 oz. Irish whiskey or 1-1/2 oz. Irish Mist liqueur
  • 3 sugar cubes
  • 1 cup black coffee, strong and very hot
  • Fresh Whipped Cream
  • 1 heat-proof glass mug or Irish Coffee mug, pre-warmed
DIRECTIONS

Using a pre-warmed heat proof glass mug, add the measure of whiskey together with the sugar cubes. Stir in the hot coffee to about 3/4 of the way up the glass. Float a couple of heaping tablespoons of the whipped cream on top. Don't stir the coffee, just serve and drink immediately. If you want to be even more authentic, you can buy Waterford Crystal Irish Coffee mugs.

Friday, October 27, 2006

Tomato Chutney

Slogar's Tomato Chutney The tomato season is almost over here in Southern California and an excellent way to keep that summer taste during the winter is to jar your tomatoes, or make this delightful tomato chutney. My sister-in-law gave me a jar of Slogar's famous tomato chutney from Crested Butte, Colorado and it was delicious. The malted vinegar gives it an extra kick. You can flavor up your chicken or even pork, with tomato chutney. However the way I was told to eat it was with cottage cheese. You can also make extra delicious bruschetta with this tomato chutney. Yummers!

INGREDIENTS (makes about 4 cups)

  • 1 Tablespoon vegetable oil
  • 4 lb ripe tomatoes clean and chopped
  • 1 cup Onions, chopped
  • 6 oz Sugar
  • 4 oz Malt Vinegar, divided
  • 1 Tablespoon kosher salt
  • 1 teaspoon Paprika
  • 1/8 teaspoon Cayenne Pepper

Place one tablespoon of vegetable oil into a heavy bottomed saucepan. Add the tomatoes and onions and cook gently on medium-low to release the tomato juices. Simmer for 20 - 30 minutes until tender.

Add the salt, paprika, cayenne and half of the vinegar. Simmer for another 45 minutes or until chutney begins to thicken.

Add the sugar and remaining vinegar, stirring until the sugar is fully dissolved. Continue simmering until the mixture becomes thick, stirring occasionally.

Once chutney is done, let it cool completely. Pour into warmed sterilized jars, cover and label. Leave for 3 - 5 weeks to allow the flavor to mature.

Thursday, October 26, 2006

French Brie Sandwich

Brie Sandwich
On our recent trip to Paris, my husband and I were in total awe of the beauty of the City of Light. We had no idea how enormous and inspiring the Louvre was, and I think we both had epiphanies’ after our Notre Dame visit. However one of our most memorable moments in Paris was this brie sandwich we had at a little corner pastry shop near place des Pyramides. Mom @ the French patisserie shop in ParisThis sandwich is so simple, yet it was all we could talk about after we ate it. It was the most delicious thing we've ever had...of course the authentic French baguette, and fresh brie and the fact that we were in Paris also added to our delight. Try this at home and you'll momentarily be transported to Paris.

INGREDIENTS (serves 4)

  • 1/2 lb. Brillat-Savarin Petit or Brie de Nangis (or your favorite French or domestic brie), cut into 1/8" slices
  • 1 baguette (thin, and about 2 feet long), cut 3/4 of the way through lengthwise
Place the brie slices, slightly overlapping, inside the baguette. Cut the baguette into four 6" sandwiches. You can wrap each sami in parchment paper and serve them or slightly warm them up in your oven for a few minutes. Either way, a light Côtes du Rhône wine goes wonderfully with this simple dish.

Tuesday, October 24, 2006

Fish and Chips

authentic fish and chips
I am back from my European Vacation! Sorry I didn't update my blog while I was away, but I was having so much fun in London, Paris and in Ireland that I did neglect my blog for the last two weeks. But do not despair since I did have lots of great food on my trip. And one of my favorite was fish and chips in London. This is England's most famous dish, and don't forget a good ale to go with it. Make sure you use malted vinegar for the chips to get that authentic British taste! Cheers.

INGREDIENTS (serves 4)

  • 1/2 cup flour
  • 1/2 cup cornmeal
  • 4 - 6 ounces ale
  • 1/4 teaspoon salt
  • 4 cups vegetable oil for frying
  • 4 large russet potatoes
  • 2 pounds fish fillets, cut in half, crosswise
DIRECTIONS

Preheat oven to 250° F. Prepare batter: Mix flour, cornmeal and salt together. Add ale and mix well. Batter should be thin.

Cut potatoes in even, finger-sized pieces.

Heat oil in deep fryer. DO NOT FILL TO TOP. The potatoes and the fish will cause the oil to bubble. Allow room for the oil to rise.

Cook 1/3 of the potatoes until golden brown, about five minutes. Drain on paper towels. Place in warmed oven. Repeat process until potatoes are done and sprinkle potatoes with a little salt. Note: Do not put in too many potatoes at a time. It will cool the oil too much.

Dip fish in batter, allowing excess to drip off. Fry in batches until golden brown, about 5 to 8 minutes. Drain on paper towels. Keep warm in oven until all fish are cooked.

Serve with a sprinkling of malt vinegar.

Wednesday, October 04, 2006

Chicken Curry Roti

Chicken Roti

In the West Indies, it is common to eat Roti for breakfast or lunch. It is their version of burritos, I guess. Basically roti is this fabulous Indian flat bread that sort of looks like a large flour tortilla, but it tastes more like naan bread. Spicy chicken curry is then wrapped in the roti, and you eat it just a like a burrito. You can usually buy roti at your favorite Indian restaurant (or you can try to make it); if you can't find roti, you can use large flour tortillas or even lavash for this dish.

INGREDIENTS (4 to 6 servings)

  • 6 boneless skinless chicken thighs
  • 1 onion, chopped
  • 3 cloves of garlic, chopped
  • 4 bay leaves
  • 5 cloves
  • 1 teaspoon ground ginger
  • 1/2 teaspoon cumin
  • 1 heaping tablespoon curry powder + 1 teaspoon curry powder
  • 1 teaspoon salt
  • 1 dried red chile pepper (optional)
  • 1 cup low-sodium chicken stock
  • 3 potatoes, peeled and diced
  • Vegetable oil
  • 2 tablespoons butter
  • 2 tablespoons flour
  • 4 to6 roti wraps
DIRECTIONS

Cut the chicken into 1-1/2 inch cubes and place cubes in a large bowl. Add garlic and mix into chicken. Then add 1 heaping tablespoon of curry powder; make sure that chicken is well coated. Add ground ginger, cumin, salt, and mix again. Set aside.

In a large skillet with high sides or Dutch oven, add just enough vegetable oil to cover the bottom, about 2 tablespoons. Place 4 bay leaves, cloves and red chili pepper (if using) into the pot and warm oil on medium for a couple minutes. Add the onions and sauté for 5 minutes.

Turn heat to high and add chicken. Stir it around and let it cook for a few minutes on high and reduce back to medium heat stirring frequently, for about 8 to 10 minutes. Remove chicken, onions, pepper, bay leaves and cloves with tongs or a slotted spoon onto a plate and set aside.

In the same skillet, add 2 tablespoons of butter, 2 tablespoons of flour and the remaining 1 teaspoon of curry powder. Cook on medium-high for about a minute. Whisk in one cup of chicken stock until smooth. Carefully add the potatoes and bring to a boil. Simmer for 5 minutes, and then add the chicken, onions, bay leaves, and red chili pepper back into the pot, along with any juices that may have come out of the chicken. (If curry looks like it needs more liquid, add more stock or water--you want the consistency of thick stew).

Keep simmering the curry, uncovered, for another 10 to 15 minutes. Remove from heat and let it cool a little--remoe the bay leaves. Meanwhile, heat up the roti in the oven or over a griddle. Place about 3/4 to 1 cup of chicken curry in the middle of the roti, then fold it as you would fold a burrito or a wrap. Eat immediately!

Tuesday, October 03, 2006

Grilled BBQ Tofu and Israeli Couscous Salad

BBQ Tofu and Israeli Couscous salad

Israeli couscous is fast becoming one of my favorite pastas. Yes, it is pasta, not a grain. Basically, this type of couscous is pasta dough shaped into a pearl--sort of like a tapioca pearls--then toasted and dried, which gives it a very chewy and buttery flavor after it's cooked. You do not just add boiling water to Israeli couscous and let it sit like you would with regular couscous....you actually have to cook it longer. Just follow the package directions and I bet you'll enjoy this great pasta.

INGREDIENTS (Serves 4)

  • 2 packages firm tofu
  • 2 cups Asian BBQ sauce or your favorite Teriaky sauce
  • 1 large yellow zucchini, split lengthwise
  • 1 large green zucchini, split lengthwise
  • 2 Japanese eggplant, split lengthwise
  • 1 bunch scallions
  • 3 cups cooked Israeli couscous (just follow the package directions)
  • 2 tablespoons extra virgin olive oil
  • Juice of 1 lemon
  • 2 tablespoons fresh parsley, finely chopped
  • kosher salt and freshly cracked black pepper
  • Cooking spray
DIRECTIONS

Marinate the tofu in 1-1/2 cups of the Asian BBQ sauce overnight or at least 4 hours.

Prepare a hot, cleaned grill, sprayed with a lot of cooking spray. Grill the tofu until well caramelized on both sides. With the remaining BBQ sauce, season and coat the yellow and green zucchini, eggplant, and scallions and grill them until they are cooked through. Transfer the vegetables to a board and cut the zucchini and eggplant into a ½-inch dice and the scallions into ½-inch slices.

In a large bowl, mix the vegetables with the Israeli couscous, parsley and add olive oil and lemon juice. Season with kosher salt and freshly ground black pepper and check for flavor. Slice tofu and plate over couscous salad and enjoy.

Friday, September 29, 2006

Roast Beef Sandwiches

Roast Beef Sandwiches

There is nothing like perfectly cooked roast beef. My favorite kind is the roast beef that is medium rare, yet it's not dripping any pink juices. This type of roast beef is very difficult to come by. But the other day while we were at Henry's Marketplace, I saw the most perfect roast beef in the deli counter. Immediately we bought a half pound and Matthew made these absolutely delicious sandwiches.

INGREDIENTS (makes 2 sandwiches)

  • 1-10 to 12" sourdough roll
  • 1/2 lb. thinly sliced roast beef (the pinker, the better, me thinks)
  • 4 slices medium cheddar
  • Sliced tomatoes
  • Lettuce
  • Dijon mustard
  • Mayo
DIRECTIONS

First, toast the sourdough bread in the oven or toaster oven until golden brown on all sides (Matthew burnt ours a little bit, but it was still good). Then cut the bread in half, and slice each half lengthwise. Be careful because bread will be hot.

Workings quickly, spread mayo on the bottom two slices of bread, then place a slice of cheese, sliced tomato and lettuce. Divide roast beef between the slices; slather with as much, or as little, Dijon mustard (believe me, you want mustard on this baby). Finally, add last slice of cheese, then add the top bread slice.

Serve with a side of kosher dill pickles or cornishons. Delicioso!

Wednesday, September 27, 2006

Pasta Fra Diavolo, Diva Style

fasta pasta fra diavolo

I know I've been slacking with my recipes lately. You see, Mateus and I are getting ready to travel to Europe in 9 days...yes, nueve dias. So, I haven't been cooking a lot since our fridge is kind of empty now--plus we haven't shopped for groceries in over a week. But, I know that my readers (all two of you!) probably check for new recipes once in a while. Below is this pasta I created from thin spaghetti I had in the cupboard, tuna and frozen mussels, and a half empty jar of Prego sauce. Authentic fra diavolo has shrimp and all sorts of seafood in it and you can definitely add it to this tasty pasta, however if you're in a hurry, you'll totally like this spicy version. Oh, and yes, Lindsey, I had ALL of these ingredients in my kitchen. Enjoy.

INGREDIENTS (about 4 servings)

  • 1/2 pound (or half the box) of thin Spaghetti or Fettuccini
  • 1 package of frozen mussels in garlic and butter (you can find it at Vons or Trader Joe's) cooked to package directions. Remove the meat from each mussel and set aside--DO NOT discard the garlic/butter liquid it will give off, but do discard the shells.
  • 1 package StarKist® Tuna Fillets, Teriyaki flavor
  • 1 tablespoon olive oil
  • 1 tablespoon of butter
  • 1 tomato, diced
  • 1 cup diced onion
  • 2 whole dried red chili peppers
  • 1 teaspoon red pepper flakes
  • 2/3 cup Prego® Traditional pasta sauce
  • Black pepper
  • 2 tablespoon Kraft®Parmesan cheese (yes, the blue stuff)
  • 1 tablespoon finely chopped parsley
DIRECTIONS

In a large pot of boiling water that is well salted, add your spaghetti or fettuccini and cook to package directions.

In a large sauté skillet on medium-high add the olive oil and butter. Add two whole, dried red chili peppers and sauté for 1 minute. Then add the onions and sauté until soft, about 3 to 5 minutes. Add the diced tomato and cook for 2 more minutes. Add the tuna fillets and break apart with your spatula; also add the mussels, 1/2 cup of the mussel liquid, 2/3 cup of the pasta sauce, two tablespoons of parmesan cheese, 1/2 teaspoons black pepper, and one teaspoon of red pepper flakes. Let the sauce come to a boil, then lower heat to medium and simmer for 5 minutes more.

Drain your pasta well and add it into the skillet with the seafood sauce, or fra diavolo. Toss to combine. Then add the finely chopped parsley and serve while still hot. You can top it off with additional parmesan cheese.

Friday, September 22, 2006

Key Lime Pie Martini

yummy keylime pie martini
Sometimes after dinner I'd rather have a digestif than a heavy dessert. Usually Matt and I like to drink a fine port or his favorite tequila liquor, but for those of you who want the taste of a dessert but not the heaviness, you'll love this cocktail. It tastes just like a wedge of Key Lime Pie, but it's in a martini form. How fabulous is that?

INGREDIENTS (makes 1 martini)

  • 3 tablespoons Licor 43 vanilla liqueur
  • 1 tablespoon lemon-flavored vodka
  • 2 tablespoons key lime juice or fresh lime juice
  • 2 tablespoons heavy cream
  • 1 lime wedge for garnish
  • 1/8 teaspoon finely crushed cinnamon graham cracker crumbs, for the rim
DIRECTIONS

Chill the martini glass.In a shaker filled with ice combine Liquor 43, vodka, key-lime juice& heavy cream. Shake till shaker is icy cold to hold. Rub rim of chilled martini glass with lime wedge then dip into graham; strain drink into martini glass and enjoy, my friend.

Monday, September 18, 2006

ChocoFlan

Matthew's ChocoFlan

This cake pretty much has it all. I mean, how can you go wrong with a layer of flan and then a layer of chocolate cake smothered in caramel? Heck no! ChocoFlan is a very popular cake for birthday parties in Mexico, so definitely make this for a special occasion. TIP: Even though the flan is poured on top of the cake batter, it will sink to the bottom of the pan as it cooks. Once you take the cake out of the pan, the flan will be on top. Scrumptious!

INGREDIENTS (yields about 12 slices)

  • 1 box of your favorite Devils Food Cake Mix
  • 3 eggs, room temperature
  • 1 (14 oz) can sweetened condensed milk
  • 1 (12 oz) can evaporated milk
  • 1 (8 oz) pkg cream cheese, softened
  • 1 teaspoon vanilla
  • 1 can caramel spread
  • Pecans
DIRECTIONS

CAKE: Preheat oven to 375 degrees. Prepare cake batter according to instructions on package. Do not bake, set aside.

FLAN: In a blender, mix eggs, condensed milk, evaporated milk, cream cheese and vanilla until smooth. Grease the Bundt pan very well; pour the chocolate cake batter and on top carefully spoon the flan batter. Don't worry if the surface of the chocolate mix gets disturbed a little bit. Cover with aluminum foil and cook in a water bath for 1 hour to 1 hour and 10 min at 375 F. Check the cake with a knife or bamboo skewer until it comes clean to make sure is cooked.

Remove cake and cool for 30 minutes to 1 hour and then flip it onto your serving dish. Refrigerate the cake overnight so that the flan sets.

TOPPING: Pour caramel spread on top and garnish with desired amounts of pecans and whipped cream. ChocoFlan

Apple and Pecan Cheesecake

apple pecan cheesecake

My husband, Mateus, is in a cheesecake kick this week. After my mom tasted his Oreo Cheesecake he made last weekend, she was so impressed by it that she nominated him to make her birthday cake for next weekend. Below is the recipe he'll be trying out. If you don't have a 9" springform pan, you can also make this cheesecake on a 13"x9" rectangular pan.

INGREDIENTS

  • 1 cup HONEY MAID Graham Cracker Crumbs
  • 3/4 cup finely chopped PLANTERS Pecans, divided
  • 3 Tbsp. sugar
  • 1 tsp. ground cinnamon, divided
  • 1/4 cup (1/2 stick) butter or margarine, melted
  • 2 pkg. (8 oz. each) PHILADELPHIA Cream Cheese, softened
  • 1/2 cup sugar
  • 1/2 tsp. vanilla
  • 2 eggs
  • 1/3 cup sugar
  • 4 cups thin peeled apple slices
DIRECTIONS

PREHEAT oven to 325°F if using a silver 9-inch springform pan (or to 300°F if using a dark nonstick 9-inch springform pan). Mix crumbs, 1/2 cup of the pecans, 3 Tbsp. sugar, 1/2 tsp. of the cinnamon and butter; press firmly onto bottom of pan. Bake 10 minutes.

BEAT cream cheese, 1/2 cup sugar and vanilla with electric mixer on medium speed until well blended. Add eggs, 1 at a time, beating on low speed after each addition just until blended. Pour over crust. Mix 1/3 cup sugar and remaining 1/2 tsp. cinnamon in large bowl. Add apples; toss to coat. Spoon over cream cheese layer; sprinkle with remaining 1/4 cup pecans.

BAKE 1 hour and 10 minutes to 1 hour and 15 minutes or until center is almost set. Run knife or metal spatula around rim of pan to loosen cake; cool before removing rim of pan. Refrigerate 4 hours or overnight. Store leftover cheesecake in refrigerator.

Friday, September 15, 2006

The Most Evil Cheesecake Ever

I truly love cheesecake. It's probably one of the worst things anyone could eat, but how can you say no to cream cheese? I especially love this OREO® Cheesecake. I think the macadamia nut cheesecake is probably the second evilest (is that even a word?). Anyhoo, I was tempted to buy the Oreo Cheesecake at the Cheesecake Factory but it was $23.95 for a 7" cake!!! So, after some calculation (and I was lazy to go buy it) I figured out that it's actually cheaper to buy the stuff and bake the darn cheesecake yourself.

INGREDIENTS (about 16 slices)

  • 1 pkg. (1 lb. 2 oz.) OREO Chocolate Sandwich Cookies, divided
  • 1/3 cup butter or margarine, melted
  • 3 pkg. (8 oz. each) Philadelphia Cream Cheese, softened
  • 3/4 cup sugar
  • 1 cup Sour Cream
  • 1 tsp. vanilla
  • 4 eggs
DIRECTIONS

PREHEAT oven to 350°F if using a 9-inch silver springform pan (or to 325°F if using a dark nonstick 9-inch springform pan). Finely crush 30 of the cookies. Mix crushed cookies with butter. Press firmly onto bottom and 2 inches up side of pan; set aside.

Coarsely chop remaining 15 cookies; set aside.

BEAT cream cheese and sugar in large bowl with electric mixer on medium speed until well blended. Add sour cream and vanilla; mix well. Add eggs, 1 at a time, mixing on low speed after each addition just until blended. Gently stir in chopped cookies. Spread into prepared crust.

BAKE 55 minutes to 1 hour or until set. (If necessary to prevent top from overbrowning, tent with foil during last 15 to 20 minutes of baking time.) Cool completely on wire rack.

REFRIGERATE at least 4 hours or overnight. Run knife or metal spatula around side of pan to loosen cake; remove side of pan before serving. Decorate with additional Oreo cookies or whipped cream. Incredibly yummy!

Monday, September 11, 2006

Minnesota State Fair On A Stick

YUMMY! Who doesn't love food-on-a-stick?

Friday, September 08, 2006

Cheddar-Stuffed Burgers

cheddar-stuffed burger

Can you believe summertime is almost gone? It has been so hot and humid here in San Diego lately that it seemed like summer would last forever, but last night the winds changed it's definitely getting cooler now (yes, that's like 70 degrees for us!!!). As a last hurrah, make these cheddar-stuffed burgers to remind you of summer and get you ready for the fall.

Grilling Method: Direct/Medium

INGREDIENTS (makes 6 burgers)

  • 1 pound ground sirloin
  • 1 pound ground chuck
  • 1 tablespoon Worcestershire sauce
  • 1 teaspoon Coleman's dry mustard
  • Kosher salt
  • Coarse black pepper, freshly ground (about ¼ cup)
  • 6 - 2 inch cubes of sharp cheddar cheese
  • 6 hamburger buns
  • 6 crisp lettuce leaves (optional)
  • 6 slices ripe tomato (optional)
  • Ketchup (optional)
  • Mustard (optional)
  • Mayonnaise (optional)
DIRECTIONS

Being careful not to over-work the meat, mix the sirloin and chuck, add the Worcestershire sauce, mustard and salt until just combined. Portion the meat into 6 equal pieces and shape each patty around one cube of cheese and set aside.

Meanwhile, put peppers on a shallow plate and roll the rim of each burger in the pepper until it is coated in a "stripe" of pepper. (The burgers can be made up to this point one day earlier and kept refrigerated.)

When ready to grill, place burgers on the cooking grate and grill until the meat is no longer pink, 8 to 10 minutes, turning once halfway through grilling time. Meanwhile grill the buns over Direct heat until lightly toasted, if desired.

Serve immediately on the buttered rolls with a lettuce leaf and tomato if desired. Serve with traditional condiments on the side.

Recipe from Girlsatthegrill.com

Friday, September 01, 2006

Gorgeous Foods

Kobe Beef Sushi Roll

From the mind of Executive Chef, Jeff Thruston, comes this delectable sushi roll. It's a roll with asparagus and braised hijiki and topped with seared Kobe beef. You can only find this at The Prado Restaurant in San Diego, CA.Kobe Beef Sushi Roll

T-Bone Steak Dinner & Panna Cotta

We had this fabulous dinner at the Wine Vault and Bistro in San Diego, CA.

T-bone steak

panna cotta

Thursday, August 31, 2006

Individual Molten Center Chocolate Cakes

Molten Chox Cake

I saw this recipe on another fellow bloggers site, bakinsheet.blogspot.com, and I had to give it a try. I am freakishly addicted to chocolate and this recipe especially caught my eye because it uses bittersweet chocolate. This is a perfect recipe for a dinner party or if you want to impress your family, or that special someone.

INGREDIENTS (makes 6 individual cakes)

  • 6 oz. bittersweet chocolate, chopped and divided
  • 1 tablespoon heavy cream
  • 3 tablespoons unsalted butter, very soft
  • 2 large eggs, room temperature
  • 1/4 cup sugar
  • 1 teaspoon vanilla extract
  • 1/8 teaspoon salt
  • 1 tablespoon all-purpose flour
DIRECTIONS

Preheat oven to 400F.

Butter a 6-cup muffin tin and dust each well with cocoa powder. Set aside.

In a small bowl, melt together 2 ounces bittersweet chocolate and 1 tablespoon heavy cream, either in the microwave in very small intervals, or over a small double boiler. Once it becomes smooth and shiny, chill for about 10 to 15 minutes. This is the ganache.

In another small bowl, melt together the remaining 4 ounces of bittersweet chocolate and the butter. Set aside to cool for about 10 minutes at room temperature.

In a large bowl, combine the eggs, sugar, vanilla and salt. Beat with an electric mixer until the mixture triples in volume and is very thick (about 5-7 minutes). Sift flour over egg mixture and fold in. Add cooled chocolate/butter mixture and fold in until batter is uniform. Pour into prepared muffin tins.

Form ganache into 6 teaspoon-sized balls and place one in each cake, pressing gently to cover with batter. (If there is a little left over, that's ok.)

Bake at 400F for 9-11 minutes, until the tops are set. Let cakes cool in pan for 5 minutes before turning out onto a wire rack and serving on individual plates. Cakes can be served right side up or still inverted. Serve immediately, with lightly sweetened whipped cream or vanilla ice cream.

Wednesday, August 30, 2006

Hot Dogs, Mexican Style

hot dog street vendor in L.A.In Mexico, bacon-wrapped hot dogs are a staple street food that you can find in almost any busy corner, especially during the mmmm, bacon...evenings. Nowadays, you can also find these hot dog vendors in Southern California. There are a few vendors in San Diego that sell these doggies and, boy are they good. If you're a bacon lover, which I know you are, you'll enjoy these perros calientes. Mmmmm, bacon....

INGREDIENTS (makes 8 hot dogs)

  • 8 hot dogs
  • 8 hotdog buns
  • 8 slices bacon
  • Mayonnaise, as needed
  • Ketchup, as needed
  • Mustard, as needed
  • 1 medium tomato, diced
  • 1 medium onion, diced
  • 1 jalapeño pepper (optional), seeded and finely diced
DIRECTIONS

In a bowl, combine the chopped tomatoes, onion and jalapeño pepper and set aside.

Wrap bacon around each hot dog. If needed, you can insert toothpicks to hold the bacon in place, but usually it will stick to the hot dog by itself. Place the hot dogs on a pre-heated skillet and cook on medium until the bacon is done.

Warm the hot dog buns and spread mayonnaise on them.

Place one bacon wrapped hot dog on each bun (remove toothpicks, if used), and add your favorite condiments such as ketchup and mustard.

Finally, spread some of the salsa over the hot dog, about one to two tablespoons and enjoy!

bacon wrapped hot dog...yummy!