Showing posts with label grilling. Show all posts

Friday, October 30, 2009

Wood-Grilled Salmon

This past weekend Matt and I watched an episode of Cooks Country on PBS. I usually don't watch cooking shows on PBS because they are on at weird times here in San Diego, but at the moment all we do is stay in the house and take care of the baby, so we stumbled upon it. In this particular episode they grilled salmon over cedar wood chips. Both of us thought that the recipe deserved to be made by us. I have to say that we were not disappointed at all. The salmon was perfectly cooked and it had just the right amount of cedar smoke. You *must* use the cedar chips for this recipe; don't even think about using hickory or mesquite. I paired the salmon with Jasmine rice and braised collard greens with pancetta. The meal was just divine! We will definitely be making the salmon again.

INGREDIENTS (serves 4)

  • 1 1/2 teaspoons sugar
  • 1/2 teaspoon table salt
  • 1/4 teaspoon pepper
  • 1/4 teaspoon granulated garlic
  • 4 skin-on salmon fillets (each 6 to 8 ounces and 1 1/4 inches thick)
  • 1 tablespoon olive oil
  • 2 cups wood chips , soaked for 15 minutes to 30 minutes
DIRECTIONS
  1. Combine sugar, salt, pepper, and granulated garlic in small bowl. Pat salmon dry with paper towels. Brush flesh side of salmon with oil and sprinkle with sugar mixture.
  2. Make four 7- by 5-inch trays using heavy-duty aluminum foil. Using tip of knife, perforate bottom of each tray. Divide wood chips among trays and place salmon skin-side down on top of wood chips.
  3. Place trays with salmon over hot fire and grill, covered, until center of each fillet is still just translucent, about 10 minutes. Remove trays from grill.
  4. Slide metal spatula between skin and flesh of fish and transfer to platter. Serve with Jasmine rice or your favorite side dish.

Monday, February 23, 2009

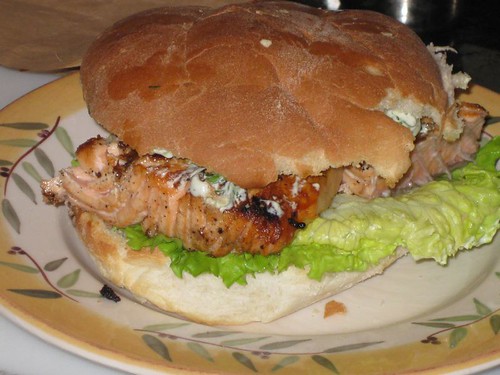
Grilled Salmon Sandwiches

The Contessa never fails! I got this recipe from Ina Garten's cookbook and I just had to make it because it seemed like such a simple yet healthy meal and, as I mentioned before, my family and I are trying to eat more fish. I am very lucky that there is a fishmonger I can go to and get the freshest catch of the day, and I think that's a big key in this recipe: super fresh salmon fillets. I cut the recipe below in half since it's just me, Matt and Mike, and the portions came out perfectly!

INGREDIENTS (serves 6)

  • 2 pounds fresh salmon fillets
  • Olive oil
  • Kosher salt
  • Freshly ground pepper
For the sauce:
  • 1 cup Hellman's mayonnaise
  • 1/4 cup sour cream
  • 3/4 teaspoon white wine vinegar
  • 12 fresh basil leaves
  • 3/4 cup chopped fresh dill
  • 1 1/2 tablespoons chopped scallions, (white and green parts)
  • 1/4 teaspoon kosher salt
  • 1/4 teaspoon freshly ground black pepper
  • 3 teaspoons capers, drained
To assemble:
  • 6 fresh white or brioche rolls (4-inch round)
  • 1/4 pound mesclun mix or fresh basil leaves
DIRECTIONS

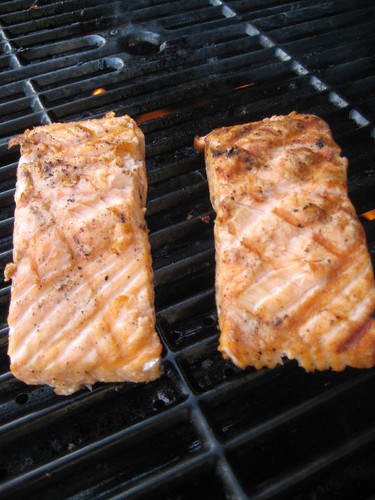
For the salmon, heat your (coals or propane) outdoor grill and brush the top of the grill with oil. Rub the outside of the salmon with olive oil, salt, and pepper, to taste. Grill for 5 minutes on each side, or until the salmon is almost cooked through. Remove to a plate and allow it to rest for 15 minutes.

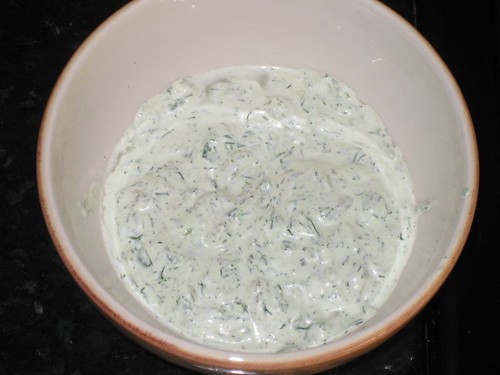
For the sauce, place the mayonnaise, sour cream, vinegar, basil, dill, scallions, salt, and pepper in the bowl of a food processor fitted with a steel blade. Process until combined. Add the capers and pulse 2 or 3 times.

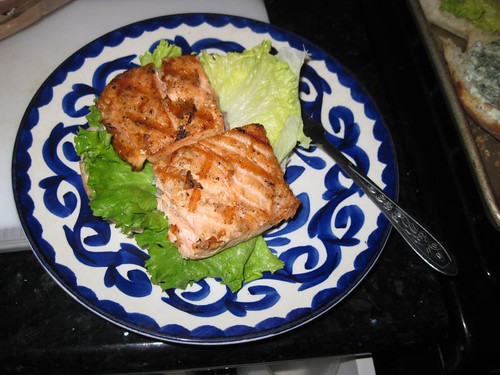
To assemble the sandwiches, slice the rolls in 1/2 crosswise. Spread a tablespoon of sauce on each cut side. On the bottom 1/2, place some mesclun salad and then a piece of salmon. Place the top of the roll on the salmon and serve immediately.

Tuesday, February 17, 2009

BBQ Chicken Pizza

I'm not a Sandra Lee fan as most of her recipes call for 70% canned or store bought ingredients and only 30% fresh ingredients, but at times some of her recipes do save many cooks a lot of time. So what I did here is we took part of her BBQ chicken pizza recipe but we raised up a notch by making our own dough and grilling our chicken. Yes, this definitely is not a Semi-Homemade recipe, but give it a try because homemade pizza dough is so good and this pizza was super cheesy and gooey!

INGREDIENTS

Pizza Dough

  • 1 tablespoon honey
  • 1 cup warm water (110 to 115° F)
  • 2 teaspoons active dry yeast
  • 1 Tablespoon olive oil
  • 3 cups all-purpose flour
  • 1 teaspoon salt
BBQ Chicken
  • 1/2 pound chicken tenders
  • 1 Tablespoon Butt Rub
  • 2/3 cup barbecue sauce (we used Sweet Baby Ray's Original BBQ Sauce)
Pizza
  • 3/4 cup shredded Smoked Gouda
  • 1 cup shredded mozzarella
  • 3/4 cup shredded Parmesan
  • Grilled chicken, cut into 1" pieces
  • 1/2 medium red onion, thinly sliced
  • 3 tablespoons chopped fresh cilantro leaves
DIRECTIONS

Make the dough: In a small bowl, dissolve the honey in the warm water. Sprinkle the yeast over the water and stir until it dissolves. Let the yeast mixture stand for 5 minutes, until a layer of foam forms on the surface.

In a large bowl, combine the flour and the salt. Make a well in the center of the flour mixture and pour the olive oil and the yeast mixture. Stir the flour into the wet ingredients, until all the flour is incorporated. If its too dry, add more water in tablespoon increments.

On a lightly floured surface, knead the dough for 15 minutes, until it is smooth and elastic. Shape the dough into a ball and put in in a well-oiled bowl. Cover with a moist towel and let rise in a warm place until double in bulk (about 45 minutes).

After about 45 minutes the dough should have about doubled in size. Show it who's boss and punch it down. That's right, give it a good smack so it deflates. Let it rise for another hour to an hour and a half. The dough is now ready to be rolled out

About 15 minutes before baking, pre-heat your oven to 400 degrees F.

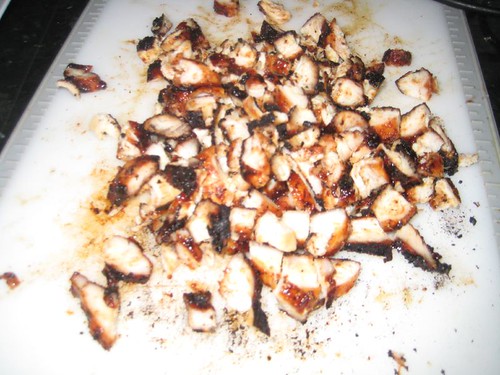
For the Chicken: sprinkle the Butt Rub (or your favorite grill rub) over the chicken. Heat your grill on medium-high for direct heat grilling. Grill chicken pieces, about 5 minutes per side.

About one minute before you remove chicken from grill, brush two tablespoons of the bbq sauce over chicken. Set chicken aside to cool and chip into 1" bite-sized pieces.
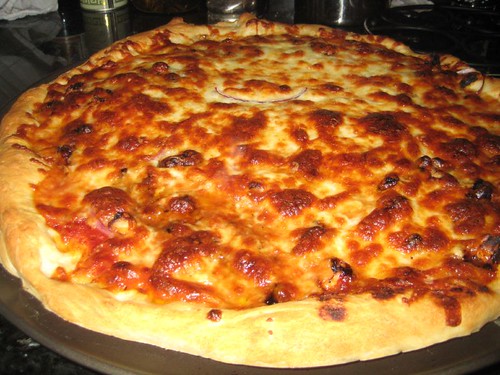
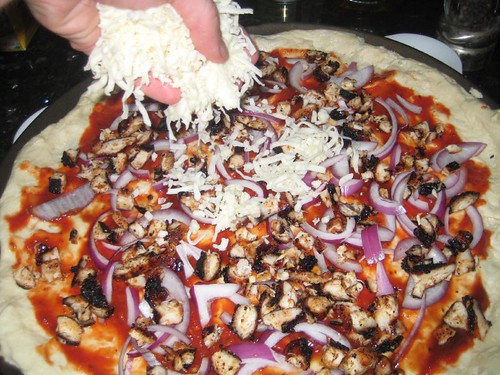
For the Pizza: Punch the dough down, and roll out into a 16 inch flat circle. Spread remaining barbecue sauce evenly over pizza dough. Sprinkle smoked Gouda, 1/2 cup mozzarella, and Parmesan. Next spread the onions and chicken pieces and top with remaining 1/2 cup mozzarella. Bake for 18-20 minutes or until cheese bubbles. Sprinkle with chopped cilantro and cut into pieces.
Thursday, February 05, 2009

Mikey Burgers

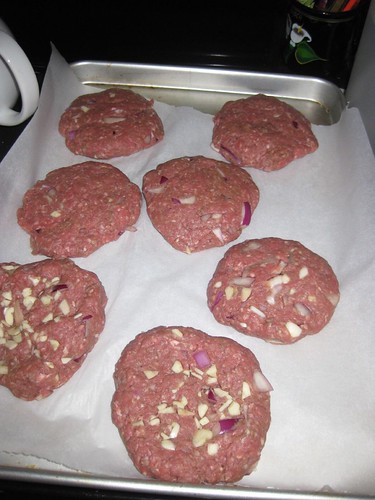
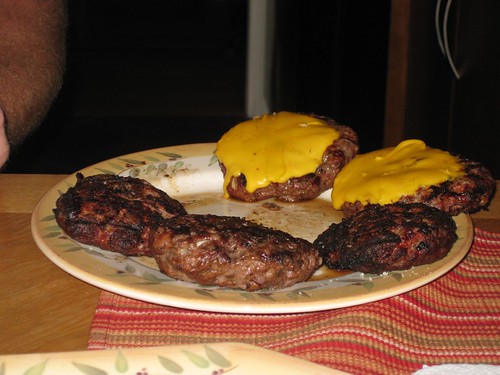
My brother-in-law, Michael, is staying with us for now and he had an insatiable craving for hamburgers a few days ago. Perhaps he was craving burgers because we have a new grill and the weather is quite nice here, or he's just low in iron. Nevertheless, he prepared these hamburgers for us and they were really good. He, of course, added all 5 cloves of garlic, but it's definitely up to you. We also used excellent buns we bought at Mike's new favorite place, Panchita's Bakery in Golden Hill.

INGREDIENTS (makes 6 to 7 burgers)

  • 1 lb. ground chuck
  • 1 lb. ground sirloin
  • half a red onion, chopped
  • 3 to 5 garlic cloves, chopped
  • 3 to 5 dashes of Worcestershire Sauce
  • Salt & pepper
  • Hamburger buns, lettuce, tomato, onions, mayo, mustard, catsup, etc...
DIRECTIONS

In a large bowl add the ground chuck and ground sirloin, the chopped onions and garlic and mix, gently, with your hands until it's well combined. Add several dashes of worshy sauce and mix to combine again.

Lay out a piece of parchment on a shallow tray and start forming your patties. Place patties over parchment.

Let the patties rest 10 minutes before you start grilling.

Setup your grill for direct-heat grilling and grill patties, about 5 minutes per side, or depending on how you like them. While patties are on grill, season with salt and pepper. And if you want cheese, place a slice of American during the last two minutes of grilling.
Monday, February 02, 2009

Best BBQ Beans Ever

Best BBQ Beans Ever!

[REPOST] As you may have noticed, I haven't posted many recipes lately and that's because Matt and I have had a steady stream of visitors lately. So, we've been entertaining out-of-town guests and I haven't been doing much cooking lately--but Matt has been doing quite of bit of grilling since our weather here is warming up nicely.

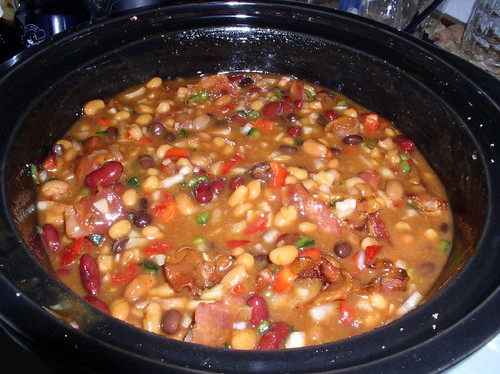
When it comes to grilling I always think of beans as a side dish, but not just any beans...BBQ beans! This is a recipe I tweaked from Steven Raichlen. He makes his beans over a grill and adds wood chips to a smoker box to give it a smoky flavor. I, on the other hand, added smoked bacon and liquid smoke to my crock-pot beans to give it that "outdoorsy" taste. These beans are simply fabulous and a sure hit at any BBQ.

INGREDIENTS (feeds about 14 people)

  • 1 pound smoked bacon cut into 2" pieces
  • 1 can (15 ounces) black beans
  • 1 can (15 ounces) dark red kidney beans
  • 3 cans (each 15 ounces) baked beans or pork and beans
  • 1 large sweet onion, finely chopped
  • 1 red bell pepper, cored, seeded, and finely chopped
  • 1 poblano pepper, seeded and finely chopped
  • 4 cloves garlic, minced
  • 2 jalapeƱo peppers, seeded and diced (for hotter beans, leave the seeds in)
  • 1 Anaheim pepper, seeded and diced
  • 2 cups sweet red barbecue sauce (your favorite commercial brand)
  • 1-1/2 cups firmly packed light brown sugar
  • 1/2 cup Dijon mustard
  • 2 teaspoons liquid smoke (optional)
  • 1 teaspoon kosher salt
  • 1/2 teaspoon freshly ground black pepper
DIRECTIONS
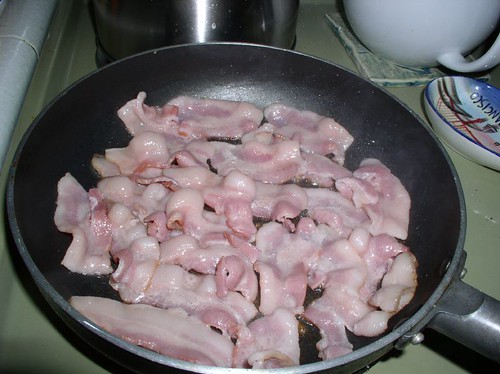
  1. Place the bacon in a large skillet over medium heat and fry until crisp and golden brown, about 5 minutes. Pour off all the bacon fat, saving two tablespoons for the beans.
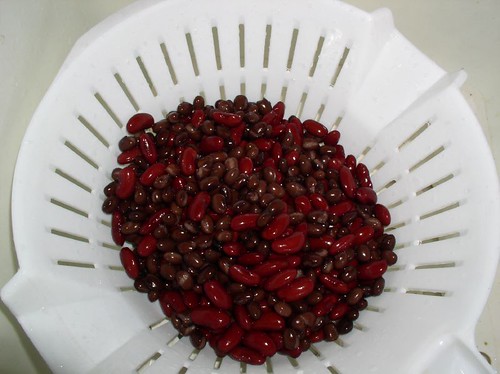
    frying up bacon drain the beans, man!
  2. Empty the cans of black and kidney beans into a colander and drain. Rinse the beans under cold running water and drain again. Place all the beans (including the baked beans or pork and beans) in your Crock Pot and add the onion, bell and poblano peppers, garlic, and jalapeƱos and Anaheim peppers and stir to mix.
  3. Add the barbecue sauce, brown sugar, mustard, liquid smoke, if using, and fried bacon and stir to mix. Taste for seasoning, adding more brown sugar and/or mustard as necessary, and add salt and black pepper; the beans should be very flavorful.
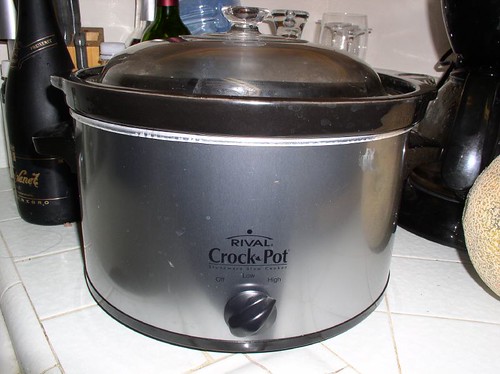
    the crock-pot
  4. Place the lid on your Crock pot and set it to "High." The beans will be ready in about 4 hours. If you're cooking them over the stove top, simmer them for 1-1/2 to 2 hours, stirrings once in a while. Add the reserved bacon grease (if using) to the beans about 10 minutes before serving and stir well. Your beans will be perfect!
Recipe slightly modified from Steven Raichlen's BBQU.NET

Thursday, January 08, 2009

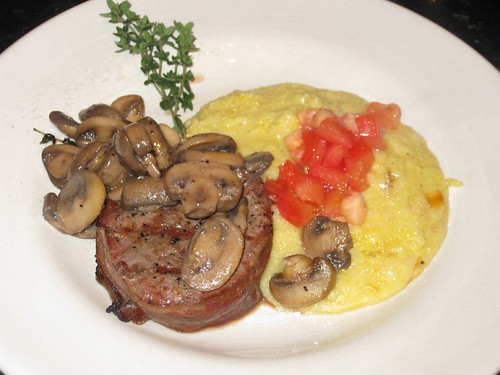
Grilled Filet Mignon Wrapped in Bacon

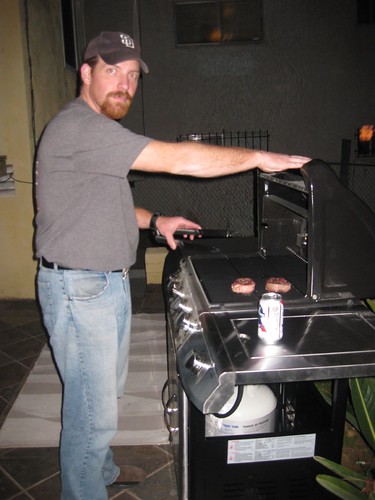
My hubby is back in town, YAY! And what is the first thing Matthew did? Purchase a grill, of course! I know right now is not "grillin' season" in some parts of the country, but a true griller would tell you every day is a grill day.

So, I wanted him to grill something special, yet not too complicated. I thought of rib eye, but then I saw filet mignon on sale. I know grilling filet mignon is a little tricky because the meat is so tender and you definitely don't want to burn it, but you do want it a little on the medium-rare side. And since this was the first time we were testing our grill, it was chance we had to take.

Thankfully, the grill is AWESOME! Filet mignon came out perfect and the recipe is probably one of the easiest ever. And yes...we're probably going to grill everyday now!

INGREDIENTS (serves 2)

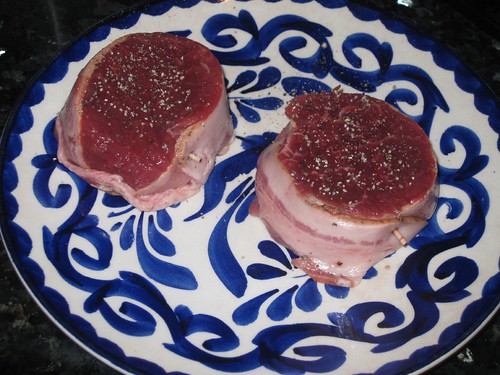
  • 2 filet mignons medallions
  • 2 slices of bacon
  • 2 toothpicks
  • Olive oil
  • Salt and pepper
DIRECTIONS
  1. Place filets in kitchen counter and let them come to room temperature (about 30 minutes--your patience will be rewarded). If you have a dog, put the steaks somewhere safe!
  2. Pre-heat your grill on medium-high heat. Set it up for direct heat grilling.
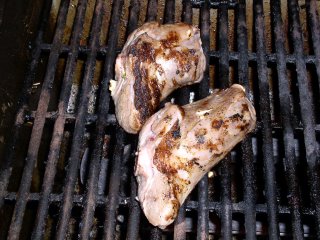
  3. Wrap a piece of bacon around each filet mignon medallion and secure with a toothpick. Drizzle a little olive oil on both sides of each medallion and salt and pepper each side.
  4. Place the meat on the grill and DO NOT MOVE IT. Let it sear for about 3 minutes (for medium rare) with the lid down. After about 3 minutes, lift, turn your steak 90 degrees and then set it back down for another 3 to 4 minutes (again, for medium-rare, a little more if you have to have it more done) again with lid down. This will give you cool looking grill marks.
  5. Flip the steaks for the one and only time. Gently lift, flip and set it back down in the same spot and leave it alone again for about 3 to 4 more minutes. Repeat step 4 above.
  6. Once the filet mignon are done to your liking, remove from grill and lightly cover with foil (don't wrap it in foil, though). Let it cool for 5 to 7 minutes and serve immediately--and don't forget to remove the toothpick.
howyoudoin?

Monday, May 19, 2008

Creamy Goat Cheese Pasta with Grilled Asparagus

It's late May and it's so hot. Why? It's supposed to be gray and slightly cool. Where is May gray, Mr. Weatherman?

I can't write. My fingers are overheating. I can't cook. My kitchen is 85 degrees...AND I HAVE TWO FANS AT FULL BLAST.

Must find shade.

My chanclas are hating the hot pavement. What am I going to eat?

INGREDIENTS (serves 4)

  • 2 bunches asparagus (2 pounds total), tough ends removed
  • 2 tablespoons olive oil
  • 3 tablespoons butter, cut into small pieces
  • 12 ounces cavatappi or other short pasta
  • 1 small log soft goat cheese (5 ounces), crumbled
  • 2 to 3 tablespoons snipped fresh chives, for garnish (optional)
DIRECTIONS

Preheat your outdoor grill to high.

Bring a large pot of water to a boil for pasta--if you have a fancy grill with a burner, then you can do the whole thing outside.

Place asparagus on a plate and toss with 2 tablespoons olive oil and season with salt and pepper to taste. Place asparagus on grill over high heat turning each spear occasionally for 3-4 minutes, or to desired tenderness (asparagus should begin to brown in spots); cut into 2-inch lengths.

While asparagus is grillin', generously salt boiling water. Add pasta, and cook until al dente, according to package instructions. Set aside 1 1/2 cups pasta water; drain pasta and return to pot.

In a medium bowl, combine goat cheese, 3 tablespoons butter, and 1/2 cup pasta water. Season with salt and pepper, and whisk until smooth. Add goat-cheese mixture and asparagus to pasta; toss to combine, adding more pasta water if necessary for sauce to coat pasta. Serve pasta garnished with chives.

Recipe adapted and modified from Everyday Food.

Tuesday, September 04, 2007

Grilled Bacon Wrapped Orange-Chipotle Shrimp

It has been so unbelievably hot here lately that I've had no desire to cook indoors or outdoors. I was trying to find a recipe where my outside grilling was at a minimum, and of course, I found this excellent recipe that, yes, it is also bacon-themed! Wrapping shrimp in bacon is a very common recipe and quite easy, just make sure wrap each shrimp in half of a bacon piece this way your shrimps won’t overcook and get tough. Seriously, my friend, this is all we ate while sipping super cold Amstel Lights and sitting in front of a fan that we set to go at 90 miles per hour. Stay cool!

INGREDIENTS (makes 12 jumbolicious scrimps)

  • 12 jumbo, raw, peeled and deveined shrimp
  • 2 Tbsp grapeseed oil or olive oil
  • 1 teaspoon orange zest
  • 2 Tablespoons fresh orange juice
  • 1/2 teaspoon chipotle powder (or to taste)
  • Pinch of kosher salt
  • 6 strips thin bacon cut in half (12 pieces)
  • Skewers
DIRECTIONS

In a medium bowl, combine the oil, orange zest, orange juice, chipotle powder and salt. Add the shrimp and make sure it is all well coated. Set aside in the fridge for 5 to 10 minutes.

When you are ready, run outside and turn on your grill on high, for direct heat, then run back into house. Take a zip of your beer and take a breather.

After 10 or so minutes, wrap a half piece of bacon around each piece of shrimp, then thread the shrimp onto skewers, preferably the long, flat ones or metal skewers. You can also use bamboo, but make sure you soak them in water for at least a half hour first. Drizzle the remaining marinade over the shrimp.

Now, with all your shrimps wrapped in bacon, quickly take them outside to your hot grill and grill uncovered for 5 to 7 minutes on each side, until shrimp is pink and the bacon is crisp. Make sure you take a cold beverage with you because these will be the hottest 14 minutes of your life. When shrimp is done, run back in and enjoy them with your life-partner...

Tuesday, August 28, 2007

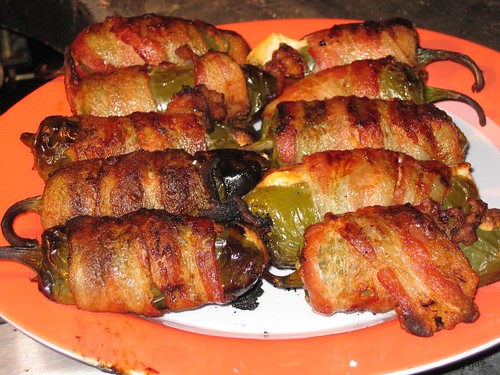
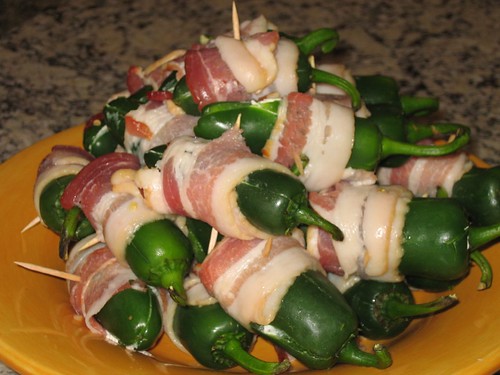
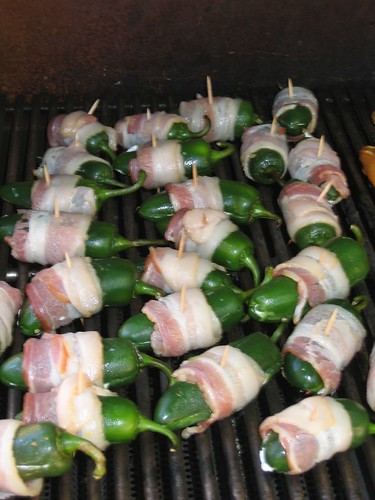
Bacon-Wrapped JalapeƱo Poppers

Grilled JalapeƱo Poppers
My sister-in-law Lindsey, or SILLi as I like to call her, made some fabulous jalapeƱo poppers last week. Her dad, Dave Baggs, came up with the idea of stuffing cream cheese into jalapeƱos, wrapping them with bacon, then grilling them. Now, anyone that comes up with recipes where bacon is a key ingredient is my personal hero. So, I copied the Baggs recipe, although I did embellish it a little with shredded cheese and cilantro. But you can leave that out and just use cream cheese. Either way you do it, these poppers will blow you head away...or just make you hot for a little while.

INGREDIENTS

  • 12 jalapeƱo peppers
  • 1 package (8 oz.) cream cheese
  • 1/2 cup shredded cheddar cheese
  • 1 tsp. fresh cilantro, minced
  • Pinch Salt and pepper
  • 1 lb. sliced bacon
  • 24 toothpicks
DIRECTIONS

Soak toothpicks in cold water. The longer the better but at least 1 hour.

Cut a slice lengthwise in the jalapeƱo to make enough space to remove seeds. Make sure not to split the pepper all the way through when you do this. Remove seeds and ribs and wash jalapeƱo with cold water. It's a good idea to wear gloves during this step, especially if you have sensitive skin.

Mix cream cheese, shredded cheddar, cilantro and salt and pepper in a separate bowl. Put cream cheese mixture inside a plastic baggie and cut a small slit on one corner of baggie (you're making a MacGyvered pastry bag). Squeeze mixture from baggie into jalapenos.

Wrap bacon in a spiral fashion around stuffed pepper and secure with a couple of toothpicks. Grill the popper until the bacon is cooked, about 20 to 30 minutes. Let rest 5 minutes before serving. I'm pretty sure MacGyver would love these!

Friday, July 27, 2007

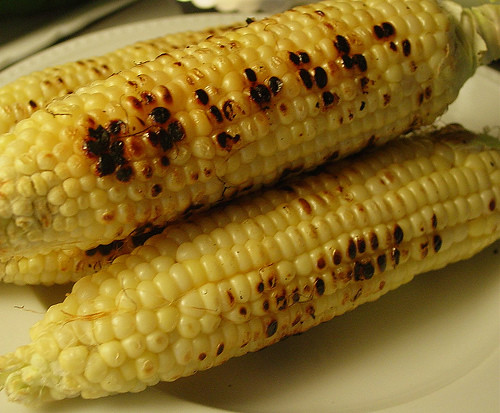
Grilled Corn with Chipotle Butter

It has been so hot here lately, that I rather grill outdoors than cook inside a hot kitchen. Grilled corn, along with grilled veggies, is probably one of my favorite summer dishes. Usually, us Mexicans tend to slather our grilled corn with mayonnaise, cotija cheese, chili powder and fresh lime juice (oh, believe me it's delicious!). But this recipe is a slight variation on our Mexican grilled corn--and probably more healthy than mayo! An ice cold Tecate beer goes quite smoothly with this grilled corn. Buen provecho!

INGREDIENTS

  • 1/2 cup (1 stick) unsalted butter
  • 1 1/2 tablespoons minced seeded canned chipotle chilies in adobo
  • 2 teaspoons fresh lime juice
  • 1/4 teaspoon salt
  • 8 ears of corn, husked
  • Olive oil
DIRECTIONS

In a small mixing bowl, mash together the butter, chipotles, lime juice and salt. Form into a log and chill for cutting into coin-shaped pieces.

Brush the ears of corn lightly all over with olive oil. Place on cooking grate over direct medium heat. Cook, turning occasionally, until the kernels are lightly browned and blistered all over, 8 to 10 minutes for grocery store corn and 4-5 minutes for farm-fresh corn.

Spread the chipotle butter evenly over all ears of corn and sprinkle with salt to taste. Serve immediately.

Thursday, May 24, 2007

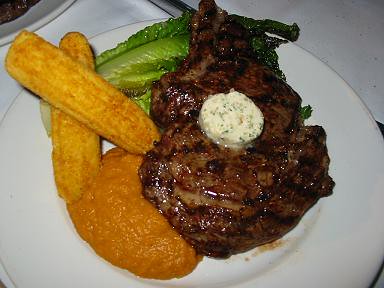
Aragorn's Grilled Steak

grilled rib eye steak a la aragorn
Have you ever wondered what Lord Aragorn ate at his coronation party after he was crowned King Elessar? (If you have no idea what character I'm talking about, then you better go to the library). Perhaps they served lots of boiled potatoes and all sort of meats, and an assortment of good weeds to smoke. However, I'm thinking that Aragorn was more of an "cook over an open fire" type of guy, don't you think? And I'm pretty sure he would be impressed with this grilled steak recipe. Perhaps even the Prancing Pony would have it in their menu! Don't forget to serve it with a huge pint of ale, lads!

INGREDIENTS (Serves 4 normal Hobbits or 2 hungry Orcs!)

Grilling Method: Combo/Medium Heat

  • 2 sticks unsalted butter, softened
  • 2 shallots minced, soaked in Jack Daniels
  • 3 teaspoons minced parsley
  • ½ teaspoon Worcestershire sauce
  • ½ teaspoon Dijon mustard
  • 3 teaspoons Jack Daniels
  • ½ teaspoon sea salt
  • White pepper to taste
  • 2 Bone-in ribeye steaks, about 1 pound each and at least 1-inch thick
  • Olive oil
  • Kosher salt
  • Freshly ground pepper, optional
  • Parsley, chopped for garnish
DIRECTIONS

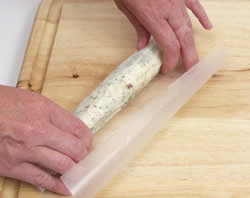
Make Butter at least 3 hours in advance. Combine butter, shallot, parsley, Worcestershire, mustard, Jack Daniels, salt and pepper. Mix well. On a piece of Saran Wrap, drop butter in spoonfuls to form a log. Roll butter in plastic wrap and smooth out to form a round log. Refrigerate until hard and easy to cut into pieces. making a butter log

Preheat grill or build a charcoal fire. While the grill is preheating, allow meat to come to room temperature about 20 minutes before grilling. Wrap meat in paper towels to get rid of excess moisture. Just before grilling, brush both sides of the steaks with oil and season with salt and pepper.
Place steaks directly over Medium High heat for about 5 minutes. Turn steaks and continue cooking for about 8 more minutes for medium rare, or 10 - 12 for medium. Remove the steaks from the grill and allow to rest at least 5 minutes but no longer than 10 before serving.

Cut the cold compound butter into four generous slices. Serve the steaks warm with the butter. Garnish with chopped parsley, if desired.

    One day I will make Armida my queen

Saturday, April 21, 2007

Dry-Rubbed Skirt Steak

I was watching iconoclasts on the Sundance Channel the other night and they had Chef Mario Batali interview of Michael Stipe of REM. I was pleasantly surprised with the show and the interview. But the show got me thinking that I had never tried any of chef Batali's recipes. So I went online and looked for a non-pasta recipe from him and found this dry-rubbed skirt steak. What's so great about it, you ask? The man uses ground dry porcini mushrooms in the rub. The best part is that you can either grill outdoors, or make it in your broiler. Serve it atop an baby green salad. Manga!

INGREDIENTS (serves 4)

  • 2 tablespoons sugar
  • 1 tablespoon kosher salt
  • 5 garlic cloves, finely chopped
  • 1 tablespoon hot red pepper flakes
  • 1 tablespoon finely ground black pepper
  • 1/4 cup dry porcini mushrooms, ground to a fine powder in a spice grinder
  • 1/4 cup extra-virgin olive oil
  • 2 pounds skirt steak, trimmed of fibrous fat
  • Best-quality extra-virgin olive oil, for drizzling
  • Best-quality balsamic vinegar, for drizzling
DIRECTIONS
  1. In a small bowl, combine the sugar, salt, garlic, red pepper flakes, pepper, mushroom powder, and olive oil and stir well to form a thick, fairly dry paste. Rub the past all over the steak, coating it evenly, and refrigerate, wrapped in plastic for 12 hours or overnight.
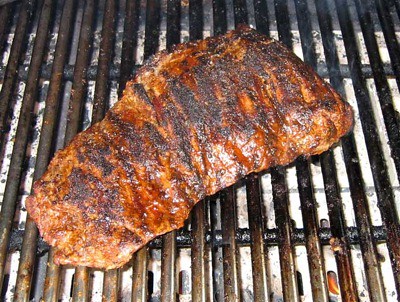
  2. Pre-heat the grill or broiler and remove the steak from the refrigerator and brush off the excess marinade with a paper towel. Cook on the hottest part of the grill for four minutes on one side then turn carefully with tongs and cook three minutes on the other side. dry-rubbed skirt steak on the grill
  3. Allow the steak to rest for three to five minutes, then slice against the grain. Drizzle with the olive oil and the balsamic vinegar and serve immediately.
Recipe courtesy of Mario Batali copyright © 2003.

Wednesday, February 21, 2007

How to Grill Flat Iron Steaks a la Baggs

My sister-in-law, Lindsey, grilled us some extremely delicious flat iron steaks for Valentine's Day. Here she is in action! Notice all the butter...mmmm, butter...

INGREDIENTS (Serves 4)

  • 4 flat iron steaks (between .40 and .50 pounds each)
  • Kosher salt and ground black pepper
  • 2 tablespoons olive Oil
Garlic Butter
  • 6 garlic cloves, finely minced
  • Kosher salt
  • 1 cup unsalted butter, softened (two sticks)
  • 2 teaspoon dried thyme
  • Ample pinch of coarsely ground black pepper
DIRECTIONS

Prepare the garlic butter: Chop the garlic finely. Sprinkle 1 tablespoon salt over the garlic and continue to chop it, occasionally smashing and smearing the garlic with the flat side of the knife, until the garlic becomes pastelike. (Alternatively, mash the garlic and salt together in a mortar and pestle.) Put the garlic paste, butter, thyme, and pepper in a small bowl. Fold the softened butter over and onto the garlic and thyme, mashing it down with the back of a spoon or spatula. Use a sheet of plastic wrap to help shape the butter into a log, wrap the log well with the plastic wrap, and refrigerate until ready to use. (The garlic butter can be made up to 3 days ahead; it can also be frozen, well wrapped, for a couple of months.)

Grill: Make sure your grill is clean, lightly oiled and very hot.

Brush beef with olive oil. Sprinkle salt and a generous amount of ground, black pepper all surfaces of each piece of meat.

Place steak on hottest part of grill and char for approximately 6 - 8 minutes per side for medium rare to medium. Place a generous amount of garlic-butter on each piece (see movie). Make sure to place cooked steak on platter, cover with foil and let muscle tissue rest for 6 - 8 minutes.

Thursday, January 19, 2006

Prime Rib

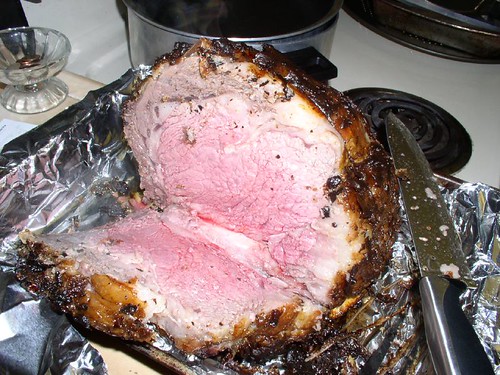
If I could, I would eat prime rib every day, specially if it's cooked just right. I have tried prime rib in almost every state I've visited and to this day the best Prime Rib dinner I've ever had was at the Beverly Depot Restaurant in Beverly, Massachusetts. Recently, I've been craving prime rib and I decided to finally give it a try. The recipe is quite easy, it's the cooking that takes the longest. There are many recipes for prime rib out there and I combined two that I found to make this one. This is for a 6 lb. prime rib roast that has been trimmed and tied by my butcher. It serves 4 very hungry people.

INGREDIENTS

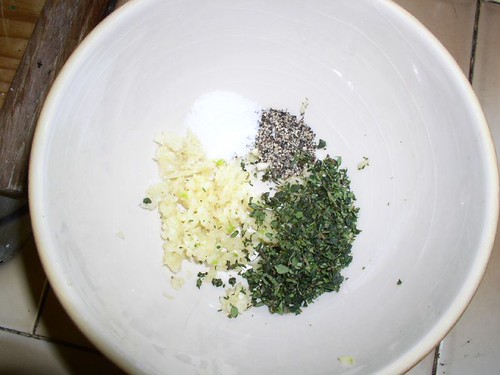
  • 2 Tbsp. fresh Thyme, finely chopped
  • 3 Garlic cloves, passed through a garlic press
  • 3/4 tsp. kosher salt
  • 1/4 tsp. ground black pepper
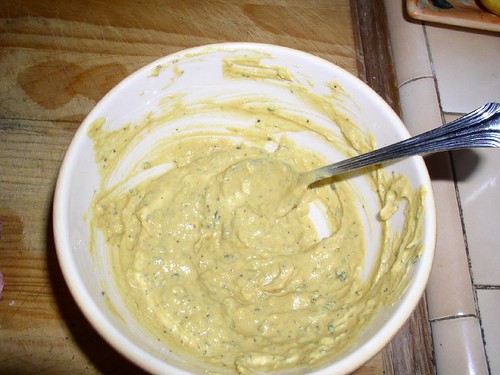
  • 1/2 cup Dijon Mustard
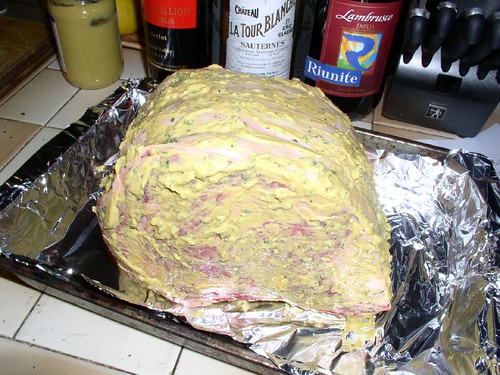
  • 6 lbs. standing prime rib roast, trimmed and tied with butcher string
DIRECTIONS
  1. Mix the first 5 ingredients in a bowl.
  2. Rub mustard marinade all over the prime rib and place it in a shallow baking pan. Let the roast sit at room temperature for 1 to 2 hours. It is very important that your roast be at room temperature before you cook it.
  3. Pre-heat oven to 500 F.
  4. Put a meat thermameter through the thickest part of your roast--make sure you don't put it next to the bone.
  5. Place the prime rib in the oven for 30 minutes (5 minutes per pound), uncovered, at 500 F.
  6. Lower the temperature to 350 F. Tent the prime rib with a piece of aluminum foil and cook for 1 hour. After an hour, check the temperature. Cook longer until it reaches your desired doneness. 135 is rare, 140 medium-rare and 150 and above is well-done. We like ours at medium-rare.
  7. Remove prime rib from the oven and let it rest for 10 minutes before cutting. Serve with a side of horseradish and Yorkshire pudding.

Wednesday, January 18, 2006

Yorkshire Pudding

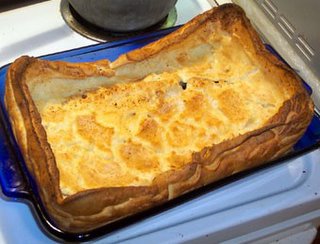
Last night I cooked prime rib for the first time (pictures and recipe coming very soon) and a very traditional side dish to prime rib is Yorkshire Pudding. This isn't really a pudding but a souffle-like pastry that was originally cooked in a tin under the rotating spit. By cooking it this way the juices from the meat dripped on to it, giving a delicious flavor. You can use prime rib or roast beef drippings, melted lard or even bacon drippings in this recipe. I'm sure you can use olive oil too, but it will not give it that authentic Yorkshire taste!

INGREDIENTS (serves 6 to 8)

  • 2 cups all-purpose flour
  • 1 teaspoon salt
  • 6 large eggs
  • 2 1/2 cups milk
  • 1/4 to 1/2 cup pan drippings from Prime Rib, Roast Beef or bacon or melted lard
  1. Preheat oven to 425 F.
  2. Sift together flour and salt; set aside. In a medium bowl, whisk together eggs and milk. Add flour mixture, and whisk until combined. Cover with plastic; chill in the refrigerator for at least 4 hours, or overnight.
  3. In a baking pan pour reserved pan drippings. Heat pan and drippings on top of the stove until very hot, about 5 minutes. Remove batter from refrigerator, and shake or whisk well; quickly pour into hot roasting pan. Note: You can also make this into individual Yorkshire puddings by baking them in pop-over pans or muffin tins. Simply pour pan drippings into each tin, then the batter and bake for 10 to 15 minutes for individual pudding.
  4. Bake until crisp and golden, 30 to 40 minutes. Serve warm with prime rib.

Thursday, December 15, 2005

The Perfect Grill Marks

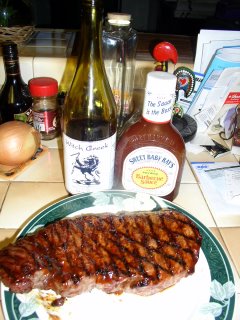
The Perfect Grill Marks Have you ever been to a steak house or to a dinner party and the grill marks on your steak were perfect? Have you wondered, "how did they do that?" Believe me, I have, and I've been learning the art of grill marks for a while. I'm still an intermediate beginner but my husband has mastered the art. Check out his perfect steak pictured above!

To acquire the perfect grill marks on your steak you will need:

  • A hot grill
  • Patience, and
  • Timing

Place your steak directly onto a hot grill for a few minutes. Then using tongs or a spatula give your steak a quarter turn to create the second set of marks resulting in a crisscross pattern.

When it is time to flip your steak repeat the process of grilling for a few minutes and then give it a quarter turn.

You may need to practice a few times before mastering the art of presentation, but once you've learned it you shan't forget it. Don't forget to baste your steaks in your favorite BBQ sauce or one of my new favs, Sweet Baby Ray's barbacue sauce.

Tuesday, November 22, 2005

Grilled Jack Daniels Steaks

Not too long ago, my husband found a Jack Daniels®EZ-Marinader bag in the grocery store and we wanted to give it a try. Usually, we prefer to give our steaks a dry rub then grill it, then slather it with BBQ Sauce, so this EZ-Marinade was new to us. The bag is sturdy and it has a zip-loc type of seal. The marinade is already inside. All you have to do is place your meat in the bag, close it and let it marinate. Check the EZ-Marinader website here.

INGREDIENTS
  • 2 Steaks (T-Bone or Sirloin)
  • 1 Jack Daniels® EZ Marinader® bag
Place the steaks inside the EZ Marinader bag. Let it marinate for a minimum of 30 minutes, preferably 2 hours.

When ready to grill, turn on your grill to high. Make sure the grates are clean. Oil the grates with a paper towel or cloth. When the grill gets to 350 degrees, lower down to medium-high.
Remove steaks from the bag and place them for direct grilling. If they are thick steaks (3/4 to 1") grill for 10 minutes on one side and 8 on the other for medium-rare. Grill longer for well-done steaks. As you can see, the steaks come out juicy and slathered with the Jack Daniels Sauce. Serve with a baked potato or your favorite side dish.

And enjoy the steak...my sister sure did!!!

Monday, November 21, 2005

Grilled Lamb Shanks with Garlic and Lemon

Here's an easy recipe for grilled lamb shanks (and finished off in the oven). The marinade is very simple but full of flavor and it is also very Greek. You can marinate the lamb shanks in a large zip-loc bag, or two smaller ones, as I did. This recipe is for two lamb shanks.

INGREDIENTS

Marinade

  • 3 garlic cloves, minced
  • 1/4 cup fresh lemon juice
  • 1/2 tsp. salt
  • 1/2 tsp. pepper
  • 2 TBSP. mint, finely chopped
  • 1/2 cup Olive Oil
  • 2 Lamb Shanks
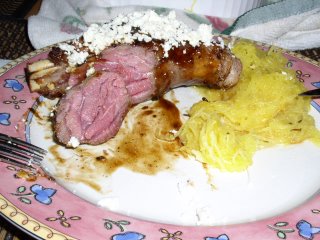
In a glass bowl, whisk garlic, lemon juice, salt, pepper, and fresh mint. Slowly, drizzle in the olive oil until it emulsifies. Season lamb shanks with salt and pepper, place them in the zip-loc bag and pour in the marinade. Place it in the fridge and let it marinate at least 30 minutes, up to 2 hours. Heat up your grill to high. Place lamb shanks on grates and turn down heat to medium-high. Grill for about 10 minutes per side, until it caramalizes on the outside. Place the shanks in an oven-safe plate and place it in a 350 degree oven for 10 more minutes for medium, or 20 minutes for well done. When ready to serve, squeeze more fresh lemon juice over the shanks and top with feta cheese, if you want. A good side dish is Roasted Spaghetti Squash.