Monday, December 20, 2010

My Go-To Meatball Recipe


I don't know what it is about me that I'm obsessed in finding that perfect meatball recipe. I have a few meatball recipes on my blog, but this one is probably my favorite (and I know I always say that out ever recipe I put on here).

This recipe is originally called "Grandma Maronis Meatballs 100 Year Old Recipe" and I saw it on an episode of Throwdown with Bobby Flay (and yes, I know I keep saying I can't stand Bobby Flay but I just can't help but watch that show). 

I've made this recipe about 5 times now and here are a few tips: use fresh bread crumbs, if possible; I only use 3 large eggs and one large finely diced shallot instead of the onion. Also, add half of the milk first and mix; if the mixture seems slightly very moist but still holds it's shape, then don't add the remainder. You want your meatball mixture to be slightly on the wetter side. Lastly, I add a half cup of grated mild cheddar because I just love it in the meatballs. 

INGREDIENTS (makes 16 meatballs)
  • 1 pound ground chuck
  • 4 ounces dried bread crumbs
  • 4 large eggs
  • 4 ounces whole milk
  • 6 ounces grated Romano
  • 3 ounces grated Spanish onion
  • 2 ounces finely diced fresh garlic
  • 2 ounces finely chopped fresh Italian parsley leaves
  • 2 ounces finely chopped fresh basil leaves
DIRECTIONS 

Preheat oven to 350 degrees F. Spray a baking sheet with olive oil cooking spray.

Mix all ingredients thoroughly in large bowl. If mixture seems a little loose add more bread crumbs.
Roll meatballs loosely about the size of a golf ball and place on baking sheet. Place them close to each other so that they hold their shape. Place into preheated oven for approximately 35 to 40 minutes.

Once they are done, you can add them to your favorite sauce and simmer them in the gravy or serve over spaghetti and marinara sauce. Enjo
y!

Monday, October 25, 2010

Lemon And Herb Roasted Chicken With Root Vegetables


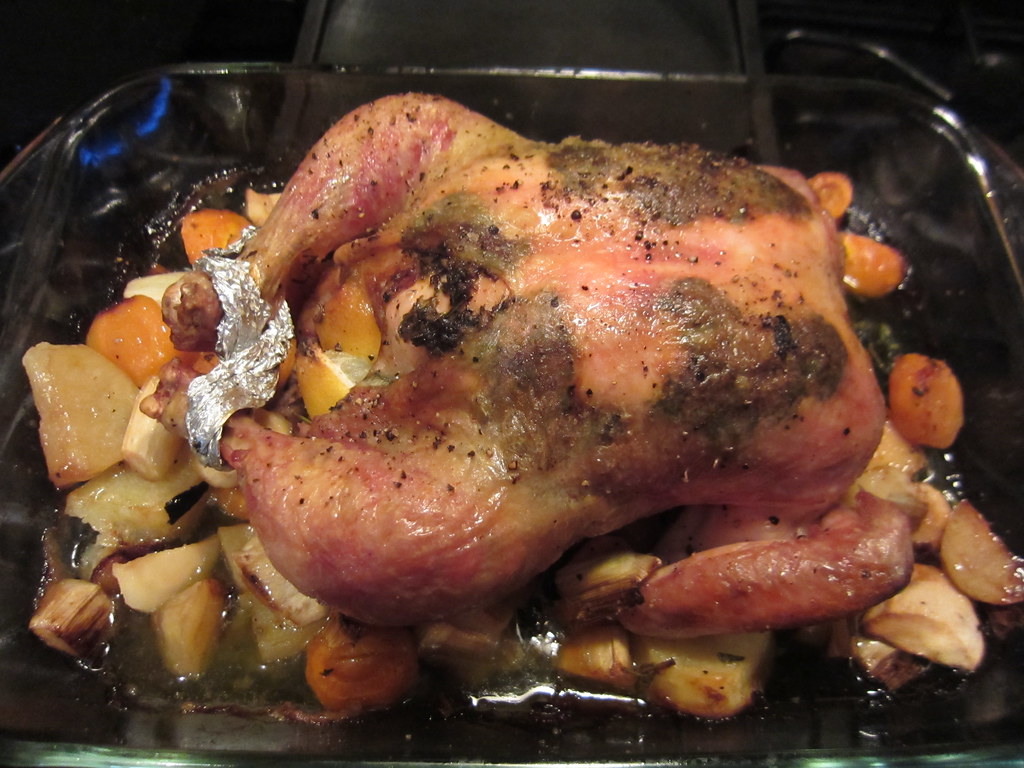
It rained all of last week and, for San Diego, that is pretty much unheard of. However, we welcomed the rain because our city totally needs it. One thing about rainy, cold weather is that it makes me want to use the oven! I went to Trader Joe's and saw they had a great selection of organic, free range and some cage free, hormone free roasting chickens. I bought a smallish, 4 pounder, but that was enough for me and Stella (and a little for Lilu, our dog, too!). 

This was my first roasted chicken ever and I have to say it came out pretty fabulous. I know it seems there's lots of salt, but I read in many recipes you have to really season the chicken inside and out well in order to give it extraordinary flavor. I was also very surprised how juicy and succulent the chicken was after roasting. I am definitely making this recipe again! 

INGREDIENTS (serves 4 to 6)
  • 1 (4 to 5-pound) free range chicken
  • Kosher salt
  • Freshly ground black pepper
  • Olive oil
  • 1/4 bunch each fresh thyme, rosemary and parsley (reserve a few sprigs of thyme and rosemary for the vegetables)
  • 2 lemons, cut in quarters (reserve 1 teaspoon of lemon juice for the herbed butter)
  • 1 head of garlic, cut in 1/2 crosswise
  • 3 garlic cloves, peeled
  • 1 teaspoons of fresh thyme
  • 1 teaspoon of chopped fresh rosemary
  • 2 tablespoons butter, softened
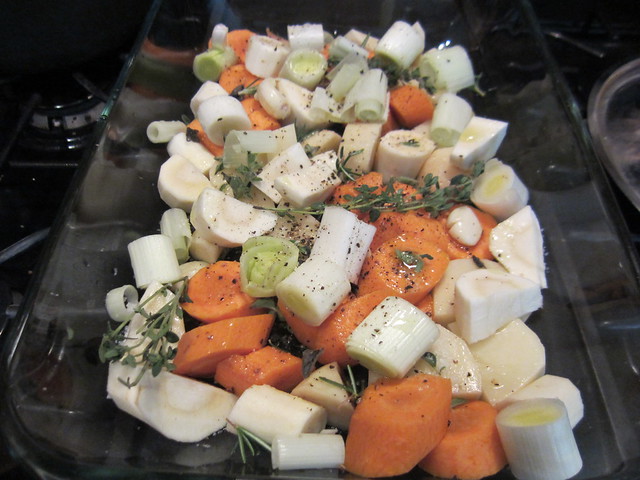
  • 11/2 pounds mixture of 1" cut carrots, parsnips, red new potatoes, and red onions
DIRECTIONS 

Preheat the oven to 400 degrees F.

Remove the chicken giblets. Rinse the chicken inside and out. Remove any excess fat and leftover pinfeathers and pat the outside and inside dry.

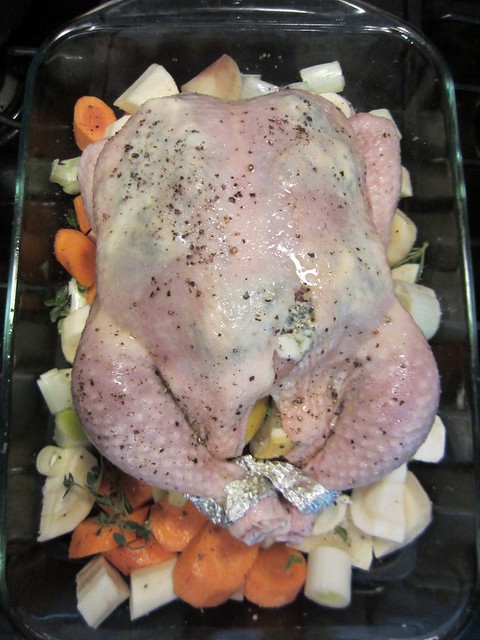
Generously season the cavity with salt and pepper, drizzle a little olive oil in there and then stuff the lemon, garlic, and herbs inside. Tie the legs of the chicken together with kitchen twine to help hold its shape (I used tin foil).

Make the herbed butter: mix the 2 tablespoons softened butter with 1 teaspoon fresh lemon juice, 1 teaspoon each chopped fresh thyme and rosemary, 1/2 teaspoon kosher salt and 1/4 teaspoon pepper and mash it with a fork or spoon until it's all well combined. Using your fingers, gently lift the skin from the chicken breast and slip the remaining seasoned butter under, massaging the breast meat as you go.

In roasting pan or large baking pan, toss the carrots, parsnips, potatoes and onions with 3 peeled garlic cloves, a few good globs of olive oil, salt and pepper and reserved sprigs of thyme and fresh rosemary. Place the chicken, breast-side up, in a roasting pan (if you're using a baking pan like I did, place the chicken on top of the vegetables). Season the outside of the chicken with salt and pepper and drizzle with olive oil.

Roast the chicken and vegetables for 1 to 1 1/2 hours. Don't forget to baste the chicken with the drippings and rotate the pan every 20 minutes or so to insure a golden crispy skin. The chicken is done when an instant-read thermometer says 165 degrees F when inserted into the thickest part of the thigh (the legs of the chicken should wiggle easily from the sockets too.) Remove the chicken to a platter and let stand for 10 minutes, so the juices settle back into the meat before carving. Serve with the roasted vegetables on the side.

Friday, September 10, 2010

Maple Cinnamon and Bacon Cupcakes


Obey the bacon!

Yes, my friends, I had a Baconpalooza party for my birthday and we made everything "bacon." From bacon-wrapped jalapeno poppers, bacon-garlic sauce that went on EVERYTHING, and even chocolate-covered bacon. But these cupcakes were my favorite dessert with bacon-goodness. I made a simple cream-cheese frosting to go with them, but a maple buttercream frosting will be just oh so decadent, too! Sweet, baby Jesus this is good!


INGREDIENTS (Make 12 cupcakes)
  • 1 1/2 cups all-purpose flour
  • 1 1/2 tsp baking powder
  • 1/2 tsp ground cinnamon
  • 1/4 tsp salt
  • 3/4 cup sugar
  • 1/2 cup unsalted butter, melted and then cooled
  • 2 eggs
  • 1 tsp maple extract
  • 1/2 cup milk
  • 4 slices cooked, crispy bacon, cut into small pieces
DIRECTIONS 

Preheat oven to 350F and line baking pan with paper liners.

In a small bowl, mix together flour, baking powder, cinnamon and salt.

In a large bowl, whisk together butter, sugar and eggs until smooth. Whisk in maple extract.
Alternately whisk in flour mixture and milk, making three additions of flour mix and two of milk, beating until smooth.

Scoop batter into prepared pan, filling about 3/4 of the way up.

And bake 20-25 minutes until golden brown and tops spring back when lightly touched.


Let cool in pan on a rack for 10 minutes, then remove from pan and cool completely.

Frost with maple cream cheese frosting  (recipe below) and evenly sprinkle the bacon pieces on top of all the cupcakes. Sweet, baby Jesus this is good!


MAPLE CREAM CHEESE FROSTING

Ingredients
  • 8 oz. cream cheese
  • 4 Tblsp. softened butter (half a stick)
  • 1 tsp. maple extract
  • 2 cups confectioners sugar, sifted
DIRECTIONS 

Beat the cold cream cheese (not rock solid, but it means you can use it straight out of the refrigerator) with the softened butter and the maple extract until combined. Gradually add powdered sugar.

Thursday, August 26, 2010

Oldie but Goodie: Perogies

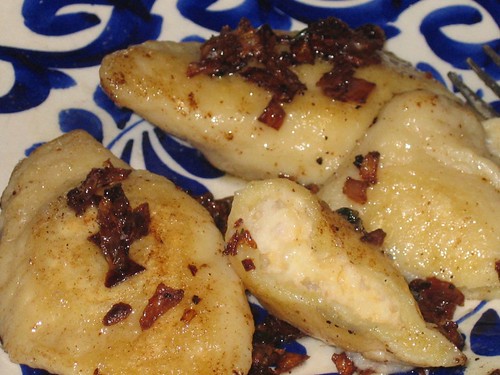
Perogies with Potato-Cheese filling
On Christmas night of 2006, my husband, my brother-in-law, Michael (along with Max and Lola), and myself had a barbecue--yes, a BBQ! It was very surreal for Matthew and Michael since they are used to a Minnesotan white Christmas, but for me, well, it's just typical. We grilled up steaks, and I made rosemary-garlicky mashed potatoes.

One thing I learned from my father-in-law, Jim, is to always cook extra potatoes and stash away a few unseasoned mashed potatoes for another use. This way, I can make lefse, gnocchi or even perogies the next day.

For me, perogies remind me of Boston because when I lived there with my now Russian ex-boyfriend, his mom used to make them for us all the time. Thank goodness that relationship went kaput, but at least I learned how to make these billowy potato dumplings. If you don't want to use a potato-cheese filling, you can also make a meat filling, like cooked ground beef with onions and olives, or even a sweet filling like ricotta with orange marmalade...believe me, the possibilities are endless.


INGREDIENTS

Potato and Cheese Filling (makes 3 cups)
  • 1 tablespoon grated onions (I used red onions)
  • 2 cups cold mashed potatoes
  • 1/2 cup cottage cheese (or ricotta cheese)
  • 1/2 cup grated mild or sharp cheddar cheese (you can also use Colby)
  • 1/2 teaspoon salt, or to taste
  • 1/4 teaspoon ground black pepper (use white pepper, if you have it)
  • OPTIONAL: I added fresh thyme to my filling, but you don't have to
DIRECTIONS
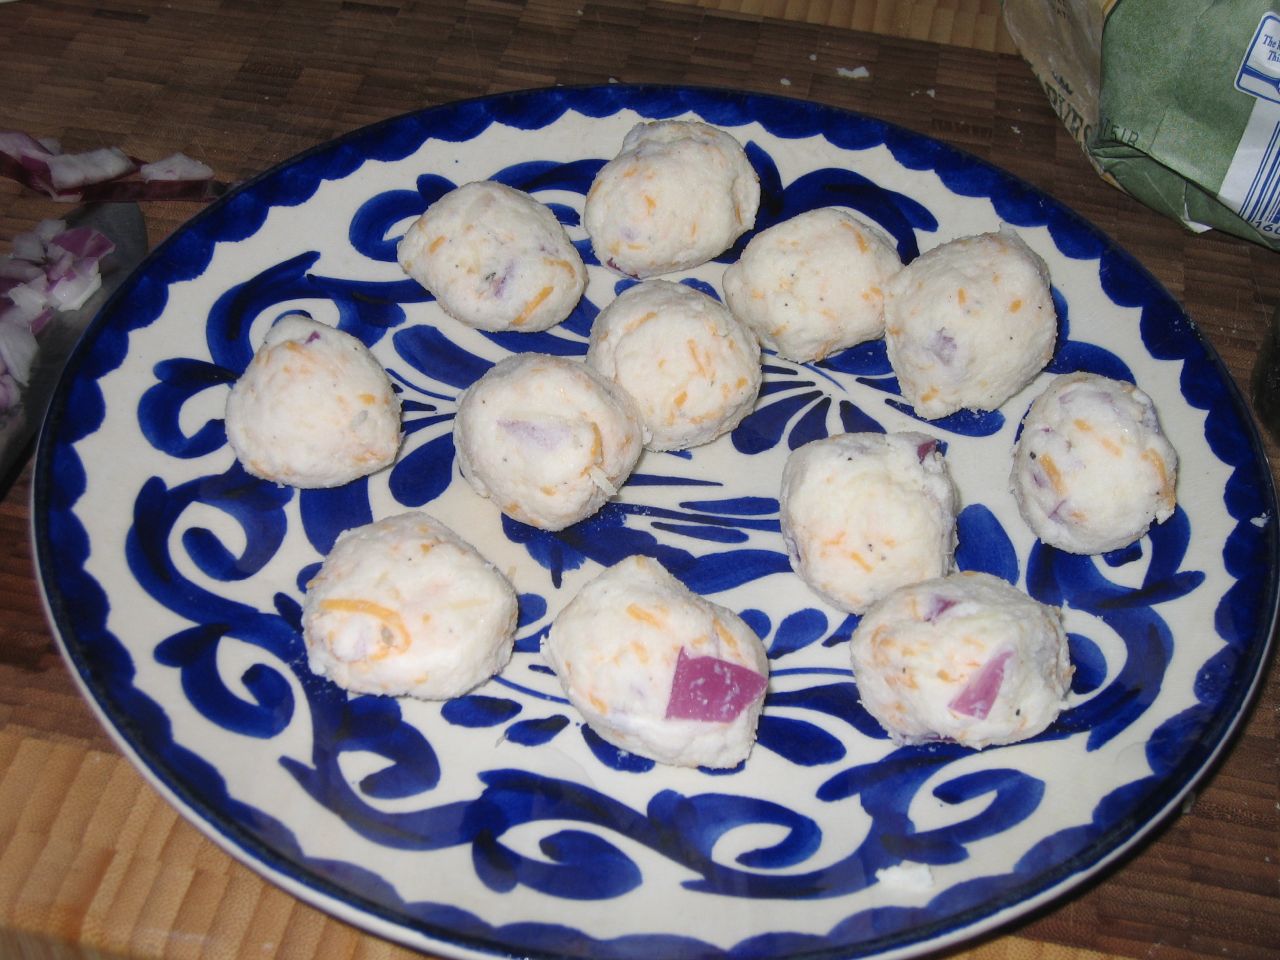
In a large bowl add grated onions, mashed potatoes, cottage cheese and grated cheddar cheese and mix well to combine. Taste filling for seasoning, and add salt and pepper, to taste. You can always vary the proportions and ingredients in this recipe to suit your taste. Note: The filling should be thick enough to hold its shape.

Now start forming tablespoon-sized balls with the filling and set filling aside.

INGREDIENTS Perogie (makes 12 to 18, depending on how thick you roll them out)
  • 2 1/2 cups flour
  • 1/2 teaspoon salt
  • 1 egg
  • 2 teaspoons oil
  • 1/4 cup sour cream
  • 2/3 to 3/4 cup warm water (depending on weather and humidity)
DIRECTIONS
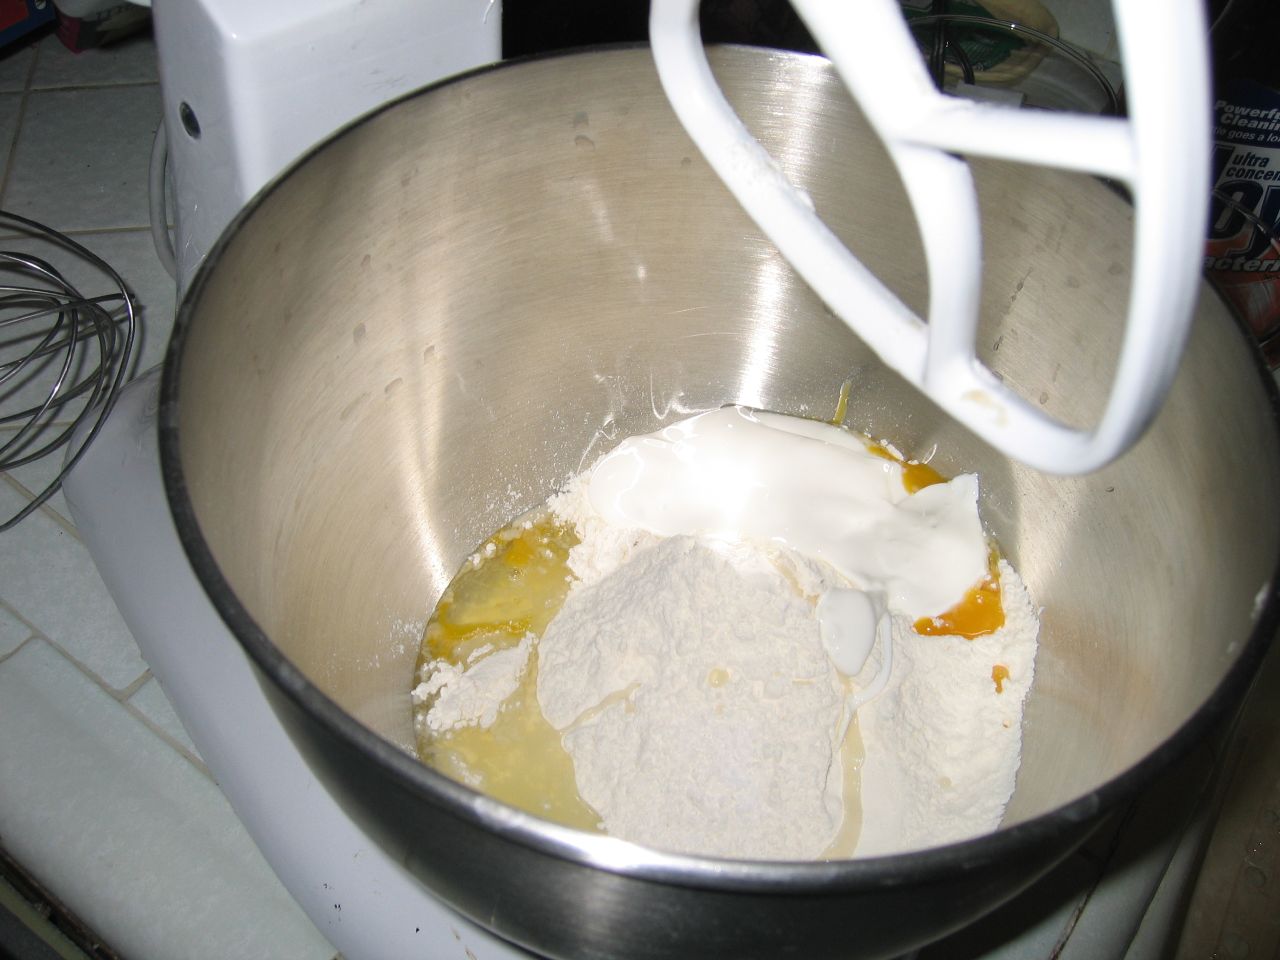
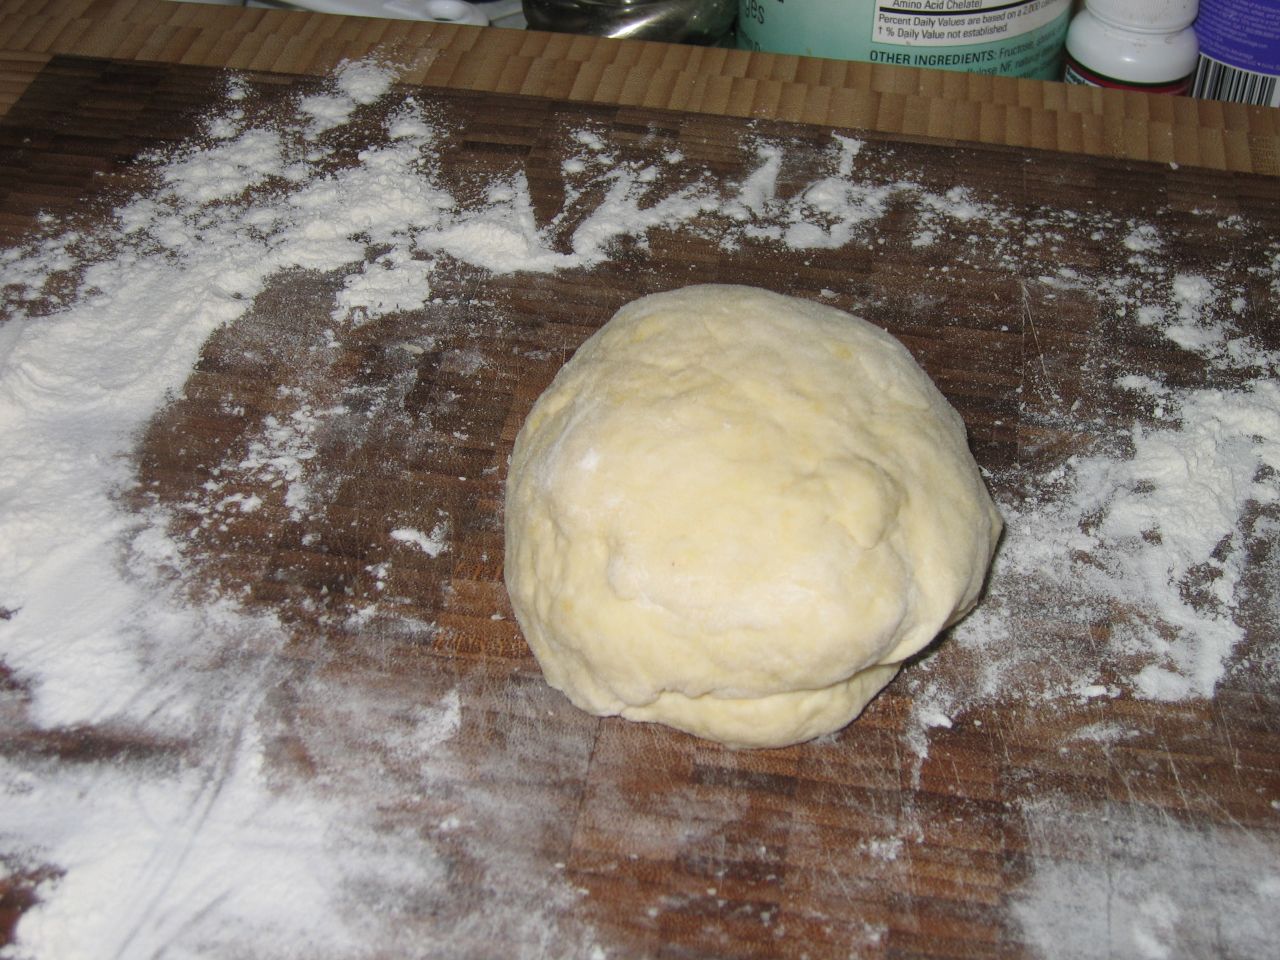
In a stand mixer or a large bowl, add the flour and salt and mix to combine. Add the egg, oil, sour cream and warm water and mix. Add enough water to form medium-soft dough. Knead the dough on a floured board until smooth. Do not over knead. Divide the dough into 2 parts and cover and let stand for 10 minutes.

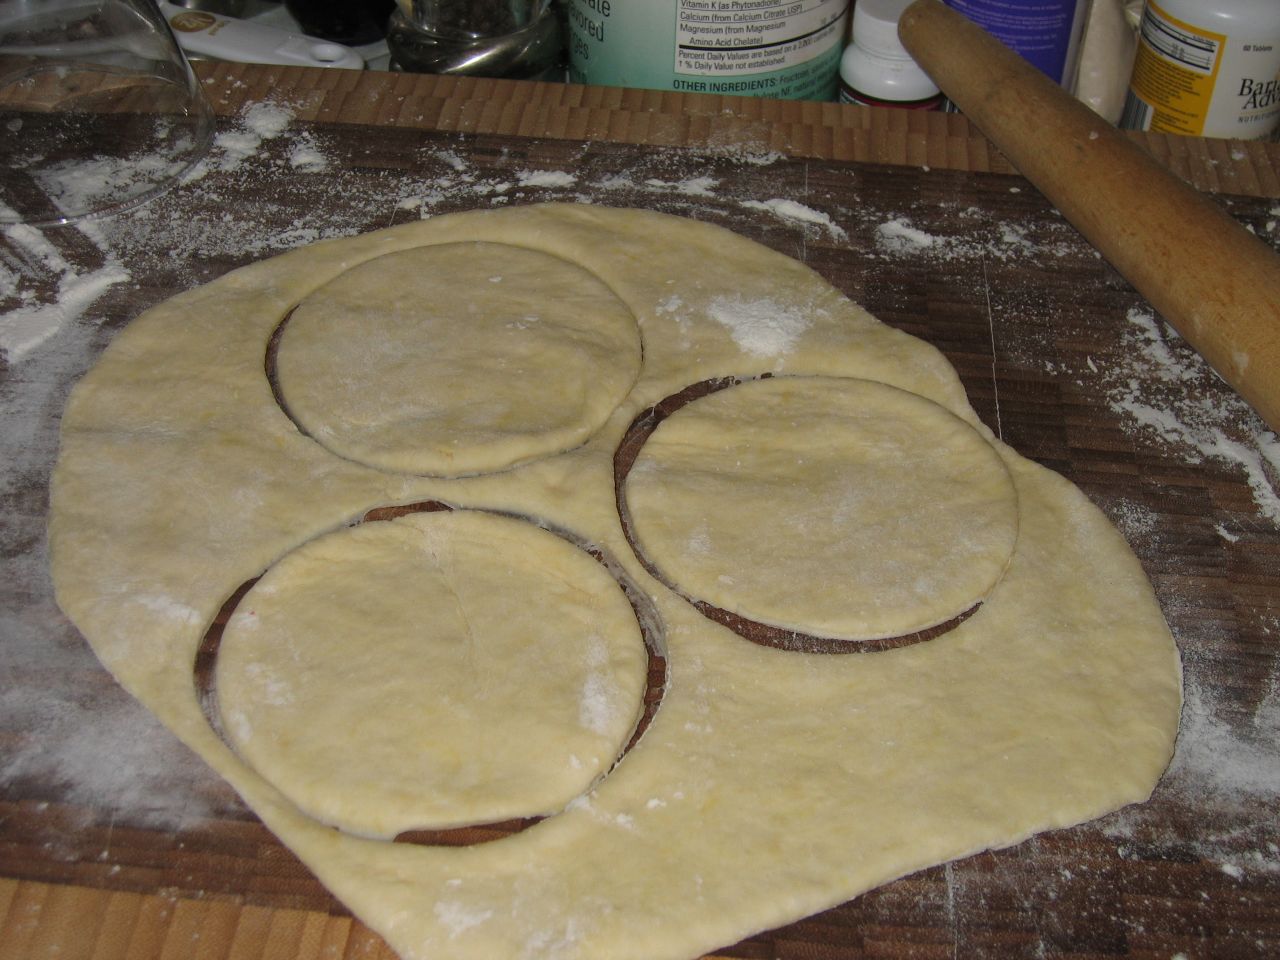
Now, roll out the dough about 1/8" thick (or thicker, deepening on how you like them) and cut out rounds with a large biscuit cutter or with the open end of a glass. Cut out about 4 rounds at a
time. Place the round on the palm of your hand then place one ball of filling into each round and
fold over to form a half circle. Press the edges together with fingers. You can crimp the edges, if you prefer, but make sure that the edges are sealed well to prevent the filling from running out.
Keep on making the perogies, and set them aside on a floured board or plate and cover with a tea towel or parchment paper to prevent from drying out.
TO COOK: Gently drop about 3 to 4 perogies into the rapidly boiling water and cook for 4 to 6 minutes, depending on thickness of dough. Do not cook more than 4 perogies at a time. Stir very gently with a wooden spoon to separate them and to prevent them from sticking to the bottom of the pot. Perogies are done when they puff up and float to the top. Removed cooked perogies with a perforated spoon or skimmer to a colander and drain thoroughly.
Place them in a deep dish and add butter to prevent them from sticking. Serve pergoies immediately and top with more melted butter or chopped, crisp bacon, or with chopped onions lightly browned in butter. NOTE: You can quickly pan-fry the perogies after you've boiled them in even more butter (which is what I did) and top them with cooked onions in butter. Talk about heart-attack!
If you don't plan cooking all perogies, simply place uncooked perogies on a floured cookie sheet. Make sure they are not touching each other, and freeze them. Once they have frozen solid, place them in a plastic baggie and keep frozen. TO REHEAT: Boil them in salted water for 7 to 10 minutes.

Sunday, August 15, 2010

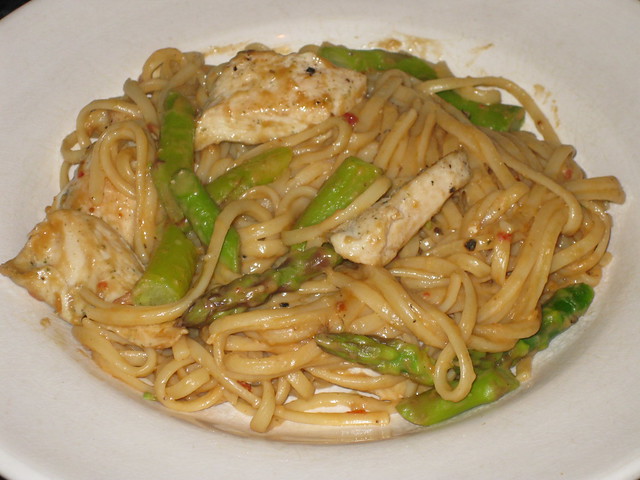
Sesame Noodle with Chicken and Asparagus


Today was a really long day for Stella and me. We got up at 6:30am, did our daily mama/baby routine and at 2pm we were at the mall for Stella's first professionally done photo shoot. Amazingly, it all went so well, but almost 3 hours later, she had not napped, I only had a hot dog-on-a-stick in my tummy and we were both tired and hungry when we got home.

She got her formula, of course, and went to bed. I, on the other hand, did not have the chance to go grocery shopping so all I had in the fridge were asparagus and some chicken tenders I had defrosted the night before. Luckily, I received a "free trial" of Cook's Country magazine and found this super easy, super fast, super yummy recipe. It's just the meal you want when you're tired and hungry because it's filling, it's nutritious, it's a little spicy and it's got a great peanut-sesame taste. 

INGREDIENTS (serves 4)
  • 2 boneless, skinless chicken breasts (about 12 ounces) cut crosswise into 1/4-inch pieces
  • Salt and pepper, to taste
  • 1 Tablespoon vegetable oil
  • 1 pound linguine (or fettuccine or spaghetti)
  • 1 pound asparagus, trimmed and cut into 1/2-inch pieces
  • 1/3 cup peanut butter
  • 5 Tablespoon rice wine vinegar
  • 1/4 cup oyster sauce
  • 2 teaspoons chili-garlic sauce
  • 1-1/2 teaspoon grated fresh ginger
  • 1-1/2 Tablespoon toasted sesame oil
DIRECTIONS 

Bring a large pot with water to a boil. Pat chicken dry with paper towels and season with salt and pepper. Heat the vegetable oil in a large skillet over medium-high heat until just smoking. Cook the chicken until it's not longer pink inside, about 2 to 3 minutes per side. Transfer to a plate.

Add a large pinch of salt to the boiling water then add pasta and cook until just beginning to soften, about 8 minutes. Add the asparagus to the pot and cook until bright green and the pasta is al dente, about 4 minutes more. Reserve one cup of pasta water. Drain pasta and asparagus and return to the pot.

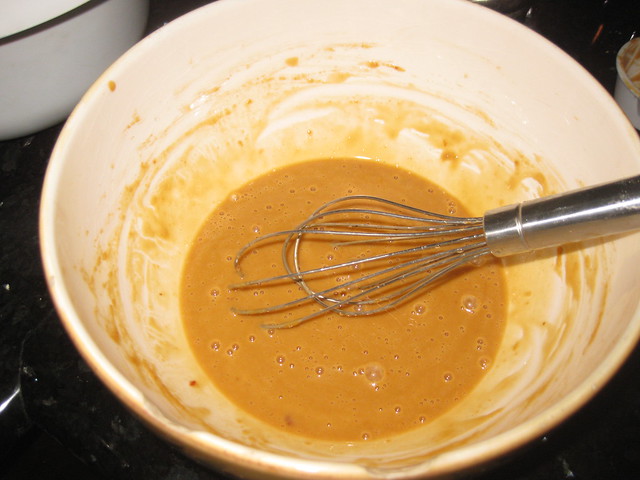
In a medium bowl, whisk peanut butter, vinegar, oyster sauce, chili-garlic sauce, ginger, sesame seed oil and 1/2 cup of the reserved pasta water until smooth.

Add the cooked chicken to the pot with the pasta and asparagus, then add the peanut butter mixture and toss to combine.

Add more of the reserved pasta water, if needed. Serve immediately!

Thursday, August 12, 2010

Khinkali Dumplings


My version of khinkali.
They don't look like they are supposed to, but they tasted SO GOOD!
The two in the background were already eaten by me!


If there is one dumpling I truly love (and miss) are the Suan La Chow Chow dumplings from Mary Changs in Cambridge, MA. They were these perfectly cooked and delicious pork dumplings laying on a bed of bean sprouts with a spicy, soy-sauce based sauce at the bottom. So it's been a while since I've found any new or out-of-the ordinary dumplings that grabbed my attention.

Then Matt told me about khinkali dumplings and he said they were the best dumplings he'd ever had. You had to eat them so as to sop up all the juice trapped inside. I was intrigued! I did some research online and all the khinkali recipes I found varied from the filling, to measurements for the dough, to its origins. But one thing is for sure, you HAVE to make the pleats or at least form a point at the top of the dumpling. That way you can grab it, turn it to its side and suck it up.

According to Matt, you don't eat the top, or the pleated part, of the the dough. Only the poor people eat that. And you are not supposed to let any of the meat juices trapped inside the dumpling hit your plate. Lastly, all you need to top your khinkali with is lots of black pepper!  So I gave the dough two different tries. Both failed! But the meat filling was DIVINE! And the juice it forms inside the dumpling is simply sopilicious.

Here's my recipe, but you can find many more online here, here and here.

INGREDIENTS
  • 1/2 lb. ground beef (a little on the fattier side)
  • 1/2 lb. ground pork
  • 1/2 tsp. kosher salt (if  you use water instead of beef broth, add an additional 1/2 tsp. kosher salt)
  • About 1/4 of a red onion, processed in the food processor (you have to do it in the processor or blender because you need the onion juice!)
  • 1/2 tsp. ground caraway seed
  • 1/2 tsp. ground black pepper
  • a good pinch of red pepper flakes
  • 3/4 cup beef broth or water
Dough
  • 4 cups of flour
  • 1 1/2 cups of warm water
  • 1/2 teaspoon of salt
DIRECTIONS

Filling: Mix the ground meats and onions together. Stir in the spices into the meat mixture, add broth, salt and mix it thoroughly. Set aside in the fridge.

Dough: Pour the flour into a large bowl, sprinkle it with salt, add water and make the dough. Knead for about 5 minutes. Form into a ball and let the dough rest 30 minutes.

Start boiling water in a large pot.

Take a mango sized piece of dough and roll it out on a floured surface to about 1/3 of an inch thick. Cut out circles about 3 inches in diameter with a drinking glass. Roll each round out to about 6 inches in diameter on a floured surface. Cup the round with your hand (or place in a small coffee cup to assist) and place a heaping teaspoon of filling in the center of each round.


Fold the edges of the dough, forming as many pleats as possible and making sure it's sealed tight. Roll the nubbin of the dumpling between your finger and thumb and pinch off extra dough.
pretty bad at forming the pleats

Boil the khinkali in salted boiling water for 6 to 10 minutes. When they float to the top it usally means they are done. Serve hot sprinkled with freshly ground black pepper.
This is what authentic khinkali look like, btw!


You can see the meat juice trapped inside!! YUM!!

Tuesday, July 20, 2010

Scottish Eggs


Okay, so I know I haven't been cooking for a while or posting any recipes. Yes, I at first blamed having to cook for myself as the reason; then when my baby came around, I complained that I didn't have enough time because I was taking care of a newborn. Well, now that Stella is 9 months and pretty much mobile, I have more time to do the things I love to do as hobbies, mainly cooking and blogging (and rowing).

Stella and I were in Minnesota this past week to visit her grandparents, MaMare and Jimmy Jam, and they have some very interesting cooking shows in that state! One evening in Minnesota I saw a show about breakfast and this lovely little recipe came up: Scotch Eggs. I had seen this dish here in San Diego before, but I just didn't think an egg surrounded by a sausage patty then deep fried would be good. Boy, was I wrong! I got this recipe from Allrecipes.com, but I did change it up a bit because I didn't have pork sausage. I had been on a bratwurst kick lately, so that's what I used. In most recipes I found they say pair up the Scotch egg with "good" mustard, however I found that a really good chutney will be just a great. And you are supposed to fry the "egg" but I decided to pan fry then bake the rest of the way because even I have limits! :)

INGREDIENTS (makes 3 servings because I only had 3 eggs left!)

  • 3 large eggs
  • 3 Johnsonville Bratwurst Links, removed from their casings
  • 3/4 tsp. smoked paprika
  • 1/4 tsp. ground coriander
  • 1/8 tsp. fennel seeds
  • 1 egg, beaten
  • 1 cup flour
  • 1/3 cup seasoned breadcrumbs
  • 1/3 cup Panko breadcrumbs
  • Vegetable oil
  • salt and pepper
  • Really good chutney
  • Really good mustard
DIRECTIONS 

Remove bratwurst from casings and add the smoked paprika, coriander and fennel seeds and mix with your hands very well to combine. Let cool slightly in fridge. In the meantime, preheat oven to 350 degrees F (175 degrees C).

Place eggs in saucepan and cover with water. Bring to boil. Cover, remove from heat, and let eggs sit in hot water for 10 to 12 minutes. Remove from hot water, cool and peel.

Setup a breading station: beaten egg in one bowl; place flour in a plate; and combine the seasoned breadcrumbs and Panko together in another plate.

Heat a large skillet with a little vegetable oil on medium-high.

Divide the bratwurst sausage into three equal parts. Flatten each part and make a patty to surround each egg.


Very lightly flour the sausage and coat with beaten egg. Roll in bread crumbs to cover evenly.

Pan fry until golden brown all over, about 3 minutes per side. Bake in the preheated oven for 20 to 30 minutes, or until bratwurst is cooked through.

Cut in half and serve over a bed of lettuce and sliced tomatoes for garnish or serve with a side of tomato or mango chutney and mustard.

Thursday, June 24, 2010

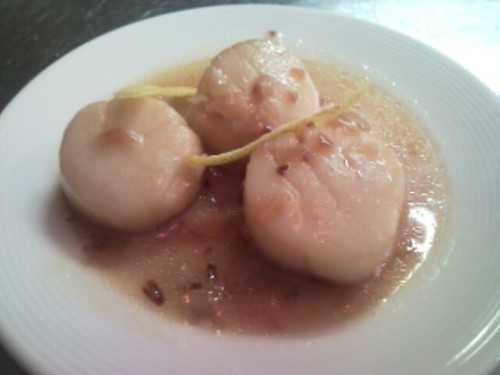
Martini Scallops

I am a sucker for seafood, we all know that, but it's not very often I get wowed by sea scallops. I enjoy eating these mollusks, but sometimes I feel they are over priced, at the grocery store and restaurants, and oftentimes people tend to overcook them. But when I went to the Balboa Park Food and Wine ooking school last week, the chef showed us how to make this dish and it blew me away. He did not use any salt or pepper whatsoever, and they were wonderful. You want to use large sea scallops (8 to 12 per pound) and don't go buy fancy diver scallops. Just good quality, fresh sea scallops will do. This serves 4 to 6 people, depending on how many scallops you get on the pound and this makes a fabulous first course or pair it with a salad and it makes a pretty good darn meal.

INGREDIENTS
  • 8 ounces large sea scallops
  • 3 ounces clarified butter (you have to use clarified butter or ghee. Don't use regular butter or olive oil)
  • 1 chopped shallot
  • 1/2 cup gin
  • 2 tablespoons dry vermouth
  • Garnish of lemon twists or lemon zest

DIRECTIONS

Heat the clarified butter in a saute pan. When hot, add the shallots and saute until golden brown. Add the scallops and saute until firm, about 3 to 5 minutes. Deglaze the pan with the gin and dry vermouth (be careful with the open flame) for another minute. Serve immediately with some of the sauce and garnish with lemon twists or lemon zest.

Tuesday, June 22, 2010

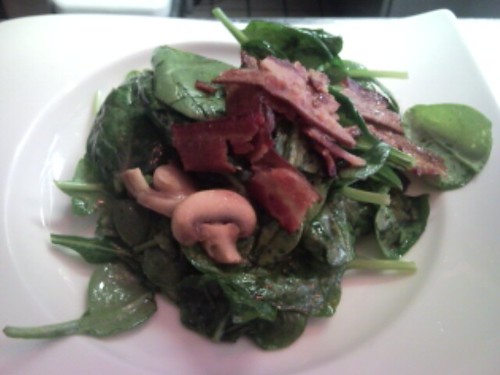
Gin and Tonic Wilted Spinach Salad

I finally was able to get out of the house and go to a cooking class. Not that I don't love being home with my baby, but since I'm solo parenting it's tough leaving my girl without me not feeling guilty. I went to the Balboa Park Food and Wine school and this was a "cocktail cuisine" class; all our dishes had a cocktail theme to them and were even made with the hard liquor. A note about this recipe is to add the gin to the pan AWAY from the stove and open flame. The chef in our class did it right over the flame to give us a show, but he's a professional. This salad was so delicious, and you don't want to wilt the spinach too much. It's a great starter to any meal.

INGREDIENTS (serves 6)
  • 4 cups fresh, cleaned spinach
  • 3 strips thick cut bacon
  • 1/2 cup sliced mushrooms
  • 3 tablespoons fresh lime juice
  • 1/2 cup gin
  • 3 tablespoons tonic water
DIRECTIONS

Cook the bacon in a large saute pan with high sides (3 to 4 inches). When bacon gets to your crispy likeness, remove from pan.  Cut bacon into 2" pieces. Leave bacon grease in the pan.

Heat bacon grease on high and add the mushrooms and sautee for 2 minutes. Lightly season with salt and pepper.  Add lime juice, gin (away from open flame)  and tonic water and reduce by half.

Finally, add the spinach and wilt. Spin the spinach around the sauce for a minute, then plate immediately and top with crispy bacon and serve.


Sunday, June 13, 2010

Chunky Crab Cakes

Back in the day when Matthew was stationed on the USNS Arctic in New Jersey, I would make frequent trips from San Diego to visit him. The flight I took always had a layover in Atlanta before going onto Newark. I looked forward to arriving into the Atlanta airport because that was the only place that I was able to go to a pretty good restaurant with pretty good crab cakes: Phillips Seafood. And I always ordered the same order of crab cakes with the hush puppies and an iced tea. I know that there are probably better places in Maryland or Baltimore with incredible crab cakes, but the Phillips Seafood restaurant in ATL is the closes I've gotten to authentic style crab cakes. 

I have tried making crab cakes before but either there was too much of a mayonnaise flavor or too much of a fishy flavor because I wasn't using fresh crab meat. So after doing some experiments I've found that this recipe (which came by way of kevinsbrady.net) is probably my favorite. I did slightly alter it and I like to fry my crab cakes in ghee. I also I really like to serve them over a simple salad a little bit of a chipotle aioli on the side with them (I have to have a little bit of mayo somewhere, right?)

INGREDIENTS (makes 6 cakes)

  • 1 lb. fresh lump crab meat, drained
  • 1 large egg, beaten
  • 1 tsp. onion powder
  • 1/2 tsp. garlic powder
  • 1 tbsp. lemon juice
  • 1 tbsp. Worcestershire
  • 1/2 tsp. Old Bay seasoning
  • 1/2 tsp. dill weed
  • 1/2 tsp. kosher salt
  • 1/8 tsp. black pepper
  • 1 cup panko breadcrumbs
DIRECTIONS
 
In a large bowl, combine the egg, onion powder, garlic powder, lemon juice, Worcestershire sauce, Old Bay seasoning, dill weed, salt and black pepper and mix well. Mix in 1/4 cup of the panko breadcrumbs, saving the remainder of the crumbs on a plate for coating the crab cakes. Add in the crab meat, and gently mix it in using a fork or spatula -- or better yet, your hands, coating the lumps with the mixture. Be careful not to pulverize the lumps when mixing - the idea is to keep the mixture chunky.

Place the mixing bowl with crab cake mixture in the refrigerator for about 15-20 minutes to firm it up. After refrigeration, drain off any excess liquid.

Gently press mixture into thick patties (slightly smaller than hamburgers) and lightly coat them using the remaining panko breadcrumbs. Don't compact the cakes; keep them a bit loose. Use just enough pressure to make the mixture hold together. Fry the cakes in butter or ghee at low to medium-low heat in an uncovered fry pan or griddle, turning when the first side is brown, about 5 minutes per side.

Serve immediately with slices of lemon, chipotle aioli or good tartar sauce. Mmmm..

Thursday, May 13, 2010

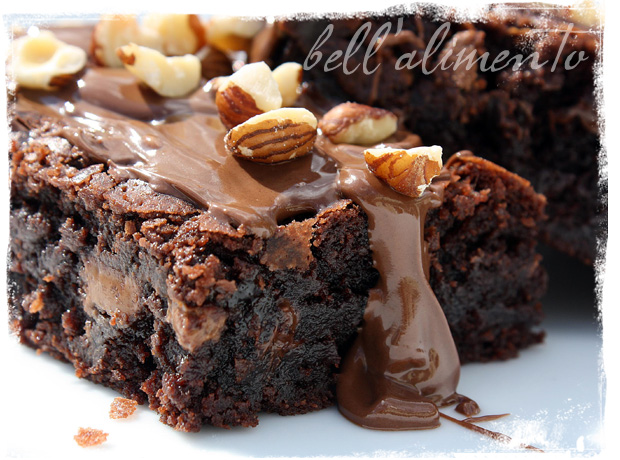
Nutella Caramel Hazelnut Brownies


Source: bell alimento


I was looking for recipes that had Nutella as an ingredient and look at what I found? Nutella Caramel Hazelnut Brownies! Don't these look divine? The recipe is from bellalimento.com. My mouth is watering already. 

INGREDIENTS
  • 2 large fresh eggs
  • 1/2 stick unsalted butter - room temp.
  • 1 cup sugar
  • 1 tsp pure vanilla extract
  • 1/2 cup all purpose flour
  • 1/3 cup cocoa powder
  • 1/4 tsp baking powder
  • pinch salt
  • 1/4 cup Nutella - melted
  • 1/4 cup Caramel Sauce- melted
  • Hazelnuts
DIRECTIONS 

Preheat your oven to 350 degrees. Into a mixing bowl add your flour, baking powder, salt & cocoa powder. Using a whisk, mix together & set aside. Into your stand mixer add the sugar & butter & mix together until creamy. Add in eggs one at a time and mix well. Add in your vanilla. GRADUALLY add in your flour mixture until it’s well combined. Batter should be thick and sticky.

Spray an ovenproof 8 x 8 dish with cooking spray. Place a piece of parchment paper (slightly larger than your dish to allow for handles) inside. It will adhere to bottom of dish. Take HALF of your brownie batter & smooth it on top of the parchment paper. Take your caramel sauce and spoon it on top of brownie mixture covering entire layer of brownie. Place the remaining brownie batter on top smoothing it out. Place in oven and bake for 30-40 minutes until sides are firm and center is no longer giggly.

Allow brownies to cool completely before removing. Cut your brownies to your desired size using a serrated knife. Make a small indentation with your finger into each brownie. Take your melted Nutella and drizzle over the tops of the brownies. Garnish with the hazelnuts.


Monday, May 03, 2010

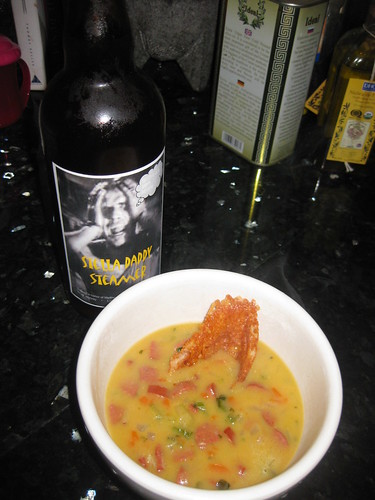
Stella Beer Cheese Soup

The last time my husband was home I tried to make him beer cheese soup. It was a disaster! I had to toss the entire thing out. My issue was with making the roux for the soup. I do not know what I did wrong, but the soup ended up with a texture of soaked newspaper. Anyway, this evening I found myself, yet again, with an almost empty fridge. I had: 1 Stella Artois® beer, 2 spicy, smoked-type sausages, veggies, and in my cupboard a can of Campbell's Cheddar Cheese Soup. Can you tell where I'm going with this? Not only did these ingredients inspire me to try to make beer cheese soup again, but also the fact that I named the recipe after my baby girl, Stella.

INGREDIENTS (serves maybe 4 people)
  • 1 celery stalk, small dice
  • 1 carrot, peeled and cut into small dice
  • 1/2 cup diced onion
  • 1 sprig of thyme
  • 1 garlic clove, finely chopped
  • 1 tablespoon butter
  • 2 smoked-sausages (your favorite kind), diced
  • 1 bottle of Stella Artois® beer
  • 1 (10 oz) can of Campbell's Cheddar Cheese Soup
  • 1/2 cup low-sodium beef broth or chicken stock or water (optional)
  • Salt and pepper
DIRECTIONS 

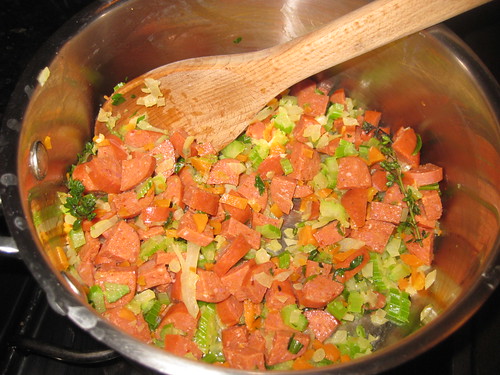
In a medium stock pan melt the butter. Add the celery, carrot, onion and thyme sprig and a pinch of kosher salt and sweat over medium-high heat until vegetables are slightly tender, about 8 minutes. Add the garlic and saute until fragrant, about 30 seconds. Add the diced sausage and mix to combine and to heat through.
Next, add half of the beer and slightly raise the heat. Bring to a boil and let boil for 2 minutes. Add the canned cheese soup and mix to combine. Bring to a simmer and add the rest of the beer. Bring to a boil again then, if soup thickness is to your liking, just keep it on very low for another 5 minutes. But if you want your soup a little more thinner, add the 1/2 cup of beef broth. Bring to a boil again, then simmer on low for 5 minutes.
Serve with cheese crostini and a cold, home-brewed Stella beer (if you can find one) or a Stella Artois®.

Saturday, May 01, 2010

Zucchini Börek (Kabak Böreği)

I am secretly addicted to the show No Reservations with Anthony Bourdain. I say secretly because it usually comes on at 10pm at night--when I should be asleep--and I have to take advantage of every sleep opportunity with my very active, 7 month old daughter. But I digress. A couple of months ago the Travel Channel televised the Istanbul, Turkey episode. All the food in it looked amazing; the people seemed quite friendly and very family and food oriented; and it just seemed like a very fun and intriguing country to visit. 

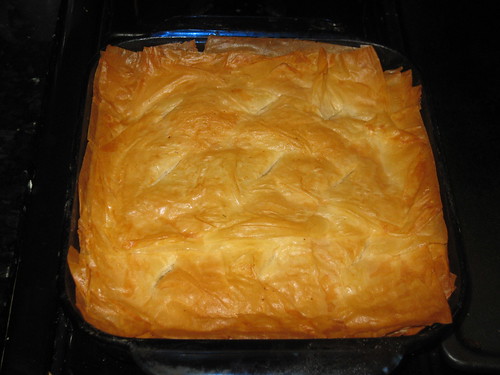
Towards the end of this episode, Bourdain goes to a Turkish household and has dinner with the entire family. The mom made börek, which is her specialty. It is a pie made with zucchini and Turkish cheese and lots of dill. It looked amazing and I just had to try to make it. I couldn't find a recipe online or in my cookbooks that looked like the börek that was made in the show, but I did find this one on Almost Turkish Recipes. I made several modifications to the recipe because I wanted it to look like the one I saw on t.v., and yet, it was just delightfully yummy. I don't know if this is authentic zucchini börek, but I think I love this dish a lot more than spanakopita now.


INGREDIENTS
  • 20 sheets of phyllo dough, thawed
  • 1/2 cup melted butter for brushing phyllo
For the filling
  • 3 zucchinis, grated
  • 1 egg
  • 1/2 cup finely chopped dill
  • 1/3 cup finely chopped fresh mint
  • 1/2 cup crumbled Turkish white cheese or feta
  • 1 Tbsp paprika
  • 1 tsp spicy red pepper flakes
  • salt and pepper
DIRECTIONS
First off, let me start by saying I'm not from Turkey and I have never been to that lovely country, so I kind of made up this recipe while at the same time taking ideas and ingredient amounts from other recipes. So, this is what I did:
  1. Place the grated zuchinni in a muslin bag. Twist it as tight as you can and let it drip for an hour. Twist bag again and squeeze more water out and let it drip again another half hour. 
  2. Carefully remove the squeezed-dried zuchinni and place in large bowl. Add the egg, dill and mint. Next add the cheese, paprika, red pepper flakes and salt and pepper (I added 1/2 teaspoon salt and 1/4 teaspoon pepper) and mix to combine. Let sit for 15 minutes.
  3. After 15 minutes, the mixture will be juicy. Place another muslin bag over a colander and add the mixture and let it drip out some of the juice for 15 more minutes.


  4. Meanwhile, preheat oven to 350 degrees
  5. Take the zucchini mixture and blend it in a blender (you may have to do it in batches) for about 30 seconds. You don't want it smooth, just broken down a bit and with a little bit of texture to the mixture.
  6. Brush an 8x8x3 pyrex baking dish with some of the melted butter.
  7. Brush one sheet of phyllo with butter and place it in the baking dish (there will be overhang). Keep doing this with 9 more sheets.
  8. Pour the zuchini mixture and fold any of the over hang over the mixture.


  9. Next, brush another phyllo sheet with butter and place on top. Repeat with remaining 9 sheets. Tuck in any of the overhang into the sides or fold it over.
  10. Brush the top with more butter. Make several slits on top and sprinkle some water over over the phyllo.


  11. Bake for 45 to 55 minutes until golden brown.

Wednesday, April 21, 2010

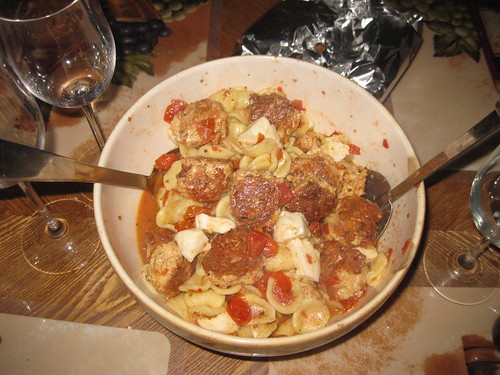
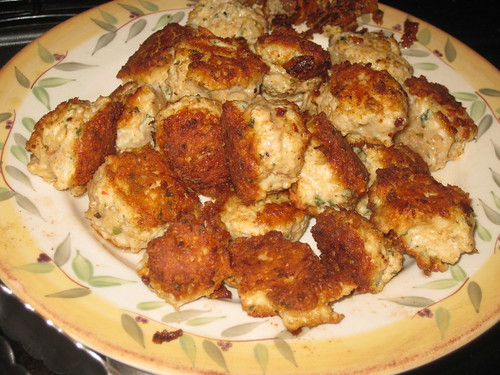
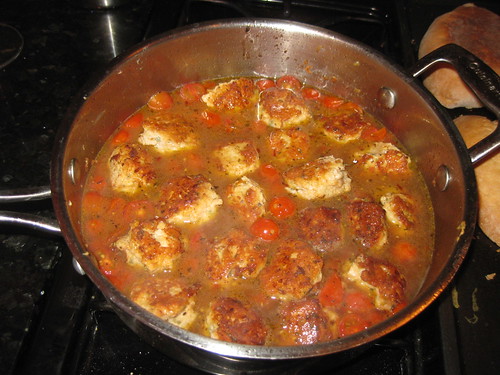
Orecchiette with Mini Chicken Meatballs

I've really fallen in love with orecchiette pasta. I think it's because the pasta has more body and texture to it, and it's chewy yet firm. The only problem is that it's quite hard to find this pasta here in San Diego. On a recent trip to Mona Lisa deli , though, I saw they started selling fresh orecchiette pasta and I just had to buy it.

This recipe is from Giada, but as always I changed it up a bit. I actually read the comments from other users who made this recipe and mostly all said meatball mixture was too sticky and wet, so I modified the recipe by omitting the milk and ketchup and adding just a tablespoon of marinara instead. Additionally I increased the breadcrumbs just a bit. My husband and brother-in-law (and yes, he's living here with us for a bit) loved it! They both especially enjoyed the chicken meatballs because they sure were flavorful.

INGREDIENTS (serves 4)

  • 8 ounce package of fresh orecchiette pasta, if available. (If you're unable to find orecchiette, you can use mini shells).
  • 1/4 cup + 2 tablespoons plain bread crumbs
  • 2 tablespoons dried parsley flakes
  • 1 large eggs, lightly beaten
  • 1/2 cup your favorite marinara sauce
  • 1/2 cup grated Romano or parmesan
  • 1/4 cup grated mozzarella cheese
  • 3/4 teaspoon salt
  • 3/4 teaspoon freshly ground black pepper
  • 1 pound ground chicken
  • 1/4 cup olive oil
  • 1 1/4 cups low-sodium chicken stock, hot
  • 1 pint cherry tomatoes, halved
  • 1/2 teaspoon dried basil
  • 1/4 teaspoon red pepper flakes
  • 8 ounces bocconcini mozzarella, halved
  • 1 tablespoon chopped fresh basil leaves
DIRECTIONS

Bring a large pot of salted water to a boil over high heat. Add the pasta and cook according to package directions.

In a medium bowl, stir together the bread crumbs, dried parsley, egg, 1 tablespoon marinara sauce, Romano cheese, mozzarella cheese, and the salt and pepper. Add the chicken and gently stir to combine. (Use your hands, if you have to).

Using a melon baller (or a teaspoon measure), form the chicken mixture into 3/4-inch pieces. With damp hands, roll the chicken pieces into mini meatballs. (I don't have a melon baller, so I just used my hands to form the meatballs).

In a large (14-inch) skillet, heat the oil over medium-high heat. Working in batches, add the meatballs and cook without moving until brown on the bottom, about 2 minutes. Turn the meatballs over and brown the other side, about 2 minutes longer. Remove meatballs from pan and set aside. To the pan add the tomatoes and sear for one minute. Next add the hot chicken stock and bring to a boil. Using a wooden spoon, scrape up the brown bits that cling to the bottom of the pan. Add remaining marinara sauce, dried basil and pepper flakes. Reduce heat to low and simmer for 2 minutes. Now add back the meatballs to the sauce and keep simmering until meatballs are cooked through, about 10 minutes. Drain the pasta, reserving about 1 cup of the pasta water. Transfer pasta to a large serving bowl and add a little olive oil and toss to lightly coat orecchiette. If pasta seems to stick, add a little pasta water to loosen. Add the meatball mixture, mozzarella cheese and gently toss to combine. Garnish with the chopped basil.