Showing posts with label chicken. Show all posts

Monday, October 25, 2010

Lemon And Herb Roasted Chicken With Root Vegetables


It rained all of last week and, for San Diego, that is pretty much unheard of. However, we welcomed the rain because our city totally needs it. One thing about rainy, cold weather is that it makes me want to use the oven! I went to Trader Joe's and saw they had a great selection of organic, free range and some cage free, hormone free roasting chickens. I bought a smallish, 4 pounder, but that was enough for me and Stella (and a little for Lilu, our dog, too!). 

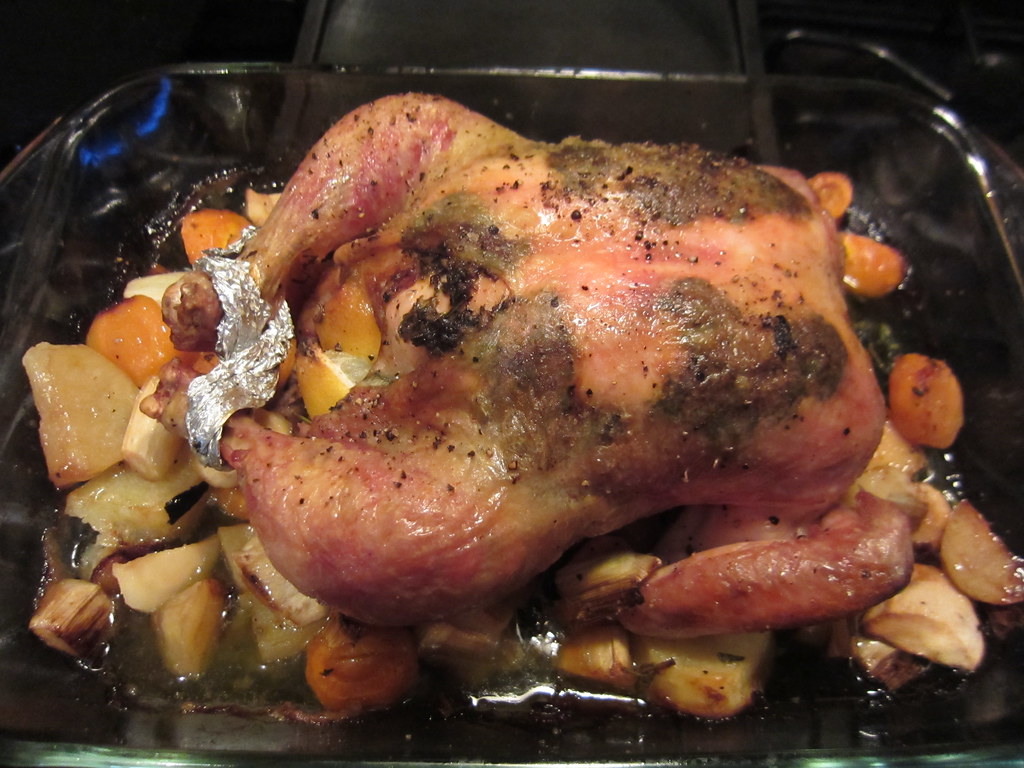
This was my first roasted chicken ever and I have to say it came out pretty fabulous. I know it seems there's lots of salt, but I read in many recipes you have to really season the chicken inside and out well in order to give it extraordinary flavor. I was also very surprised how juicy and succulent the chicken was after roasting. I am definitely making this recipe again! 

INGREDIENTS (serves 4 to 6)
  • 1 (4 to 5-pound) free range chicken
  • Kosher salt
  • Freshly ground black pepper
  • Olive oil
  • 1/4 bunch each fresh thyme, rosemary and parsley (reserve a few sprigs of thyme and rosemary for the vegetables)
  • 2 lemons, cut in quarters (reserve 1 teaspoon of lemon juice for the herbed butter)
  • 1 head of garlic, cut in 1/2 crosswise
  • 3 garlic cloves, peeled
  • 1 teaspoons of fresh thyme
  • 1 teaspoon of chopped fresh rosemary
  • 2 tablespoons butter, softened
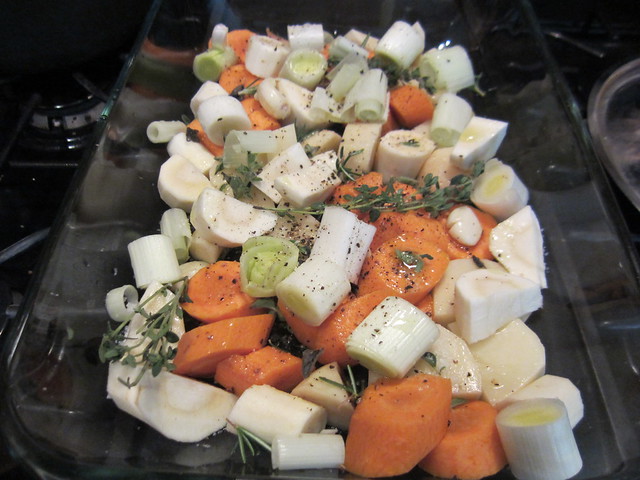
  • 11/2 pounds mixture of 1" cut carrots, parsnips, red new potatoes, and red onions
DIRECTIONS 

Preheat the oven to 400 degrees F.

Remove the chicken giblets. Rinse the chicken inside and out. Remove any excess fat and leftover pinfeathers and pat the outside and inside dry.

Generously season the cavity with salt and pepper, drizzle a little olive oil in there and then stuff the lemon, garlic, and herbs inside. Tie the legs of the chicken together with kitchen twine to help hold its shape (I used tin foil).

Make the herbed butter: mix the 2 tablespoons softened butter with 1 teaspoon fresh lemon juice, 1 teaspoon each chopped fresh thyme and rosemary, 1/2 teaspoon kosher salt and 1/4 teaspoon pepper and mash it with a fork or spoon until it's all well combined. Using your fingers, gently lift the skin from the chicken breast and slip the remaining seasoned butter under, massaging the breast meat as you go.

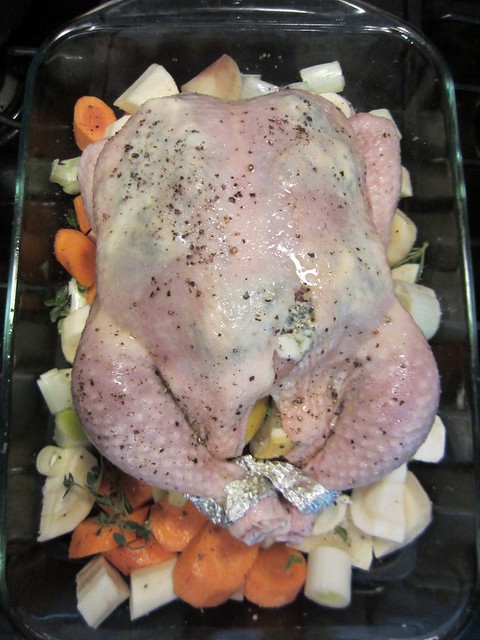
In roasting pan or large baking pan, toss the carrots, parsnips, potatoes and onions with 3 peeled garlic cloves, a few good globs of olive oil, salt and pepper and reserved sprigs of thyme and fresh rosemary. Place the chicken, breast-side up, in a roasting pan (if you're using a baking pan like I did, place the chicken on top of the vegetables). Season the outside of the chicken with salt and pepper and drizzle with olive oil.

Roast the chicken and vegetables for 1 to 1 1/2 hours. Don't forget to baste the chicken with the drippings and rotate the pan every 20 minutes or so to insure a golden crispy skin. The chicken is done when an instant-read thermometer says 165 degrees F when inserted into the thickest part of the thigh (the legs of the chicken should wiggle easily from the sockets too.) Remove the chicken to a platter and let stand for 10 minutes, so the juices settle back into the meat before carving. Serve with the roasted vegetables on the side.

Sunday, August 15, 2010

Sesame Noodle with Chicken and Asparagus


Today was a really long day for Stella and me. We got up at 6:30am, did our daily mama/baby routine and at 2pm we were at the mall for Stella's first professionally done photo shoot. Amazingly, it all went so well, but almost 3 hours later, she had not napped, I only had a hot dog-on-a-stick in my tummy and we were both tired and hungry when we got home.

She got her formula, of course, and went to bed. I, on the other hand, did not have the chance to go grocery shopping so all I had in the fridge were asparagus and some chicken tenders I had defrosted the night before. Luckily, I received a "free trial" of Cook's Country magazine and found this super easy, super fast, super yummy recipe. It's just the meal you want when you're tired and hungry because it's filling, it's nutritious, it's a little spicy and it's got a great peanut-sesame taste. 

INGREDIENTS (serves 4)
  • 2 boneless, skinless chicken breasts (about 12 ounces) cut crosswise into 1/4-inch pieces
  • Salt and pepper, to taste
  • 1 Tablespoon vegetable oil
  • 1 pound linguine (or fettuccine or spaghetti)
  • 1 pound asparagus, trimmed and cut into 1/2-inch pieces
  • 1/3 cup peanut butter
  • 5 Tablespoon rice wine vinegar
  • 1/4 cup oyster sauce
  • 2 teaspoons chili-garlic sauce
  • 1-1/2 teaspoon grated fresh ginger
  • 1-1/2 Tablespoon toasted sesame oil
DIRECTIONS 

Bring a large pot with water to a boil. Pat chicken dry with paper towels and season with salt and pepper. Heat the vegetable oil in a large skillet over medium-high heat until just smoking. Cook the chicken until it's not longer pink inside, about 2 to 3 minutes per side. Transfer to a plate.

Add a large pinch of salt to the boiling water then add pasta and cook until just beginning to soften, about 8 minutes. Add the asparagus to the pot and cook until bright green and the pasta is al dente, about 4 minutes more. Reserve one cup of pasta water. Drain pasta and asparagus and return to the pot.

In a medium bowl, whisk peanut butter, vinegar, oyster sauce, chili-garlic sauce, ginger, sesame seed oil and 1/2 cup of the reserved pasta water until smooth.

Add the cooked chicken to the pot with the pasta and asparagus, then add the peanut butter mixture and toss to combine.

Add more of the reserved pasta water, if needed. Serve immediately!

Wednesday, April 21, 2010

Orecchiette with Mini Chicken Meatballs

I've really fallen in love with orecchiette pasta. I think it's because the pasta has more body and texture to it, and it's chewy yet firm. The only problem is that it's quite hard to find this pasta here in San Diego. On a recent trip to Mona Lisa deli , though, I saw they started selling fresh orecchiette pasta and I just had to buy it.

This recipe is from Giada, but as always I changed it up a bit. I actually read the comments from other users who made this recipe and mostly all said meatball mixture was too sticky and wet, so I modified the recipe by omitting the milk and ketchup and adding just a tablespoon of marinara instead. Additionally I increased the breadcrumbs just a bit. My husband and brother-in-law (and yes, he's living here with us for a bit) loved it! They both especially enjoyed the chicken meatballs because they sure were flavorful.

INGREDIENTS (serves 4)

  • 8 ounce package of fresh orecchiette pasta, if available. (If you're unable to find orecchiette, you can use mini shells).
  • 1/4 cup + 2 tablespoons plain bread crumbs
  • 2 tablespoons dried parsley flakes
  • 1 large eggs, lightly beaten
  • 1/2 cup your favorite marinara sauce
  • 1/2 cup grated Romano or parmesan
  • 1/4 cup grated mozzarella cheese
  • 3/4 teaspoon salt
  • 3/4 teaspoon freshly ground black pepper
  • 1 pound ground chicken
  • 1/4 cup olive oil
  • 1 1/4 cups low-sodium chicken stock, hot
  • 1 pint cherry tomatoes, halved
  • 1/2 teaspoon dried basil
  • 1/4 teaspoon red pepper flakes
  • 8 ounces bocconcini mozzarella, halved
  • 1 tablespoon chopped fresh basil leaves
DIRECTIONS

Bring a large pot of salted water to a boil over high heat. Add the pasta and cook according to package directions.

In a medium bowl, stir together the bread crumbs, dried parsley, egg, 1 tablespoon marinara sauce, Romano cheese, mozzarella cheese, and the salt and pepper. Add the chicken and gently stir to combine. (Use your hands, if you have to).

Using a melon baller (or a teaspoon measure), form the chicken mixture into 3/4-inch pieces. With damp hands, roll the chicken pieces into mini meatballs. (I don't have a melon baller, so I just used my hands to form the meatballs).

In a large (14-inch) skillet, heat the oil over medium-high heat. Working in batches, add the meatballs and cook without moving until brown on the bottom, about 2 minutes. Turn the meatballs over and brown the other side, about 2 minutes longer. Remove meatballs from pan and set aside. To the pan add the tomatoes and sear for one minute. Next add the hot chicken stock and bring to a boil. Using a wooden spoon, scrape up the brown bits that cling to the bottom of the pan. Add remaining marinara sauce, dried basil and pepper flakes. Reduce heat to low and simmer for 2 minutes. Now add back the meatballs to the sauce and keep simmering until meatballs are cooked through, about 10 minutes. Drain the pasta, reserving about 1 cup of the pasta water. Transfer pasta to a large serving bowl and add a little olive oil and toss to lightly coat orecchiette. If pasta seems to stick, add a little pasta water to loosen. Add the meatball mixture, mozzarella cheese and gently toss to combine. Garnish with the chopped basil.

Tuesday, February 02, 2010

Very Easy Chicken Piccata

Not only is chicken piccata very flavorful but it is also quite easy to make and really, really fast. So if you're in a pinch for time, definitely give this recipe a try. I particularly love the briney, salty flavor of the capers, so don't skimp on them. I like to serve my chicken piccata with a side of noodles and crispy, steamed broccoli. I'm getting hungry just writing this!

INGREDIENTS (serves 4)

  • 2 skinless and boneless chicken breasts, butterflied and then cut in half
  • coarse salt and freshly ground black pepper
  • All-purpose flour, for dredging
  • 6 tablespoons unsalted butter
  • 5 tablespoons extra-virgin olive oil
  • 1/3 cup fresh lemon juice
  • 1/2 cup chicken stock
  • 1/4 cup brined capers, rinsed
  • 1/3 cup fresh parsley, chopped
DIRECTIONS

Season chicken with salt and pepper. Dredge chicken in flour and shake off excess.

In a large skillet over medium high heat, melt 2 tablespoons of butter with 3 tablespoons olive oil. When butter and oil start to sizzle, add 2 pieces of chicken and cook for 3 minutes. When chicken is browned, flip and cook other side for 3 minutes. Remove and transfer to plate. Melt 2 more tablespoons butter and add another 2 tablespoons olive oil. When butter and oil start to sizzle, add the other 2 pieces of chicken and brown both sides in same manner. Remove pan from heat and add chicken to the plate.

Into the pan add the lemon juice, stock and capers. Return to stove and bring to boil, scraping up brown bits from the pan for extra flavor. Check for seasoning. Return all the chicken to the pan and slices of lemon, if using, and simmer for 5 minutes. Remove chicken and sliced lemons to platter. Add remaining 2 tablespoons butter to sauce and whisk vigorously. Pour sauce over chicken and garnish with parsley.

Wednesday, December 16, 2009

Coq au Vin

This coq au vin recipe is supposed to be ready in 90 minutes, but it took me much longer than that. I made the wine reduction sauce first in the morning and let it get to room temp; by the time Matt got home from work in the evening, I finished off the recipe. The result: pure deliciousness. I served my coq au vin over egg noodles, but you can serve it with a side of mashed potatoes, or even over rice.

Make sure you use a medium-bodied, fruity red wine such as Pinot Noir or a Rhône Valley Grenache. Avoid bold, heavily oaked red wine varietals like Cabernet and light-bodied wines like Beaujolais.

INGREDIENTS (serves 4 to 6)

  • 1 bottle fruity, smooth, medium-bodied red wine (I used Pinot Evil Pinot Noir)
  • 2 cups low-sodium chicken broth
  • 10 sprigs fresh parsley leaves
  • 2 tablespoons minced fresh parsley leaves
  • 2 sprigs fresh thyme
  • 1 bay leaf
  • 4 ounces bacon , preferably thick-cut, cut crosswise into 1/4-inch pieces
  • 2 1/2 pounds boneless, skinless chicken thighs , trimmed of excess fat and cut in half crosswise
  • 5 tablespoons unsalted butter
  • 24 frozen pearl onions , thawed, drained, and patted dry (about 1 cup) (see note above)
  • 8 ounces cremini mushrooms , wiped clean, stems trimmed, halved if small and quartered if large
  • 2 medium cloves garlic , minced or pressed through garlic press (about 2 teaspoons)
  • 1 tablespoon tomato paste
  • 2 tablespoons all-purpose flour
DIRECTIONS
  1. Bring all but 1 tablespoon wine (reserve for later use), broth, parsley sprigs, thyme, and bay to simmer in large saucepan over medium-high heat. Cook until reduced to 3 cups, about 25 minutes. Discard herbs.
  2. Meanwhile, cook bacon in large Dutch oven over medium heat until browned, 7 to 8 minutes. Using slotted spoon, transfer bacon to paper-towel-lined plate. Reserve 2 tablespoons fat in small bowl; discard remaining fat.
  3. Lightly season chicken with salt and pepper. Heat 1 tablespoon reserved bacon fat in Dutch oven over medium-high heat until just smoking. Add half of chicken in single layer and cook until lightly browned, about 2 minutes per side. Transfer to plate and repeat with remaining chicken and 1 tablespoon bacon fat.
  4. Melt 3 tablespoons butter in now-empty Dutch oven over medium-high heat. When foaming subsides, add pearl onions and mushrooms; cook, stirring occasionally, until lightly browned, 5 to 8 minutes. Reduce heat to medium, add garlic, and cook until fragrant, about 30 seconds. Add tomato paste and flour; cook, stirring frequently, until well combined, about 1 minute.
  5. Add reduced wine mixture, scraping bottom of pot with wooden spoon to loosen browned bits; add 1/4 teaspoon pepper. Return chicken, any accumulated juices, and reserved bacon to pot; increase heat to high and bring to boil. Reduce heat to medium-low, cover pot, and simmer until chicken is tender, about 25 minutes, stirring halfway through cooking time.
  6. Using slotted spoon, transfer chicken to large bowl; tent with foil to keep warm. Increase heat to medium-high and simmer sauce until thick and glossy and measures 3 cups, about 5 minutes. Off heat, stir in remaining 2 tablespoons butter and reserved 1 tablespoon wine. Season to taste with salt. Return chicken to pot and top with minced parsley. Serve immediately.

Friday, November 13, 2009

Chicken Fettuccine Alfredo

I made this the other night and although it's not a "true" Alfredo (I mean I doubt that they use Colby-Monterey Jack cheese blend in Italy) it was very good--and it's one of those dishes that even your picky eater kids would like. Anyway, this recipe makes enough to feed 6 to 8 people, so it's great for a party.

INGREDIENTS (serves 6)

  • 6 skinless, boneless chicken breast halves - cut into cubes
  • 6 tablespoons butter, divided
  • 4 cloves garlic, minced, divided
  • 1 tablespoon Italian seasoning
  • 1 pound fettuccine pasta
  • 1 onion, diced
  • 1 (8 ounce) package sliced mushrooms
  • 1/3 cup all-purpose flour
  • 1 tablespoon salt
  • /4 teaspoon ground white pepper
  • 3 cups milk
  • 1 cup half-and-half
  • 3/4 cup grated Parmesan cheese
  • 8 ounces shredded Colby-Monterey Jack cheese
  • 1/2 cup sour cream
DIRECTIONS

In a large skillet over medium heat combine chicken, 2 tablespoons butter, garlic and Italian seasoning. Cook until chicken is no longer pink inside. Remove from skillet and set aside.

Bring a large pot of lightly salted water to a boil. Add pasta and cook for 8 to 10 minutes or until al dente; drain.

Meanwhile, melt 4 tablespoons butter in the skillet. Saute onion, 2 tablespoons garlic and mushrooms until onions are transparent. Stir in flour, salt and pepper; cook 2 minutes. Slowly add milk and half-and-half, stirring until smooth and creamy. Stir in Parmesan and Colby-Monterey Jack cheeses; stir until cheese is melted. Stir in chicken mixture and sour cream. Serve over cooked fettuccine.

Sunday, October 18, 2009

Maniladas with White Cheese Sauce and Tomatillo Sauce

I gave birth to my baby girl, Stella, on October 1, 2009. As you can imagine, I have had no time to cook nor have I had the urge to cook as my husband and I have been taking care of this little creature. But finally last week I decided to make something from scratch, and although there's a lot of steps to this dish, it goes by really fast. The cheese sauce is actually my favorite and you can use it as a sauce for almost anything, including lasagna and macaroni. I saw (and got) this recipe from the "Cooking for Real" show on the Food Network. It's an unusual take on enchiladas + manicotti, but the combination works and the tomatillo sauce really makes a difference, so go ahead and give it a try!

INGREDIENTS (serves 4 to 6)

  • 1 (8-ounce) package manicotti shells
  • 2 tablespoons olive oil
  • 1 Vidalia onion, chopped
  • 2 cloves garlic, minced
  • 1 rotisserie chicken, shredded
  • Salt and freshly ground black pepper
  • 4 Roma tomatoes, seeded and diced
  • 3 tablespoons chopped cilantro leaves
  • 1/2 cup sour cream
For the Tomatillo sauce:
  • 1 pound tomatillos, quartered
  • 1 small red onion, quartered
  • 1 jalapeno, halved
  • 2 garlic cloves
  • 2 tablespoons olive oil
  • Salt and freshly ground black pepper
For the cheese sauce:
  • 3 tablespoons butter
  • 3 tablespoons all-purpose flour
  • 2 cups heavy cream, room temperature
  • 2 cups grated fontina cheese
  • 1/4 teaspoon grated nutmeg
  • Salt
DIRECTIONS

Preheat oven to 400 degrees F.

Boil manicotti in salted water for 8 minutes. Drain, reserving 1/2 cup of pasta water and set pasta aside.

In a large skillet, heat oil over medium heat. Saute onion until translucent, about 3 minutes. Add garlic and saute 1 minute more. Remove pan from heat and mix in chicken, tomatoes, cilantro and sour cream. Set aside. To make the Tomatillo Sauce: Place tomatillos, onion, jalapeno and garlic in a baking dish. Toss with oil and season with salt and pepper. Roast until tomatillos turn golden around the edges and are soft, about 45 minutes. Remove from oven and blend ingredients together until smooth. Use reserved pasta water to thin sauce, if necessary. Season with salt and pepper, to taste.

To make the cheese sauce: In a medium saucepan, melt butter over medium-high heat. Add flour and cook 2 minutes. Whisk in heavy cream and bring to a simmer. Add cheese and nutmeg and stir until melted. Season sauce with salt, to taste.

To assemble: Reduce oven temperature to 350 degrees F. Stuff manicotti tubes with chicken mixture and assemble in a 9 by 12-inch baking dish. Pour cheese sauce over the top. Bake 30 minutes until cheese is bubbling. Drizzle tomatillo sauce on Maniladas before serving.

Wednesday, September 30, 2009

Chicken and Waffles

I never truly understood the whole "chicken and waffle" combination, which seems to have a foodie-religious following in the South. But I figured I would try it and finally say, "I've had chicken and waffles!" Unfortunately, there are not very many good soul food restaurants here in San Diego--actually there are just a handful of them. I'm a big fan of Church's chicken, which I know is fast food, but their fried chicken is pretty close to soul food, I think.

I did find a restaurant called Bonnie Jean's Soul Food and their food is quite good and tasty, although the neighborhood is somewhat questionable and the restaurant is clean, but a bit run down. Nevertheless, their chicken and waffles was quite delish. I enjoyed eating it, but it wasn't as an incredible meal as I thought it would be. Perhaps I just over-excited myself. Anyway, my favorite part is the fried chicken. I just love it. Below is a very easy fried chicken recipe and you can make (or omit) the waffles. It's up to you. A nice side of collard greens or even fried okra would go wonderful with this meal. Enjoy!

INGREDIENTS (serves 4)

CHICKEN

  • 1 (3 1/2 pound) fryer chicken, cut into 8 pieces, giblets reserved and chopped
  • 1 cup all purpose flour
  • 1 tablespoon poultry seasosing, or your favorite seasoning/rub mix
  • Vegetable oil, for frying
WAFFLES
  • 1 cup flour
  • 1 cup whole wheat flour
  • 2 tablespoons sugar
  • 1 teaspoon baking powder
  • 1 teaspoon baking soda
  • 1 teaspoon kosher salt
  • 2 cups buttermilk
  • 1/2 cup unsalted butter, melted
  • 2 eggs
DIRECTIONS

FRIED CHICKEN:

  1. Heat enough vegetable oil to come about 1-inch up the sides of a large, deep cast iron skillet to 350 degrees F.
  2. Rinse the chicken under cold running water and do not dry; leave wet. In a large sealable bag, combine the flour with the poultry seasoning. Add the chicken pieces 1 at a time, seal, and shake to coat evenly. Remove and place on a wire rack over a baking sheet and let sit for 5 to 10 minutes.
  3. Carefully add the chicken to the hot oil and fry, turning once, until golden brown and the meat is cooked through, 20 to 30 minutes (the thighs and legs will take longest to cook).
  4. Remove and drain on paper towels. Remove the pan from the heat and with a slotted spoon, scoop out any browned bits remaining in the pan and drain on paper towels.
WAFFLES: Special equipment: a waffle iron
  1. Sift together the flour, whole wheat flour, sugar, baking powder, baking soda, and salt.
  2. In a separate bowl, whisk together the buttermilk, melted butter, and eggs. Combine the wet ingredients, dry ingredients to form waffle batter.
  3. Ladle the batter into the waffle iron, following the manufacturer's instructions. While the waffle iron is closed, trim any overflow with the back of a knife. Cook until golden.
  4. Serve waffles hot, topped with hot Fried Chicken and sides of hot, melted butter, good maple syrup and hot sauce!

Saturday, August 01, 2009

Homemade Chicken Broth, Latina Style

I'm into my 30th week of pregnancy and it is increasingly becoming very uncomfortable for me to sleep. So I find myself waking up at 6 or 6:30am during the weekdays and weekends. Can you believe that? I used to be the sleep-in queen, and now I'm up early enough to do laundry, grocery shop and watch the new episode of Viva Daisy on Food Network all before 10AM! Daisy Martinez from Viva Daisy made this chicken broth and I just had to try it. I followed her directions almost to a "T", the only difference is that I cut my garlic head in half and just added it along with a bunch of cilantro, without placing them in a cheesecloth. The Latina part of this broth is the annatto seeds, the cilantro, and the ham hock which gives this broth a very homemade, almost umami type of taste, just like my abuelita used to make.

INGREDIENTS

  • 1 (5-pound) chicken, cut into 10 pieces or 5 pounds chicken backs, wings, necks and gizzards
  • 2 large Spanish onions (about 2 pounds), left whole and unpeeled
  • 1 large red bell pepper, cored, seeded, and cut into quarters
  • 1 large head garlic
  • 1 large bunch fresh cilantro
  • 2 teaspoons black peppercorns
  • 2 bay leaves
  • 1/2 teaspoons achiote (annatto) seeds
  • 1 ham hock
DIRECTIONS

Put the chicken, onions, and red pepper in a large stockpot. Rinse the garlic heads in cold water, then peel off the papery skin. Break the garlic head into individual cloves. Rinse and cut the roots off the cilantro. Cut a piece of cheesecloth the size of a kitchen towel. Put the garlic cloves, peppercorns, bay leaves, achiote seeds and cilantro on the cheesecloth, bring the ends together to make a little pouch, and tie the loosely with kitchen twine. Give the pouch a couple of good whacks with your kitchen mallet, and add it to the pot. Add enough cold water to cover the chicken by at least 2 to 3 inches. Drop in the ham hock, if using. Bring to a boil over medium-high heat, skimming foam off of the top as it forms. When the water comes to a boil, adjust the heat so the broth cooks at a steady, but not rolling boil. Cook for 30 minutes.

Check to make sure the breasts are cooked through, then remove them from the pan. Cook 15 minutes more, then remove the legs and thighs. Set the chicken aside to make another chicken dish. (If you're using backs, necks, wings, etc., you don't have to remove anything.) Leave the backs, necks and wings in to further flavor the broth.

Cook for 1 hour. Set a strainer over a large bowl and line the strainer with a couple of layers of cheesecloth. Carefully strain the broth through the cheesecloth. (Ladling it is the easiest and safest way.) Add salt, to taste, and let cool before refrigerating.

Tuesday, July 07, 2009

Creamy Bowties with Chicken and Broccoli

I decided to clean out the freezer and I found two chicken breasts, skin on and bone in, in there that were almost three months old. Instead of throwing them out, I thawed them and roasted them. Then I removed the skin and the bones and shredded the chicken. So now I had a couple of of cups of shredded chicken and below is a very simple, yet quite easy dish where I used some of the shredded chicken. I added red pepper flakes to my recipe because I just love the spiciness with broccoli. If you're unable to find the garlic and herb soft-spread cheese, you can use Philadelphia cream cheese instead and add Italian herbs and some garlic to flavor it up.

INGREDIENTS (makes 4 servings)

  • 8 ounces bow-tie pasta
  • 2 tablespoons butter or margarine
  • 1/2 pound boneless, skinless chicken breasts, cut into thin strips
  • 2 cups broccoli florets
  • 1 small red bell pepper, cut into thin strips (I omitted them from this recipe)
  • 1 cup canned low-sodium chicken broth
  • 6.5-ounces garlic and herb soft-spread cheese*
  • Good pinch of red pepper flakes, optional
DIRECTIONS

Bring a large pot of water to a boil over high heat. Add bow ties and cook according to package directions. Drain and set aside.

Melt butter in a large skillet over medium-high heat. Add chicken and cook, stirring, until done, about 5 minutes. Remove chicken and set aside. (I skipped this step as I already had cooked chicken).

Add broccoli, red pepper flakes (if using), red bell pepper strips and chicken broth to skillet. Cover and simmer until broccoli is tender, about 5 minutes. Return chicken to skillet and cook 1 minute. Remove from heat and add the cooked pasta and cheese. Stir until cheese is melted.

* There are several brands of garlic and herb soft-spread cheeses on the market, including Alouette, Rondele, and Boursin.

Saturday, July 04, 2009

Chicken Salad with Peanut Dressing and Toasted Sesame Seeds

As you can see, I haven't been cooking much and that was due to the "sick" I had. But now I'm over it and my appetite is back on...now more than ever specially since I'm almost 7 months pregnant. I'm still having issues with red meat, but I know I need to get protein in my system so I combined the peanut dressing from one recipe with some roasted chicken I had and came up with this salad. The peanut dressing is actually for hot pasta (like spaghetti or fettuccine) and it makes about 2 cups of dressing. Since I only needed a few tablespoons for one salad, I'm saving the leftover so that I can make this Crunch Noodle Salad tomorrow.

INGREDIENTS

  • Mixed greens
  • Cooked chicken, cut into bite sized chunks
  • Peanut dressing (recipe below)
  • 1/2 tablespoon toasted sesame seeds or chopped peanuts
Peanut Dressing
  • 1 cup vegetable oil
  • 1/4 cup rice wine vinegar
  • 1/3 cup soy sauce
  • 3 tablespoons dark sesame oil
  • 1 tablespoon honey (I added a little more than a tablespoon)
  • 2 garlic cloves, minced
  • 1 teaspoon grated fresh ginger
  • 2 tablespoons toasted white sesame seeds, divided
  • 1/2 cup smooth peanut butter
DIRECTIONS

Make the dressing: Whisk together the vegetable oil, rice wine vinegar, soy sauce, sesame oil, honey, garlic, ginger, 2 tablespoons sesame seeds and peanut butter in a medium bowl.

To make salad (for one): place enough mixed greens on plate and top with chopped chicken. Drizzle some of the peanut dressing over the salad then top with toasted sesame seeds or toasted chopped peanuts.

Friday, June 12, 2009

Chicken Paillard with Tomato-Arugula Salad

I realized that I need to start eating more protein because I have a little alien growing inside me that I need to feed. And if she plans on taking over the world, she's gonna need some good nutrition. My cravings and aversions tend to change from week to week, but this week I started craving all things chicken. And it just so happens that I caught an episode of Tyler Florence's Ultimate show where he made chicken paillard and it's surprisingly easy, fast and very tasty. The only thing I changed was the dressing; I made my own vinaigrette instead of making homemade Caesar dressing since I can't have raw egg yolks at this point. I guess paillard is just a fancy word for schnitzel, because the breading is similar, and I think if you serve the chicken paillard with ketchup, even kids will like it!

INGREDIENTS (2 servings)

Chicken:

  • 2 boneless, skinless chicken breasts
  • 1/2 cup all-purpose flour
  • 2 eggs, whipped slightly with a splash of half and half or milk
  • 1 cup panko bread crumbs
  • Salt and freshly ground black pepper
  • 1 Tablespoon extra-virgin olive oil
Vinaigrette:
  • 1 Tablespoon orange marmalade
  • 1 Tablespoon apple cider vinegar
  • 1 teaspoon Dijon mustard
  • 2 Tablespoons extra-virgin olive oil
  • Salt and freshly ground black pepper
Salad:
  • 1/2 cup organic grape tomatoes, halved (I used our homegrown tomatoes)
  • Fresh baby arugala (enough for two servings)
  • Shaved Parmesan, for garnish
  • Lemon wedges, for garnish
  • Extra-virgin olive oil, for drizzling
DIRECTIONS

For the chicken: Begin by pounding out the chicken breast gently between 2 pieces of plastic wrap. Prepare a breading station with flour, whisked eggs and milk, and panko crumbs. Season all with salt and pepper. Coat the breasts in flour, egg then panko. Lay the coated breasts out on a flat tray and refrigerate to let the crust dry out (about 10 minutes) this will ensure there is less moisture and less chance your coating will break when frying. Shallow fry the paillard in hot oil for approximately 2 to 3 minutes per side depending on how thick the breasts are. Drain well, season with salt and set aside when done. For the vinaigrette: Put the marmalade, cider vinegar, mustard and salt and pepper into a small bowl. While whisking, pour the olive oil in slowly for the dressing to emulsify.

Prepare the salad by splitting the grape tomatoes in half through the middle lengthwise, mixing in arugula in a mixing bowl. Add 1 tablespoon of the vinaigrette and toss the salad well. Add more vinaigrette, if needed. Refrigerate the remaining for another day.

To serve lay the warm, crispy chicken paillard on the base of the plate and top with the salad. Garnish with shaved parmesan cheese, a wedge of lemon and a drizzle of olive oil.

Sunday, March 15, 2009

Chicken with Asparagus and Roasted Red Peppers

When my brother-in-law was here, he bought chicken and asparagus for us to cook. I kind of had to find a recipe to use these two ingredients. I was thinking chicken rolled up with asparagus, or even a chicken-asparagus pasta, but I found the following recipe to be quite good, specially for those of us watching our weight and/or for people who want more protein in their diet. You can serve this dish with a side of brown or white rice, or even couscous. Or you can cut up the chicken into bite-sized pieces and serve it over penne pasta.

INGREDIENTS (serves 4)

  • 1/2 cup chicken broth
  • 1 pound boned and skinned chicken breast halves
  • salt and pepper to taste
  • 1/2 pound fresh asparagus, trimmed and cut into 2 inch pieces
  • 1 (7 ounce) jar roasted red peppers, drained and chopped
  • 1 clove garlic, minced
  • 1/2 cup chopped roma (plum) tomatoes
  • 1 teaspoon balsamic vinegar, or to taste
  • 1/2 cup shredded mozzarella cheese
DIRECTIONS
  1. Heat the broth in a large skillet over medium-high heat. Season chicken with salt and pepper, and place in the skillet. Cook 15 minutes, until chicken is almost done.
  2. Place asparagus, red peppers and garlic in skillet. Continue cooking 10 minutes, or until chicken juices run clear and asparagus is tender.
  3. Place tomatoes in skillet during last 2 minutes of cook time. Sprinkle with vinegar. Top with mozzarella cheese to serve.

Monday, March 02, 2009

Rosemary Roasted Jidori Chicken

I've been noticing several restaurants here in San Diego now offer "Jidori Chicken" in their menus, and for a while I thought Jidori was a method of cooking, but later I found out it was a type of chicken. Basically, Jidori is a Japanese term meaning "chicken of the Earth." These chickens are fresh, all-natural, no hormones, free range and the chickens eat the best feed. Jidori chickens are apparently so fresh that some Japanese restaurants even serve them sashimi-style...yes raw!

We went to the Prado a couple of weeks ago with my parents and I ordered the Rosemary Jidori chicken. It was moist, perfectly roasted and perfectly seasoned. It was served with garlic mashed potatoes, sauteed spinach and perfectly sauteed mushrooms. The dish is under $20 and I recommend it. We had a nice sauvignon blanc to go with the chicken and it worked wonderfully, although a lighter pinot noir would have been good, too.

I've been looking for Jidori chicken recipes, but it's very difficult to find one. Also, it's almost impossible for a consumer to buy fresh Jidori chicken here in San Diego, unless you're a restaurant owner. So, if you're lucky, buy one and roast it. Below is a simple yet classic recipe for rosemary chicken.

INGREDIENTS (4 servings)

  • 2 young chickens, about 2 to 3 pounds each
  • 3 tablespoons extra-virgin olive oil
  • 1 or 2 fresh rosemary sprigs
  • 1 1/2 lemons, cut into chunks
Seasoned Salt
  • 2 tablespoons very finely minced lemon zest
  • 2 tablespoons minced fresh rosemary
  • 2 tablespoons sea salt, preferably gray salt
  • Freshly ground black pepper
DIRECTIONS

Preheat oven to 450 degrees F if you have no convection fan, or to 425 degrees F if you have a convection fan.

Rinse the chickens inside and out and dry well.

Make the salt: In a bowl, combine the lemon zest, rosemary, salt, and pepper, mixing well. Rub the chicken all over with the olive oil, and then rub with 3 tablespoons of the seasoned salt. (Reserve the remaining salt for another use.) Tuck the rosemary sprigs and lemon chunks into the chicken cavity. You don't need to truss the chicken.

Place the birds on a rack in a roasting pan and roast for 15 minutes. Reduce the oven temperature by 75 degrees F and continue roasting until the juices run clear when a thigh is pierced with a skewer, about 50 to 55 minutes longer. Transfer the chicken to a platter and let rest for at least 10 minutes before carving.

Tuesday, February 17, 2009

BBQ Chicken Pizza

I'm not a Sandra Lee fan as most of her recipes call for 70% canned or store bought ingredients and only 30% fresh ingredients, but at times some of her recipes do save many cooks a lot of time. So what I did here is we took part of her BBQ chicken pizza recipe but we raised up a notch by making our own dough and grilling our chicken. Yes, this definitely is not a Semi-Homemade recipe, but give it a try because homemade pizza dough is so good and this pizza was super cheesy and gooey!

INGREDIENTS

Pizza Dough

  • 1 tablespoon honey
  • 1 cup warm water (110 to 115° F)
  • 2 teaspoons active dry yeast
  • 1 Tablespoon olive oil
  • 3 cups all-purpose flour
  • 1 teaspoon salt
BBQ Chicken
  • 1/2 pound chicken tenders
  • 1 Tablespoon Butt Rub
  • 2/3 cup barbecue sauce (we used Sweet Baby Ray's Original BBQ Sauce)
Pizza
  • 3/4 cup shredded Smoked Gouda
  • 1 cup shredded mozzarella
  • 3/4 cup shredded Parmesan
  • Grilled chicken, cut into 1" pieces
  • 1/2 medium red onion, thinly sliced
  • 3 tablespoons chopped fresh cilantro leaves
DIRECTIONS

Make the dough: In a small bowl, dissolve the honey in the warm water. Sprinkle the yeast over the water and stir until it dissolves. Let the yeast mixture stand for 5 minutes, until a layer of foam forms on the surface.

In a large bowl, combine the flour and the salt. Make a well in the center of the flour mixture and pour the olive oil and the yeast mixture. Stir the flour into the wet ingredients, until all the flour is incorporated. If its too dry, add more water in tablespoon increments.

On a lightly floured surface, knead the dough for 15 minutes, until it is smooth and elastic. Shape the dough into a ball and put in in a well-oiled bowl. Cover with a moist towel and let rise in a warm place until double in bulk (about 45 minutes).

After about 45 minutes the dough should have about doubled in size. Show it who's boss and punch it down. That's right, give it a good smack so it deflates. Let it rise for another hour to an hour and a half. The dough is now ready to be rolled out

About 15 minutes before baking, pre-heat your oven to 400 degrees F.

For the Chicken: sprinkle the Butt Rub (or your favorite grill rub) over the chicken. Heat your grill on medium-high for direct heat grilling. Grill chicken pieces, about 5 minutes per side.

About one minute before you remove chicken from grill, brush two tablespoons of the bbq sauce over chicken. Set chicken aside to cool and chip into 1" bite-sized pieces.

For the Pizza: Punch the dough down, and roll out into a 16 inch flat circle. Spread remaining barbecue sauce evenly over pizza dough. Sprinkle smoked Gouda, 1/2 cup mozzarella, and Parmesan. Next spread the onions and chicken pieces and top with remaining 1/2 cup mozzarella. 
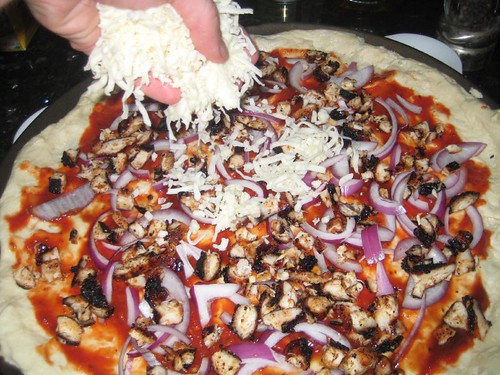
Bake for 18-20 minutes or until cheese bubbles. Sprinkle with chopped cilantro and cut into pieces.

Friday, January 09, 2009

Shredded Chicken Puffy Tacos

This puffy taco recipe is totally a Tex-Mex invention, and I love it. I believe you can only find these tacos in San Antonio and Austin, although I'm sure there are some places out there that serve them, too. This is not a complicated recipe at all, the most difficult part is making the indention in the tortilla as it fries to form the taco shell. Just be careful because the oil is hot and I did burn my fingers a couple of times making these.

The shredded chicken recipe below is just your everyday recipe I grew up on. You don't need to add anything fancy like cumin or marjoram, but you can if you like. Also, you can fill your puffy taco with seasoned ground beef or just refried beans and cheese. No matter what filling you use, these are quite delish and yes, quite fattening, too.

Puffy Tortilla

INGREDIENTS (makes 14 tacos)

  • 3 cups corn tortilla mix
  • 1/2 tablespoon salt
  • 2 1/4 cups warm water
DIRECTIONS

Combine all ingredients in a large bowl and mix thoroughly. When the dough is consistent begin rolling dough balls about the size of a ping pong ball.

Using a tortilla press that is lined in a thick plastic, press out the dough. You use the plastic (it can be a Ziploc bag that has been cut) so that the dough does not stick to the tortilla press.

Meanwhile have a deep pot filled with cooking oil approximately 2 inches high and heated to 250 degrees. Drop the flat tortilla in the hot oil and using a metal spatula repeatedly douse with the oil. You will see that it will begin to puff up. Flip it over and using the spatula make an indention in the middle of the tortilla to form a taco shape. 
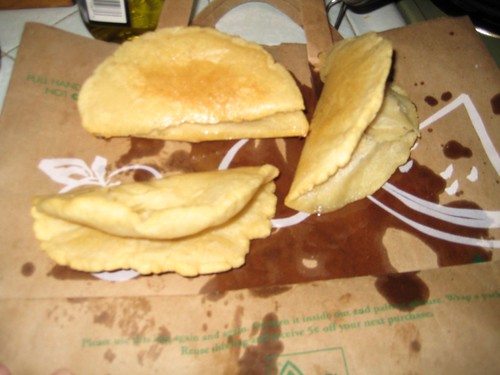
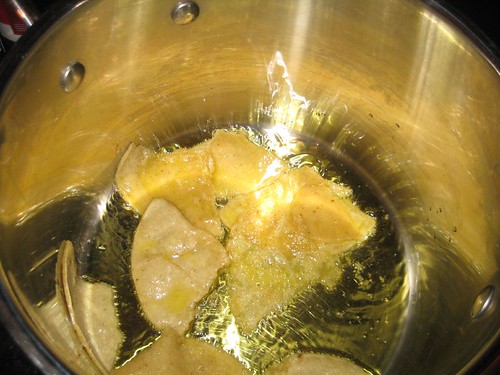
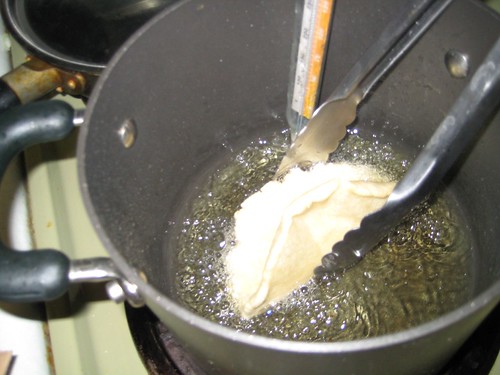
Remove from oil and allow to drain on top of brown paper bags.

Shredded Chicken

INGREDIENTS

  • About two cups of cooked, shredded chicken
  • olive oil
  • 1 medium onion, chopped
  • 1 tomato, chopped
  • 1 garlic clove, finely chopped
  • 1/4 cup finely diced red bell pepper (about half a bell pepper)
  • 1 (8oz) can El Pato tomato sauce (use the jalapeno one if you like it to be spicy)
  • About 1/4 low sodium chicken stock, if needed
  • Salt and Pepper

DIRECTIONS

In a large skillet add 1 tablespoon olive oil on set to medium-high. Add the onion and saute until soft, about 4 minutes. Add the red bell pepper and saute another 4 minutes. Next add the chopped tomato and garlic and saute until garlic becomes fragrant but doesn't burn, about 1 minutes. Add the chicken and tomato sauce and reduce heat to medium. Cook another 8 to 10 minutes, just until all flavors combine and chicken is heated through. If sauce is too thick, add a little chicken stock to get to your desired consistency. Taste for seasoning and add salt and pepper, as needed. This shredded chicken tastes even better the next day.

To assemble puffy tacos: Fill each puffy taco shell with shredded chicken, guacamole, and cheese or your favorite filling. Top with shredded lettuce and diced tomato. Yummers!

Friday, November 14, 2008

Holy Mole Experiment

Perhaps you may think I'm a bit crazy trying to make mole from scratch, and perhaps you are right. If you decide you want to try to make homemade mole you will need: patience, a well ventilated kitchen, your mise en place ready, and a huge stock pot.

Also, mole is one of those sauces that can be adjusted to your taste. If you don't want to add cilantro, you don't have to; you can use toasted cashews if you want; want to add Mexican oregano? Go ahead. It's just one of those recipes that can be customized to your liking, and the one below is basically what I thought up. Make sure you finely grind your spices before you start so that they are ready to go (I used my coffee grinder for this). And soak your dried chiles 10 to 15 minutes before you start so that they soften a little. The measurements below are approximate because mole is definitely an "eye ball it" type of recipe.

Lastly, if you've never had mole before, I suggest you go to a good Mexican restaurant and try it out first. It's definitely one of those dishes you either hate or you love. There are no in-betweens. The sauce is sweet, spicy, smokey, nutty, chocolatey and somewhat herbally. Serve mole over tortillas filled with refried beans, called enmoladas, or over cooked chicken or turkey or seafood. The recipe below made about 8 cups of mole. I poured most of it into 8oz containers and froze it since I'll be distributing some to my family. Have fun!

INGREDIENTS

  • 1 cup peanuts, toasted and chopped
  • 1/2 cup walnuts, toasted and chopped
  • 1 tablespoon olive oil
  • 2 tortillas, torn apart
  • 5 cloves of garlic, roughly chopped
  • 3 tomatoes, quartered
  • 1 large white onion, roughly chopped
  • 1 large jalapeno pepper, seeded and deveined and roughly chopped
  • 1 cinnamon stick
  • 3 bay leaves
  • 1/4 cup chicken base or bouillon
  • Mole Spices consisting of:
    1. 1 tablesspoon cinnamon
    2. 1 tablespoon corriander
    3. 1 tablespoon Thyme
    4. 1 tablespoon Majoram
    5. 4 cloves
    6. 1/2 Tsp. Allspice
    7. 2 Star anise
    8. 10 peppercorns
    9. 1/2 tablespoon cumin
    10. 1/2 tablespoon Mexican Oregano
  • 10 dried Pasillas, stemmed and seeded and softened in 6 cups hot water
  • 4 dried Guajillo chiles, stemmed and seeded and softened in 2 cup hot water
  • 1 cup raisins
  • 1 Bunch Cilantro
  • 1 Bunch Epazote (optional)
  • 1 Bunch parsley
  • 1/2 cup packed brown sugar
  • 2 discs of Mexican Chocolate, chopped (La Abuelita brand, if possible)
  • 1/2 cup unsweetened cocoa powder
  • 1/4 cup white vinegar
  • 1/2 teaspoon Hickory smoke liquid
  • Salt to taste
DIRECTIONS

In a large stock pot, heat 1 tablespoon olive oil on medium-high. Add the torn tortillas and lightly fry up to soften. 
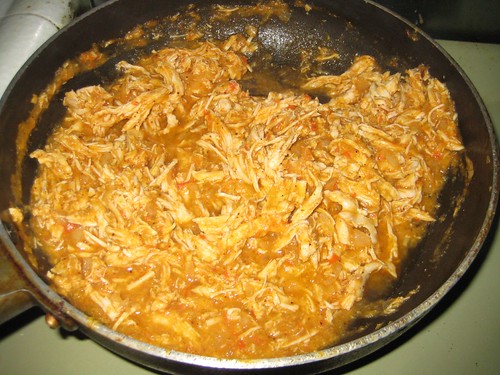
Add the garlic, onion, tomatoes and jalapenos, mole spices and 1 teaspoon salt. Saute for 8 to 10 minutes, or until everything is softened. 
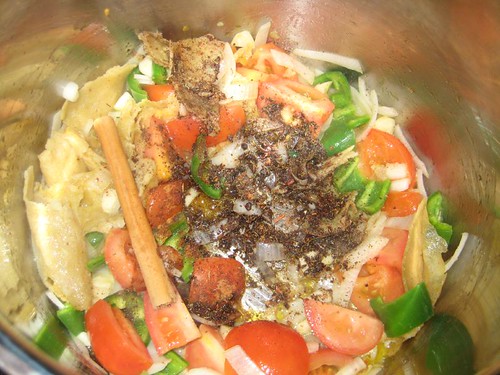
In the meantime, chop up the softened pasilla and guajillo chiles.

Add the cinnamon stick, bay leaves, and chicken base. Next add the chopped up passillas and guajillo chiles, and also add all the water the chiles were soaking in. Next add the chopped peanuts and walnuts, raisins, cilantro, epazote, parsley, brown sugar, both types of chocolate, hickory smoke and vinegar. 
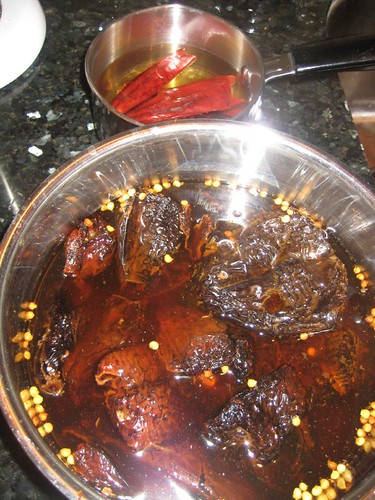
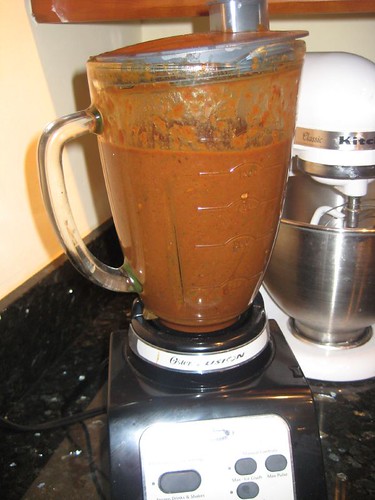
Bring to a boil then simmer for 1 hour. Remove cinnamon stick and bay leaves.

With a heavy-duty hand blender, blend all ingredients in the pot, just until everything is broken down into smaller pieces. 
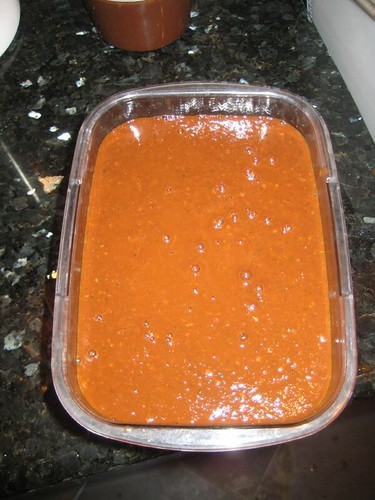
Taste for seasoning and add more salt, if needed. Simmer another 20 minutes. Turn off heat and let cool for half an hour.

Now, blend the mole in batches in your regular blender. Start on low and slowly move it to high this way you won't get too many spills. Be careful because mole is still warm. Blend until you can get a smooth, thick consistancy. Let cool to room temperature then store in containers and freeze.

To make Enmoladas:

  • 2 tortillas
  • Refried beans
  • Olive oil
  • 1/2 cup mole
  • Queso fresco
DIRECTIONS

Heat up homemade or your favorite refried beans. Set aside.

In a skillet, heat up 2 teaspoons olive oil on medium-high. Add 1 tortilla at a time and fry for 40 seconds on each side, or until they turn slightly golden and are pliable.

Place tortillas on serving plate and fill each one with refried beans and fold tortilla, like a taco.

In the same skillet (you should still have some oil left) add the mole and fry it up until it begins to bubble. 
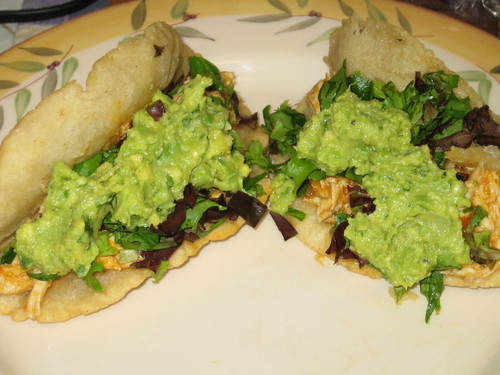
Pour the mole over the refried bean tacos and then sprinkle queso fresco over it and enjoy.