Monday, January 26, 2009

Chicago Style Italian Beef

I made this delicious Italian beef a few weeks ago, and although it may not be exactly the same as Al's #1 Italian beef from Chicago, this meal is so delish and full of flavor and you can feed an army with it! This, again, is one of those dishes you need a couple of days to prepare, but it's worth it because the meat gets juicy and da gravy is so good. One suggestion I do have is for you to purchase (or borrow) a meat slicer because you want to slice the beef as thin as you possibly can. Don't forget to dip the sandwiches in da gravy (au jus) to make it an authentic Italian beef.

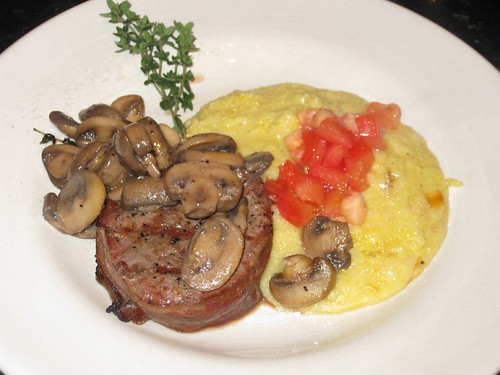
INGREDIENTS (serves 8 people)

Da Beef

  • 5 lb beef rump roast
  • 1/2 teaspoon garlic powder
  • 1/2 teaspoon dried oregano
  • 1/2 teaspoon coarse-grind black pepper
Da Gravy
  • 2 1/2 cups boiling water
  • 2 cups beef broth
  • 2 teaspoons dried oregano
  • 1 teaspoon dried thyme
  • 1/2 teaspoon coarse-grind black pepper, to taste
  • 1 teaspoon Tabasco sauce
  • 8 cloves garlic, minced (yes, 8!)
  • 2 tablespoons Worcestershire sauce
  • salt, if needed
  • Giardiniera, for relish
DIRECTIONS

Preheat oven to 325 degrees F.

Sprinkle the roast with garlic powder, oregano and pepper. Rub it all over and place roast in a dutch oven or shallow baking pan. 
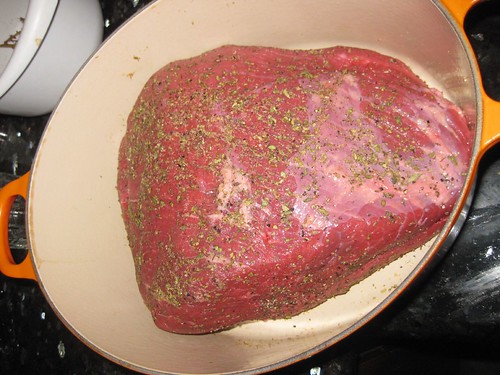
Bake, uncovered, for 1 1/2 hours. (The roast will be rare -- don't overcook it!)

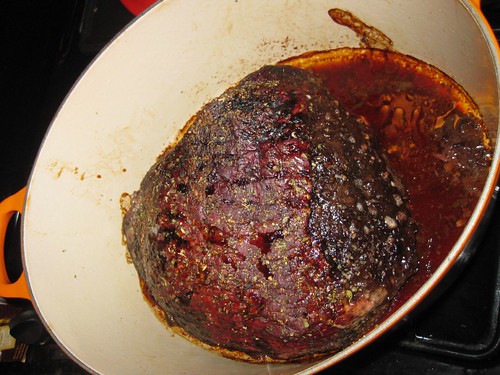
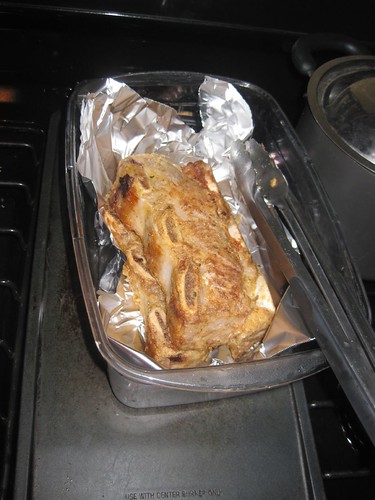
Remove roast from pan and let it cool slightly, then thinly slice with meat slicer.

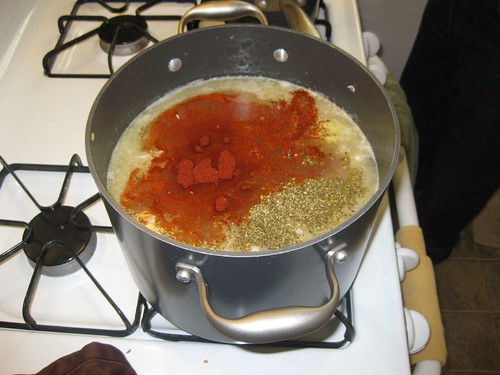
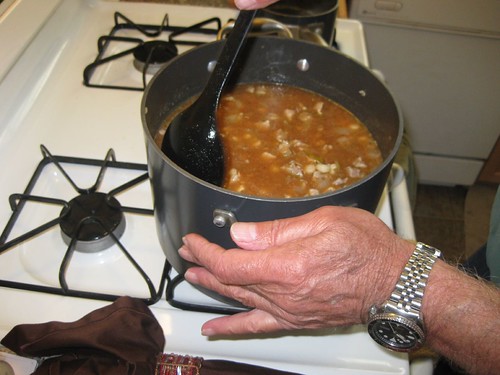
For da gravy: To the roasts pan drippings add the boiling water, beef broth, oregano, thyme, pepper, Tabasco sauce, garlic and Worcestershire sauce. 
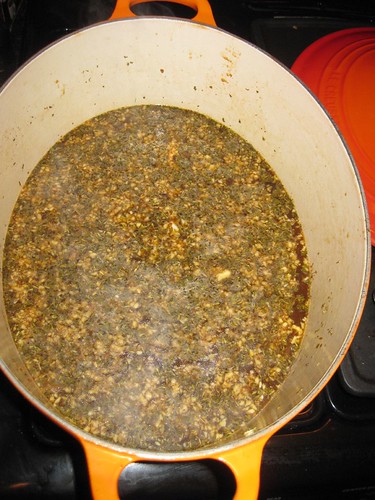
Bring to a boil then simmer for 20 minutes, scraping up the browned bits at bottom of pan. Taste for seasoning and add salt, if needed (I didn't add any). Remove da gravy from heat and then add the add the sliced beef into da gravy.

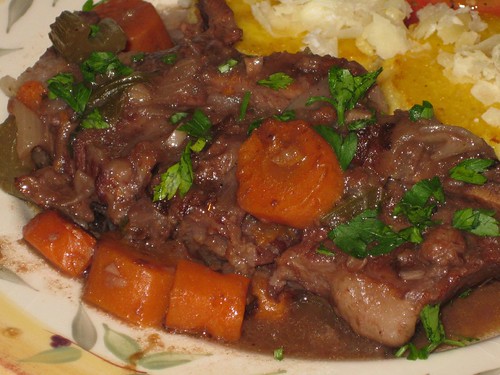
Cover and marinate the beef in da gravy overnight. Reheat the next day and serve in crusty Italian sandwich rolls; put some giardiniera as relish on sandwiches and enjoy. Da Bears!!!

Thursday, January 22, 2009

Chicago Deep Dish Pizza

Last week I started my cooking club again. After a long hiatus, we all decided it was time to bring it back. Many of the cooking club members got married, or had kids, or had changes in their lives, so it was difficult for us to get together. But I decided to start 2009 with a kick and bring back our cooking club.

Our theme this time was "What Would Obama Eat?" My brother-in-law, Tim, who lives in Chicago, made deep dish pizzas, I made Italian beef sandwiches, and we had mini Chicago dogs and other excellent appetizers other cooks brought. All in all, it was a fun and successful cooking club. Everyone had a lot of fun and below are a few pics of our "meeting" and recipe for the deep dish pizza. Mmmmm....

INGREDIENTS

Pan Dough

  • 1 cup warm tap water (110-115 degrees)
  • 1 1/4 ounces active dry yeast
  • 1 tsp. sugar
  • 3 1/2 cups flour
  • 1/2 cup course ground cornmeal
  • 1 teaspoon salt
  • 1/4 cup vegetable oil
Pizza Toppings
  • 1 lb mozzarella cheese, sliced thin
  • 1 lb Italian sausage, removed from the casing and crumbled
  • 1 (14 1/2 ounce) can diced tomatoes, drained
  • 2 garlic cloves, peeled and minced
  • 5 fresh basil leaves, chopped fine
  • 4 tablespoons grated Parmesan cheese
DIRECTIONS

Pour the warm water into a large mixing bowl, add the sugar and yeast and dissolve the yeast and sugar with a fork. Let it sit for a couple of minutes then add 1 cup of flour, all of the cornmeal, salt, and vegetable oil, and mix well with a spoon.

Continue stirring in the rest of the flour 1/2 cup at a time, until the dough comes away from the sides of the bowl. Flour your hands and the work surface and knead the ball of dough until it is no longer sticky.

Let the dough rise in an oiled bowl, sealed with plastic wrap, for 45-60 minutes in a warm place, until it has doubled in size.

Punch it down and knead it briefly. Press it into an oiled 15-inch deep dish pizza pan until it comes 2 inches up the sides and is even on the bottom of the pan.

Let the dough rise 15-20 minutes before filling.

Preheat the oven to 500°F.

While the dough is rising, prepare the filling. Cook the sausage until it is no longer pink and drain the excess fat. When the dough has finished its second rising, lay the mozzarella cheese over the dough shell. It's ok to overlap.

Distribute the sausage and garlic over the cheese. Top with the tomatoes and sprinkle on the seasonings and Parmesan cheese.

Bake for 15 minutes at 500°F, then lower the temperature to 400°F and finish baking for 25-35 minutes longer.

Lift up a section of the crust from time to time with a spatula to check its color. The crust will be golden brown when done. Serve immediately.

Tuesday, January 20, 2009

Braised Beef Short Ribs

I've had a few pounds of beef short ribs in the freezer for the past two months or so and when my husband came home on leave, I decided to cook them. Since the beef short ribs had been in a tundra for so long, I decided to brine them for a couple of days.

I'm sure if I didn't brine them they would have come out just as good, but the benefit (I find) from brining is that you usually don't need to add more salt when you cook and the food comes out extra special juicy. Here's my version of beef short ribs. Give yourself a couple of days because you have to consider the brining and cooking time. And this dish actually did taste and got even more tender the next day after I cooked it.

Brine for Beef Short Ribs

INGREDIENTS

  • 3 beef short ribs, about 14 to 16 ounces each
  • Water
  • 1/3 cup Kosher salt
  • 1/3 Sugar
  • 2 bay leaves
  • 2 to 3 garlic cloves, smashed
  • 1/4 cup sweet vermouth
  • 2 Tablespoons Worcestershire sauce
  • 6 whole black peppercorns
DIRECTIONS

In a container large enough for the ribs and with a tight fitting lid, place 2 cups of water. Add the sugar and salt and swish around to dissolve. Add the short ribs and remainder of brining ingredients. Add more water so that the ribs are completely submerged in water. Place in the fridge and let it brine overnight, up to two days.

Braised Beef Short Ribs

INGREDIENTS

  • The brined short ribs
  • 1 cup flour
  • 1/2 teaspoon salt
  • 1/2 teaspoon black pepper
  • 1 teaspoon paprika
  • extra-virgin olive oil
  • 1 medium red onion, chopped
  • 2 carrots, cut into 1/2" pieces
  • 2 stalks celery, chopped
  • 4 garlic cloves, minced
  • 2 bay leaves
  • 4 sprigs fresh thyme
  • 2 cups hearty red wine
  • 6 cups chicken stock
  • 1/4 cup flat-leaf parsley, chopped
DIRECTIONS

Remove beef short ribs from brine and pat dry. Discard brining liquid.

In a shallow dish add the flour + 1/2 teaspoon salt + 1/2 teaspoon fresh ground black pepper + 1 teaspoon paprika and mix. Dredge the beef short ribs in seasoned flour and set aside.

In a dutch oven heat 2 tablespoons of extra-virgin olive oil on medium high. When hot enough, add the short ribs and sear on each side for 4 minutes, or until they are light golden brown all over (about 12 to 16 minutes total). 
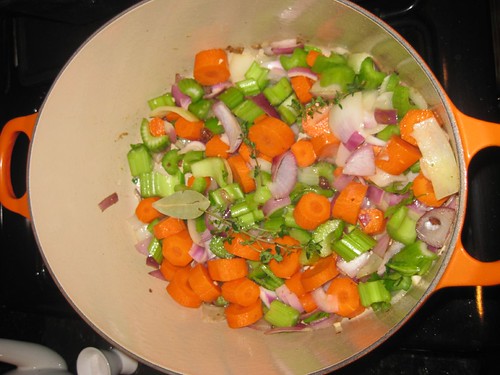
Remove from pan and set aside. Add the chopped onions, carrots, and celery and saute for 5 to 8 more minutes.

Next add the garlic, bay leaves, and thyme. Cook for 2 more minutes, making sure not to burn the garlic. Add the red wine and ring to a boil and simmer for 5 minutes. Make sure you scrape up the browned bits at bottom of pan.

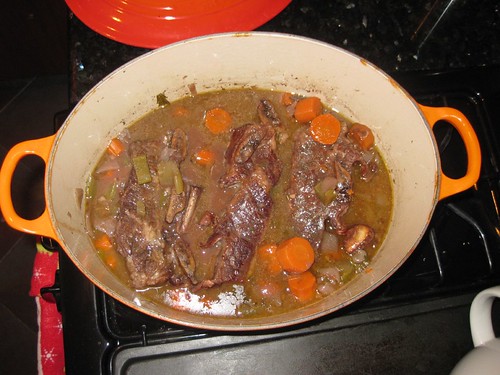
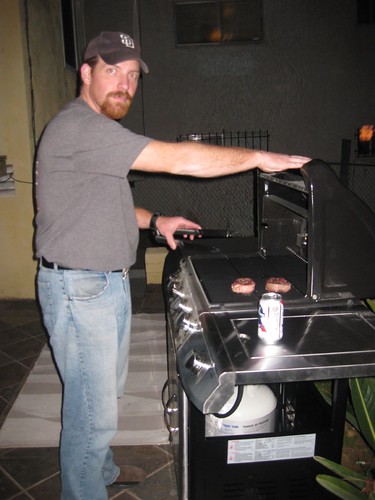
Arrange ribs in the pot, laying flat, bones standing up, in one layer. Then add the chicken stock and bring to a boil again for one minute. Lower heat to a simmer and cook, covered, for 2 1/2 to 3 hours, or until beef is tender and falling off the bone. Make sure your lid is tight fitting. You can also add a layer of parchment paper over the ribs or foil underneath the lid to maintain the heat.

About 10 minutes before serving, remove the lid and parchment or foil, if any, and remove the bay leaves. Raise heat to medium-high and let juices thicken a bit more. Add the chopped fresh parsley and serve.

    Wednesday, January 14, 2009

    Pork Posole

    Photo: Lisa, champaign-taste.blogspot.com
    This recipe is from my friend and Lindsey's dad, Dave Baggs, who has some wonderful, easy Mexican recipes. Dave is currently somewhere in Mexico having the time of his life and enjoying his retirement. He made this delish pot of soup when he was here visiting us last month and I don't think there were any leftovers.

    Posole is usually something we eat on Sunday's or for special occasions or on cold, rainy days. This is a really flavorful soup and you need to garnish it with chopped cilantro, onions and avocados so that you get the authentic Mexican flavor. And don't forget to squeeze a little lime juice in it and enjoy with warm corn tortillas. Buen provecho!

    INGREDIENTS (serves 6 - 8)

    Posole

    • 2 medium onions, chopped
    • 5 cloves of garlic, finely chopped
    • 1 (7oz) can chopped green chilies
    • 2 Tbsp. pork or bacon fat or olive oil
    • 3 lbs. cubed pork, preferably pork shoulder cut into 1-cubes
    • 2 (30oz) cans hominy
    • 8 cups water
    • 6 chicken bouillon cubes
    • 1 tsp. oregano
    • 1 tsp. cumin
    • 2 Tbsp. chili powder
    • 1/2 tsp. black pepper
    Garnishes
    • Chopped cilantro, for garnish
    • 1/4 cup finely chopped onions, for garnish
    • 6 radishes, thinly sliced, for garnish
    • 1 large or 2 small ripe Hass avocados, diced, for garnish
    • 2 limes, cut into wedges
    • Corn tortillas, warmed
    DIRECTIONS

    In a very large pot saute the onions, garlic and green chilies in pork or bacon fat for 10 to 15 minutes over medium heat.

    Raise temperature to medium-high and add the cubed pork and brown all over, about 10 more minutes.

    Next add the remaining posole ingredients an bring to a bubble. Lower heat to cook at a simmer, uncovered, for 45 to 60 minutes until the meat and hominy are tender and soup has slightly thickened. Taste for seasoning and add salt, if necessary.

    Serve in large bowls, topped with garnishes.

    Monday, January 12, 2009

    Vegetarian Wontons

    I have a friend, Kristen Piotrowski, who is from Buffalo, NY and she now lives here in San Diego. One would think that Kristen's absolute favorite food are Buffalo wings, but I was completely shocked when she told me she's a vegetarian. So, now that I am resurrecting our cooking club I'm on a mission to make good, tasty vegetarian dishes. This wonton recipe is very tasty and they make great appetizers for a large party. If you're allergic to peanuts, you can use vegetable oil, but again be careful with the hot oil.

    INGREDIENTS (makes about 30 wontons)

    • 1 package wonton skins (about 30 - 35)
    • Hoisin sauce, for dipping
    • 3 tablespoons oil for stir-frying
    • 2 cups peanut oil for deep-frying
    Filling:
    • 1 tablespoon peanut oil
    • 1/4 cup carrots, finely shredded
    • 1/2 cup cabbage, finely shredded
    • 1/4 cup bean sprouts
    • 2 tablespoons finely chopped garlic
    • 1 tablespoon dark soy sauce
    • 3 tablespoons mashed bean curd
    • 1 teaspoon sugar
    • 1/2 teaspoon salt
    • 1 teaspoon sesame oil
    • 1/2 teaspoon freshly ground black pepper
    DIRECTIONS

    For the filling: heat a wok or large frying pan and add 3 tablespoons oil. When moderately hot, add the carrots, cabbage, bean sprouts, and garlic and stir-fry for 1 minute. Set aside to cool thoroughly.

    Combine the cooled vegetables with the rest of the filling ingredients and mix well. Using a teaspoon, put a small amount of filling in the center of each wonton skin. Bring up 2 opposite corners, dampen the edges with a little water, and pinch them together to make a triangle. Fold over the bottom 2 corners so they overlap, and press together. The filling should be well sealed in.

    Heat the 2 cups of peanut oil in a deep fat fryer or large wok until hot. Deep-fry the filled wontons in several batches. Drain on paper towel. Serve at once with hoisin sauce.

    Sunday, January 11, 2009

    San Diego Super Chargers Cocktail

    Photo: James Wojick, Vogue Studio Campaign
    I hate to admit it, but I didn't think the San Diego Chargers would be in this situation this year. I mean, think about about it? Our season started AWFULLY. We lost the first two games, and ended the season at 8 and 8. And yet, through luck, hard work and lots of karma, we made the playoffs!!! I have to admit it, I was ready to admit defeat but we made it. We defeated the Colts, but now comes the real test with the Steelers. So, no matter what happens today, I think we all need to have a Chargers cocktail, right? Comon, they made it this far!!!

    INGREDIENTS

    • 2 oz Tequila
    • 1 oz Blue Curacao
    • 1 oz Triple Sec
    • 1 oz Lime Juice
    • Margarita Salt
    • Garnish: Lime Wedge
    DIRECTIONS

    Mix all ingredients in a cocktail shaker with ice. Strain into a margarita glass rimmed with salt (optional). Garnish with lime wedge.

    (This is actually a Blue Margarita cocktail, but the colors are SO Super Chargers!! Recipe and picture from CocktailTimes.com)

    Friday, January 09, 2009

    Shredded Chicken Puffy Tacos

    This puffy taco recipe is totally a Tex-Mex invention, and I love it. I believe you can only find these tacos in San Antonio and Austin, although I'm sure there are some places out there that serve them, too. This is not a complicated recipe at all, the most difficult part is making the indention in the tortilla as it fries to form the taco shell. Just be careful because the oil is hot and I did burn my fingers a couple of times making these.

    The shredded chicken recipe below is just your everyday recipe I grew up on. You don't need to add anything fancy like cumin or marjoram, but you can if you like. Also, you can fill your puffy taco with seasoned ground beef or just refried beans and cheese. No matter what filling you use, these are quite delish and yes, quite fattening, too.

    Puffy Tortilla

    INGREDIENTS (makes 14 tacos)

    • 3 cups corn tortilla mix
    • 1/2 tablespoon salt
    • 2 1/4 cups warm water
    DIRECTIONS

    Combine all ingredients in a large bowl and mix thoroughly. When the dough is consistent begin rolling dough balls about the size of a ping pong ball.

    Using a tortilla press that is lined in a thick plastic, press out the dough. You use the plastic (it can be a Ziploc bag that has been cut) so that the dough does not stick to the tortilla press.

    Meanwhile have a deep pot filled with cooking oil approximately 2 inches high and heated to 250 degrees. Drop the flat tortilla in the hot oil and using a metal spatula repeatedly douse with the oil. You will see that it will begin to puff up. Flip it over and using the spatula make an indention in the middle of the tortilla to form a taco shape. 
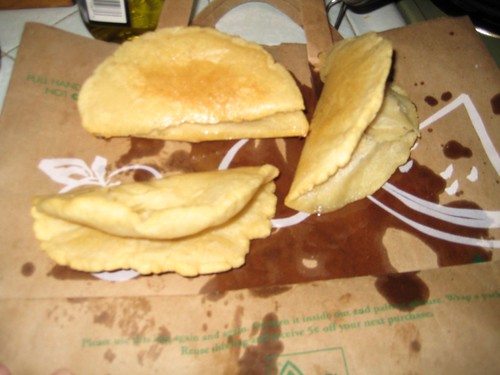
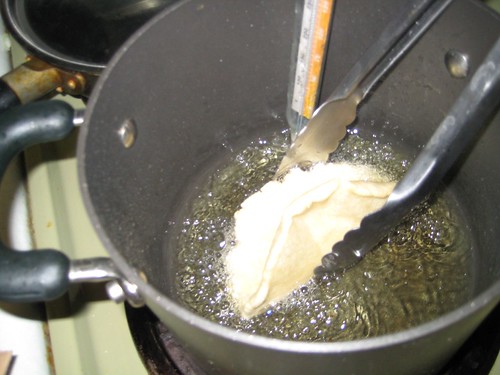
Remove from oil and allow to drain on top of brown paper bags.

    Shredded Chicken

    INGREDIENTS

    • About two cups of cooked, shredded chicken
    • olive oil
    • 1 medium onion, chopped
    • 1 tomato, chopped
    • 1 garlic clove, finely chopped
    • 1/4 cup finely diced red bell pepper (about half a bell pepper)
    • 1 (8oz) can El Pato tomato sauce (use the jalapeno one if you like it to be spicy)
    • About 1/4 low sodium chicken stock, if needed
    • Salt and Pepper

    DIRECTIONS

    In a large skillet add 1 tablespoon olive oil on set to medium-high. Add the onion and saute until soft, about 4 minutes. Add the red bell pepper and saute another 4 minutes. Next add the chopped tomato and garlic and saute until garlic becomes fragrant but doesn't burn, about 1 minutes. Add the chicken and tomato sauce and reduce heat to medium. Cook another 8 to 10 minutes, just until all flavors combine and chicken is heated through. If sauce is too thick, add a little chicken stock to get to your desired consistency. Taste for seasoning and add salt and pepper, as needed. This shredded chicken tastes even better the next day.

    To assemble puffy tacos: Fill each puffy taco shell with shredded chicken, guacamole, and cheese or your favorite filling. Top with shredded lettuce and diced tomato. Yummers!

    Thursday, January 08, 2009

    Grilled Filet Mignon Wrapped in Bacon

    My hubby is back in town, YAY! And what is the first thing Matthew did? Purchase a grill, of course! I know right now is not "grillin' season" in some parts of the country, but a true griller would tell you every day is a grill day.

    So, I wanted him to grill something special, yet not too complicated. I thought of rib eye, but then I saw filet mignon on sale. I know grilling filet mignon is a little tricky because the meat is so tender and you definitely don't want to burn it, but you do want it a little on the medium-rare side. And since this was the first time we were testing our grill, it was chance we had to take.

    Thankfully, the grill is AWESOME! Filet mignon came out perfect and the recipe is probably one of the easiest ever. And yes...we're probably going to grill everyday now!

    INGREDIENTS (serves 2)

    • 2 filet mignons medallions
    • 2 slices of bacon
    • 2 toothpicks
    • Olive oil
    • Salt and pepper
    DIRECTIONS
    1. Place filets in kitchen counter and let them come to room temperature (about 30 minutes--your patience will be rewarded). If you have a dog, put the steaks somewhere safe!
    2. Pre-heat your grill on medium-high heat. Set it up for direct heat grilling.
    3. Wrap a piece of bacon around each filet mignon medallion and secure with a toothpick. Drizzle a little olive oil on both sides of each medallion and salt and pepper each side.
    4. Place the meat on the grill and DO NOT MOVE IT. Let it sear for about 3 minutes (for medium rare) with the lid down. After about 3 minutes, lift, turn your steak 90 degrees and then set it back down for another 3 to 4 minutes (again, for medium-rare, a little more if you have to have it more done) again with lid down. This will give you cool looking grill marks.
    5. Flip the steaks for the one and only time. Gently lift, flip and set it back down in the same spot and leave it alone again for about 3 to 4 more minutes. Repeat step 4 above.
    6. Once the filet mignon are done to your liking, remove from grill and lightly cover with foil (don't wrap it in foil, though). Let it cool for 5 to 7 minutes and serve immediately--and don't forget to remove the toothpick.
    howyoudoin?

    Tuesday, January 06, 2009

    Rosca de Reyes

    Dearest readers (or should I say reader?):

    I apologize I have not updated my blog in a while but I'm still under the weather, although I'm feeling much better. Unfortunately my appetite has not come back full force yet, so I haven't had the urge to cook anything.

    I've been surviving on food my mom was bringing me (yes, sometimes even the grown up adults need a little mommy time) and leftovers tamales I froze. I'm happy to announce, though, that last night I was feeling good enough to go grocery shopping and it was the first time in years that I spent over $100!!!

    So for the coming week I have some braised beef short ribs in mind; homemade Bolognese sauce; filet mignon wrapped in bacon, and a great spicy shredded beef recipe you will not believe how easy and good it is...but you'll just have to wait.

    During my shopping excursion last night I stopped at Panchitas, our local Mexican bakery and I was happy to run into a plethora of Rosca de Reyes or Kings Cakes, they had for sale. I didn't buy one because they were quite big, but basically this is the history about the Rosca de Reyes (I'm going by what my grandparents told me): every year on January 6th (this is the date when the Three Kings arrived at the manger where Jesus was born) families get together to eat the Rosca de Reyes. Each person gets a piece of cake, but the catch is that there is a little baby Jesus hidden in the cake. So, the lucky person who gets the baby Jesus has to have a get together on Fat Tuesday (the day before Ash Wednesday). It's basically just an excuse to have a party and drink and eat...which is fine by me!

    INGREDIENTS

    • 1 packet yeast
    • ¼ cup of lukewarm milk
    • 3 1/2 cups flour
    • 3/4 cups of sugar
    • 7 eggs
    • 125 grams butter, melted
    • 1/4 tsp. aniseed
    • 100 grams raisins
    • 1 tsp vanilla
    • 2 teaspoons of cinnamon
    • Pinch of salt
    • 50 grams candied figs
    • 50 grams candied orange
    • 50 grams candied lemon
    • 50 grams candied cherries
    • 50 grams candied citron
    • 1 beaten egg
    • sugar
    • flour, for dusting
    DIRECTIONS

    Dissolve the yeast in the lukewarm milk.

    Mix the flour, dissolved yeast, sugar, eggs, melted butter, cinnamon, aniseed, raisins, vanilla and salt. Knead for five to ten minutes until pliable. Place in a bowl, cover with a tea towel and place somewhere warm to rise (1-2 hours). Meanwhile cut the candied fruits into strips.

    Form the dough into a ring or rosca. Add the baby Jesus figurine.

    Place the ring on a baking tray decorating the top with the candied fruit. Leave to rise again for 20-30 minutes.

    Preheat oven to 360° F ( 180°C)

    Brush the rosca with beaten egg and sprinkle over with sugar. Bake for 40-45 minutes.

    Remove from the oven and serve to celebrate Christmas the Mexican way. Remember, tradition says that whoever finds the figurine of the baby Jesus has to host the next party!

    Thursday, January 01, 2009

    Baked Spicy Chickpeas

    Well, it's January 1st and our New Year's resolutions shall start again. This time my resolution is to eat more healthy foods and get more legumes and veggies in my diet. Since I've been so sick since Monday, I've been living on tea and chicken broth, but today I decided I wanted a snack. I could not find anything in the house to snack on except a can of chickpeas. So, after getting some ideas from other blogs, I came up with this spicy baked chickpeas. They are so addicting to snack on...I ate the entire thing!

    INGREDIENTS

    • 1 can garbanzo beans (chickpeas)
    • 2 Tablespoons olive oil
    • 1/2 tsp. ground cumin
    • 1/2 tsp. cayenne
    • 1/4 tsp. ground coriander
    • 1/4 tsp. paprika
    • 1/4 tsp. ground black pepper
    • 1/4 tsp. kosher salt
    • 1/8 tsp. ground allspice
    DIRECTIONS

    Preheat oven to 400 degrees.

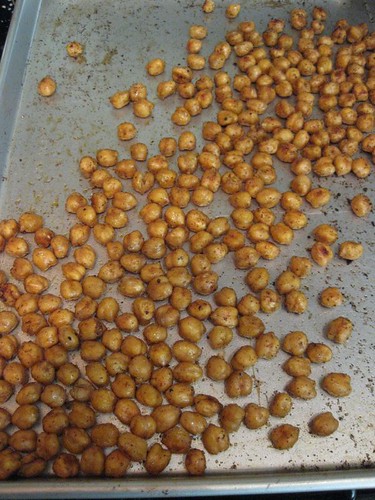
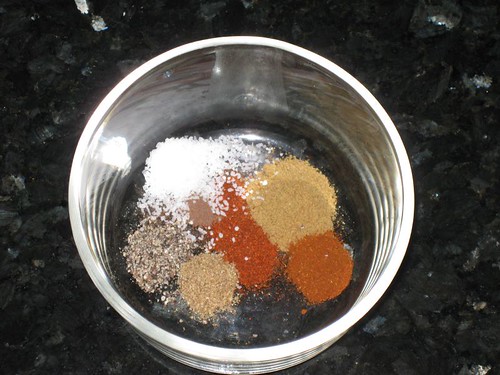
    Rinse the chickpeas, drain them and dry them well. Place in a bowl with olive oil, and all the spices. Mix well.

    Now place the chickpeas in a baking tray or into a shallow baking dish. Cook in a pre-heated 400F oven for 15 minutes. Give the pan a little shake and continue baking until crispy and golden on the outside, about 10 to 15 more minutes. You may want to bake them a little longer if you prefer a crispier snack. Sprinkle a little more kosher salt as soon as they come out, but let them cool a little before you devour them!