Wednesday, January 14, 2015

Polar Bear Ice Cream Treat

Courtesy Ranger Rick Jr. Magazine

I'd like to welcome my surprise blogger today, my 5 year-old daughter who will be the guest cook for today's recipe. It's not that I'm running out of recipe ideas (okay, maybe a little); it's just that I keep forgetting to write down my new recipes and/or take pictures of my creations.

This past Christmas my daughter received a magazine subscription to Ranger Rick Jr. from her MaMare and Jimmy Jam. In this month's issue (January 2015), this recipe appears on the inside back cover of the magazine. As soon as my girl saw it she immediately wanted to make it! I then made a quick trip to the store and bought the ingredients (actually, I only had to buy the ice cream and shredded coconut; I had loads of marshmallows leftover from the Christmas holiday).

This is a really great way to get your kids to start cooking and to follow recipes. Since my daughter is barely learning to read, I read the instructions out loud to her and she followed the steps.

This is a great treat for the kiddos and the adults, too!

INGREDIENTS (makes 1 snack)
  • 1 scoop vanilla ice cream
  • 5 marshmallows (note: I only used 3 large marshmallows and cut them in half.)
  • 2 tablespoons of shredded coconut
  • 6 raisins (3 whole raisins and 3 raisins cut in half) or (note: I only had currants so we used 6 currants).
DIRECTIONS:
  1. Place a scoop of ice cream on a plate.
  2. Use marshmallows to make ears, snout, and paws.
  3. Make eyes, claws, and a nose with raisins.
  4. Sprinkle with coconut all around.


Tuesday, November 04, 2014

Indian Potato Fritters (Aloo Bonda)


When I first received my Saveur Magazine, The India Issue (#167), many months ago, I could not put it down. Even today, I always have the magazine near my kitchen, ratty and creased with many corners turned in, standing by just in case I feel like making something great tasting and full of spices and flavors.

One of the first recipes I tried was the Aloo Bonda (potato fritters) which were gone almost as soon as I finished making them. They are accompanied by a tamarind sauce, but Sriracha tastes good with them as well. The hardest part about this recipe was finding the black mustard seeds, which I ordered thru Amazon.com. Luckily enough I live in an area where Indian and Middle Eastern stores are abundant and was able to find the rest of the ingredients. Like the black mustard seeds, if you can't find an ingredient in your area, try using Amazon.com or other online grocery shopping sites.


INGREDIENTS (MAKES 32 FRITTERS)
  • 1 lb. Yukon Gold potatoes, peeled and cut into 1" pieces
  • 3 tbsp. canola oil, plus more for frying
  • 1 tsp. cumin seeds
  • 1 tsp. ground turmeric
  • ½ tsp. black mustard seeds
  • 4 fresh or frozen curry leaves, minced
  • 1 (1½") piece ginger, peeled and minced
  • 1 small green Thai chile or ½ serrano, minced
  • ½ small yellow onion, minced
  • 2 tbsp. minced cilantro
  • 1½ tsp. red chile powder, such as cayenne
  • Kosher salt, to taste
  • 1 cup besan (chickpea flour)
  • ¼ cup rice flour
  • 2 tbsp. cornstarch
  • ¼ tsp. baking soda
DIRECTIONS

Boil potatoes in a 6-qt. saucepan of water until tender, 12–14 minutes. Drain and transfer to a bowl; using a potato masher, coarsely mash potatoes.

Add 3 tbsp. oil to pan; heat over medium-high. Cook cumin seeds, ½ tsp. turmeric, and the mustard seeds until fragrant and seeds begin to pop, 1–2 minutes. Add curry leaves, ginger, chile and onion; cook until golden, 4–6 minutes. Let cool slightly and add to bowl with potatoes.

Add cilantro, ½ tsp. chile powder, and salt; using hands, mix until smooth. Divide mixture into thirty-two ½-oz. balls.

Heat 2" oil in a 6-qt. saucepan until a deep-fry thermometer reads 350°. Whisk remaining turmeric and chile powder, the chickpea and rice flours, cornstarch, baking soda, salt, and ½ cup water in a bowl until a smooth batter forms.

Working in batches, dip potato balls in batter; fry, turning as needed, until golden and crisp, 1–2 minutes. Using a slotted spoon, transfer aloo bonda to paper towels to drain; season with salt.

Serve with coconut-cilantro and tamarind chutneys if you like.


Wednesday, March 26, 2014

Banana-Sweet Potato and Mexican Crema Bread

I have to admit, the name of this recipe is perhaps the longest I've ever created. But I figured since it has been eons since I posted any new recipes, this may make up for it.

Okay, not really. I tried.

So you're probably asking yourself, where have I been? Long story short....

  1. Got promotion at work, which means
  2. I am busier than ever, which means
  3. It's been months since I tested any new recipes, which means
  4. My camera is desperate for food porn...and
  5. Oh, yeah, we moved again!
Now that Stella and I are finally settled in our new, fancy-shmancy home, I will--no, I must--cook more, experiment more and just start having fun in the kitchen again. I was inspired on Monday, of all days, to make the bread because I had 2 over-ripe bananas, 1 sweet potato that has just been sitting in the basket for over 2 weeks, left-over Mexican crema I used last Sunday for chilaquiles and an overwhelming need to bake! And so, this bread was created. It is really moist and so good with coffee. Stella loves is warmed up slightly and slathered in butter! What kid doesn't, right? 

Enjoy!


INGREDIENTS (makes 1 loaf)
  • 3/4 cup white sugar
  • 1/4 cup brown sugar
  • 1 stick butter, softened
  • 2 eggs, beaten
  • 1/2 cup Mexican crema or sour cream
  • 1 1/2 cup all purpose flour
  • 1/2 tsp. salt
  • 1 tsp. baking soda
  • 1/2 tsp. vanilla extract
  • 1/4 tsp. cinnamon
  • 1/8 tsp. allspice
  • 1/8 tsp. ground nutmeg
  • 2 ripe bananas, mashed
  • 1 small sweet potato, boiled, peeled and mashed
  • 1/2 cups chopped walnuts (optional)

DIRECTIONS

Pre-heat oven to 350 F Degrees.

Grease 1 loaf pan.

Cream butter and sugar until smooth. Add eggs, vanilla extract and Mexican crema or sour cream and mix just until incorporated. Add flour, salt, baking soda, cinnamon, allspice and nutmeg, and mix again. Then add mashed bananas and mashed sweet potato and nuts. Mix for another 15 seconds or so. The batter will look curdled, so don't be alarmed.

Pour batter into the well greased loaf pan and bake at 350 F for 1 hour.

Let the bread cool in the pan for at least 10 minutes before taking it out.

Stella helping with the batter

Waiting for the "bee-nana" bread to be done.

Friday, November 01, 2013

Baking for Dia de los Muertos


For Dia de los Muertos most Latinos celebrate their dearly departed by remembering them with food, parties, spectacular altars, drinking and creating elaborate skulls and baking "pan de muerto" bread. It is actually a lot of fun and this will be the second year in-a-row that Stella and my family will be doing the "day of the dead" procession in Old Town, San Diego. It is truly is a family event but I have to say, it is VERY emotional.

I find that by making "Pan de Muerto" (bread of the dead) on All Saint's Day (Nov. 1) it makes me feel like I have my tios, my abuelito Tomas, my brother, and all our family that has left this world, with me, in the kitchen, watching me and most likely criticizing my baking technique. But that's what I love about day of the dead because we truly remember our lost loved ones and how much influence they had on us.

***

Okay, okay, I'm getting all emotional already writing this so I'll just move onto the recipe. This bread is lightly flavored with anise seeds, orange peel and sugar. The bread is often shaped into a large round, to symbolize the tomb or grave, with a smaller round on top, which symbolizes the head of the dead relative, and the lateral decorations, symbolizes the bones. I'm not entirely sure why the breads are shaped like this, but lately some fancy bakeries have been shaping them into skulls and even animal shapes, for the dead family pets. You can decorate the breads with colored sugars or gel food coloring, if you want. The best part is that you get to eat the bread, and believe me it's surprisingly good.

RIP Bobby, tio Manuel, tio Armando, abuelito Tomas, great-grandpa Burns, Lindsey and Jenn's mom, Barbara, baby Joanne, Abuelita de Sami and Cali, Annie, Fluffy and Princess. This world is not the same without you.


INGREDIENTS (makes 4 to 6 loaves)

Dough
  • 1/4 cup butter
  • 1/4 cup milk
  • 1/4 cup warm water (110 degrees F/45 degrees C)
  • 3 cups all-purpose flour
  • 1 1/4 teaspoons active dry yeast
  • 1/2 teaspoon salt
  • 2 teaspoons anise seed
  • 1/4 cup white sugar
  • 2 eggs, beaten
  • 2 teaspoons orange zest
Glaze
  • 1/2 cup white sugar, divided
  • 1/4 cup orange juice
  • 1 tablespoon orange zest 
DIRECTIONS

Heat the milk and the butter together in a medium saucepan, until the butter melts. Remove from the heat and add them warm water. The mixture should be around 110 degrees F.

In a large bowl combine 1 cup of the flour, yeast, salt, anise seed and 1/4 cup of the sugar. Beat in the warm milk mixture then add the eggs and orange zest and beat until well combined. Stir in 1/2 cup of flour and continue adding more flour until the dough is soft.

Turn the dough out onto a lightly floured surface and knead until smooth and elastic. Place the dough into a lightly greased bowl cover with plastic wrap and let rise in a warm place until doubled in size. This will take about 1 to 2 hours. Punch the dough down and shape it into 4 to 6 round loaves with a round knob on top and smaller ropes going down laterally (see picture). 
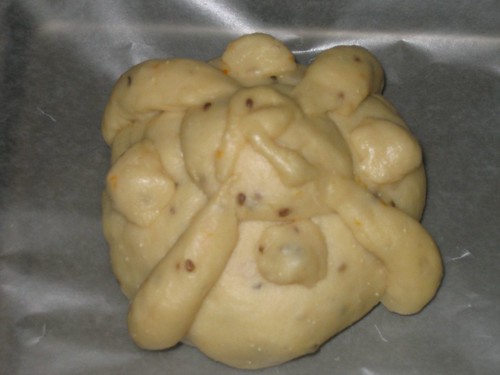
Place dough onto a baking sheet, loosely cover with plastic wrap and let rise in a warm place for about 30 minutes or until just about doubled in size.
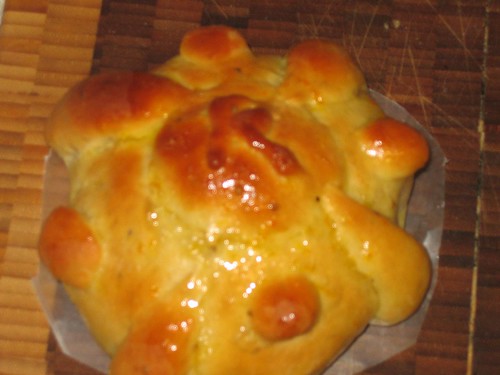
Bake in a preheated 350 degrees F oven for about 30 to 40 minutes. Remove from oven let cool slightly then brush with glaze.

To make glaze: In a small saucepan combine the 1/4 cup sugar, orange juice and orange zest. Bring to a boil over medium heat and boil for 2 minutes. Brush over top of bread while still warm. Sprinkle glazed bread with remaining 1/4 cup white sugar (as little or as much as you want!).


Wednesday, October 23, 2013

Chicken Tagine


Before you decide to make this recipe, go straight to the Preserved Lemon recipe below and make that first. Then come back in 3 weeks and then let's make the Chicken Tagine.

I'm patient. I'll wait.

Or...you can go to your local Middle Eastern market and buy ready-made preserved lemon, or you can buy it online. But, the point is, you need the preserved lemon in order to make this Moroccan dish work!

Now that we have all the ingredients, let's get ready to Tagine!

***

This recipe may have a lot of ingredients, but most of them are easily found or easily made (like the preserved lemon). And what helps me, and hopefully will help you, is that I am a big believer in mise en place which means, everything in its place. So even before I started making this (or any) recipe I always have all my ingredients washed and dried, cut, chopped, measured, and standing by and ready to go.

Finally, I am lucky I was gifted an authentic Moroccan tagine, so when I present this dish it gets a lot of ooh's and aah's. But if you don't have a tagine, you can cook your couscous and spread it in your favorite large, shallow dish or platter, then top with the chicken and the sauce.

And yes, I know I can cook in my tagine, but I'm a little apprehensive since I have never done it before. Hmm, I think it may be time for me to take a Moroccan cooking class!

I hope you enjoy this dish as much as my parents, my brother and his wife, my ex-laws and my co-workers did!
My mise en place. From top left: minced ginger, butter, Manzanilla olives, turmeric and cinnamon, preserved lemon and lemon zest on top, and minced garlic.

INGREDIENTS (serves 4)
  • 2 pounds chicken thighs and drumsticks
  • Kosher salt and freshly ground black pepper
  • 1 tablespoon butter
  • 2 tablespoons olive oil
  • 1 onion, chopped
  • 1 tablespoon fresh ginger, minced
  • 1 teaspoon turmeric
  • 1/2 teaspoon ground cinnamon
  • 3 cloves garlic, minced
  • 1 teaspoon chicken base
  • Zest of one lemon
  • Juice of one lemon
  • 1/4 cup white wine
  • 1/2 cup chicken broth
  • 1 preserved lemon (4 quarters), rinsed, pulp removed, and chopped (recipe below)
  • 1/2 cup sliced Manzanilla olives with pimentos, drained
  • 1/4 cup chopped fresh flat-leaf parsley
  • 1/4 cup finely chopped fresh cilantro
  • Couscous, for serving
DIRECTIONS

Pat the chicken dry, and season well with salt and pepper.

Heat the butter and olive oil in a Dutch oven over medium-high heat. When pot is hot add chicken and brown on all sides, about 6 minutes per side, 12 minutes total.
Remove chicken and set aside.

Add the onion, ginger, turmeric, cinnamon to the pot and cook until onion is translucent, about 4 minutes. Add one teaspoon chicken base and add the garlic and lemon zest and stir for a minute. Taste and add more salt and pepper, if needed.

Add the browned chicken back into the pot and increase heat. Deglaze with wine, stirring, and allowing it to bubble. Next, add the chicken broth, lemon juice and bring to a boil. Lower the heat and cover and simmer gently for 40-45 minutes, or until chicken is done and cooked through.

To the sauce, add the preserved lemon, olives, parsley, and cilantro and heat for 5 more minutes and serve over couscous.


Preserved Lemon


INGREDIENTS
  • 3 lemons, preferably organic, skin scrubbed well and each cut into quarters
  • 3 Tablespoons Kosher salt
  • 4 peppercorns
  • 4 coriander seeds
  • 1 bay leaf
  • 1 lemon, juiced
DIRECTIONS

In a pint jar make layers of lemon, salt, peppercorns, coriander seeds, and repeat, making sure to press firmly after each layer and making sure to use all the spices. Tuck in the bay leaf and add the lemon juice. Slowly cover with water. Let stand at room temperature for 1 hour. Add more water, if needed, to cover the lemons. Close the jar tightly and store in the fridge for 3 weeks.

To use: Remove lemon from the liquid and rinse. Scrape out the pulp. Slice the lemon peels into thin strips or cut into small dices. 

Thursday, October 03, 2013

Stella's Krabby Patties

Well, hello! I know it has been a while since I posted a new recipe and I wished I had a good excuse, but all I can say is that work has been keeping me quite busy and all you smartphone aficionados will thank me next year.

But I did manage to come up with a kid-friendly recipe this week. Although I do eat meat, we rarely eat it at home and we specially rarely eat hamburgers. The main reason: my daughter does not eat meat. Very rarely will she eat chicken, but beef...don't even think about it.

So I decided to try a little Jedi mind trick on my girl and told her I was making "krabby patties" and asked her if she wanted to help me. Well, not only did she help me, but she also told me how to hold the spatula like Sponge Bob and explained to me exactly how many pickles a krabby patty needs to have (yes, I'm beginning to think she's been watching too much Sponge Bob Squarepants lately). Most importantly, she actually ate her "krabby patty!"

Nevertheless, this is what I came up with. I put very little seasoning on the meat because I find that little kids sometimes don't like a lot of seasoning. But you can season with a little salt and pepper while the meat is sizzling on the pan to add more flavor.

Finally, I cooked these a medium to medium-well, again because I don't want to get my kid sick, but for us adults, cook only a minute per side for a medium-rare--if you like medium-rare like I do!

And just a mommy side note: don't let your kids cook without you being 100% in front, supervising them, specially if using a stove. My daughter has grown up watching and helping me cook and I have ingrained in her head the hazards of hot stoves and ovens and that she can only cook while I'm watching her. Just a reminder to be careful when your kids are helping you in the kitchen.


INGREDIENTS (makes 8 sliders)


  1. 1 pound ground beef (87/13 or 90/10)
  2. 1/8 tsp. seasoning salt
  3. 1/8 tsp. garlic pepper
  4. 1/8 tsp. garlic powder
  5. 1/8 tsp. kosher salt
  6. a few grinds of pepper
  7. 1 egg
  8. Slider buns or Hawaiian buns
  9. Slices of American cheese, cut to fit the sliders
  10. Ketchup
  11. Pickles
DIRECTIONS

In a large bowl combine first 7 ingredients and, using your hands, gently combine them all. Divide meat into 8 portions and roll them into balls (these are slider-sized burgers).

Heat a cast iron or nonstick skillet to medium high. Lightly brush with oil with a paper towel. When hot enough, add four of the balls and wait 30 seconds. With your handy spatula, smash the burgers down to about 2" to 2-1/2" diameter, making sure they are all about the same thickness, and let them sizzle another minute. 

Turn them over and add your slice of cheese. Cook for another minute for medium or two minutes for well done.


Remove from skillet and let rest a couple of minutes. Meanwhile, finish cooking the rest of burgers.

To build a proper Stella krabby patty place a burger on bottom bun, add a little ketchup and two pickle slices then place the top bun.


Friday, July 26, 2013

Cilantro-Lime Basmati Rice


Believe it or not, cooking rice is my Achilles' heel. I think that I just like to experiment and tinker with quantities so much that my rice either comes out underdone or gummy and over-cooked. So, I've taken advice and realized that when it comes to rice cooking, you either have to follow directions or you use a rice cooker. I know eventually I'll get the "formula" right but this time I followed directions...somewhat. I only tweaked the type of rice I used and I added more Serrano peppers to mine (I like it spicy), and I added the lime zest and juice at the end. Anyhoo, here it is, my first somewhat-nice-looking-rice I have ever done!

INGREDIENTS (serves 6)
  • 3 cups packed cilantro leaves (about 3 ounces)
  • 3 medium garlic cloves
  • 2 medium serrano chile, halved lengthwise and seeded
  • 3 1/2 cups low-sodium chicken broth
  • 1 tablespoon vegetable oil
  • 1/2 cup minced yellow onion
  • 2 cups Basmati rice (I used Fresh and Easy basmati rice that is already pre-soaked; original recipe calls for 2 cups long grain white rice)
  • 1 teaspoon of kosther salt (original recipe calls for 1 tablespoon of salt, so you can add a little more if you're a salty type of person) 
  • Zest of one lime
  • The juice of the lime
  • Wedges of lime, for garnish (optional)

DIRECTIONS


Combine cilantro, garlic, chile, and 2 cups broth in a blender and process until smooth; set aside. 

Heat oil in a large frying pan over medium-high heat. When it shimmers, add onion and cook until softened, about 2 minutes. Add rice and salt stir to coat in oil and cook until rice becomes lightly browned, about 4 minutes. 

Carefully pour the cilantro mixture and the remaining 1 1/2 cups broth into the rice and stir to combine.


Bring mixture to a boil then reduce heat to low so rice is at a simmer. Cover and cook until rice is tender, about 15-20 minutes. Turn off heat. Add the zest and lime juice, fluff with fork and let rice rest covered for 5 minutes. Fluff with fork again, garnish with lime wedges and serve.

Tuesday, June 25, 2013

Diva's Beer-n-Bacon Cupcakes


I admit it: I have a love affair with pork. I've made everything from braised pork belly to chile verde pork to chocolate-covered bacon to bacon-garlic-sauce. I think I love the pig so much because it has that ability to be transformed into a roast, chops, bacon, schnitzel, sausages, etc. But my favorite pork product has got to be bacon. I love the fact that you can take a salty, crispy, sometimes smokey, meat and use it in desserts.

This recipe for beer-n-bacon cupcakes is probably my favorite because you use a cake mix and they are quite moist and rich but not overly sweet. Make sure you use the Betty Crocker brand because I only tested this recipe with that brand and don't over-sweeten the whipped cream.

Lastly, if you ever have any left over bacon from your Saturday morning breakfast (not that you would, of course), you can reuse it as the topping!

INGREDIENTS (makes 16 - 20 cupcakes)
  • 1 box Betty Crocker Supermoist Butter Recipe Yellow Mix
  • 1 bottle of beer (12 ounces, preferably a Stout or IPA)
  • 1 stick butter, softened
  • 3 eggs
  • 6 strips of crispy cooked bacon, chopped or crumbled
  • Half pint of heavy whipping cream
  • 1 tablespoon superfine or regular sugar
  • 1/2 teaspoon vanilla extract

DIRECTIONS

Preheat oven to 325°F. Line 2 nonstick cupcake pans with cupcake liners.


In a large bowl add cake mix, beer, butter and eggs. Beat with an electric mixer on low speed for 30 seconds, then on medium speed for 2 minutes, scraping bowl occasionally. Fill cupcake liners three-quarters full with cake batter and bake according to package directions, generally 19 to 24 minutes. Let cool completely before frosting.

Meanwhile, add the heavy cream to a bowl and 1 tablespoon of sugar and 1/2 teaspoon vanilla extract and beat with an electric mixer until soft peaks form or to your desired whipped cream consistancy.

Remove cupcakes from pan and frost each with the whipped cream then sprinkle each equally with the crumbled bacon. Mmmmm, bacon...

my buddy, Scott, enjoying a beer-n-bacon cupcake


Sunday, June 09, 2013

Chakalaka-Khaaan!


Today I saw my friend, Robin. The last time I saw her we were graduating from high school...23 years ago!!! Yet, it seemed like I had not seen her in 23 days. We picked up right where we left off and meeting her wonderful family was such a treat. When I found out her husband was from South Africa, I immediately knew I had to give chakalaka a try.

Chakalaka is a SA condiment that is found in most households, and sometimes they put beans in it, but I like is sans beans. You can add chakalaka to top your sausages, top your quiche or eggs, or even use it as a salsa on tortilla chips. Anyhoo, this is my tribute to my good friend, Robin, her awesome family, the ever righteous Nelson Mandela and to the greatest Star Trek villain ever....Khannnnnn!!!!!

INGREDIENTS (makes 3 cups)

  • 2 Tablespoons olive oil
  • 2 White or yellow onions, choppep
  • 2 Bell peppers, seeded and chopped
  • 2 Jalapeno peppers, seeded and finely minced
  • 1 Serrano pepper, seeded and finely minced
  • 4 Garlic cloved, minced
  • 1/2 teaspoon fresh ginger, finely minced
  • 3 Large tomatoes, chopped
  • 2 heaping Tablespoons brown sugar
  • 2 teaspoons Curry powder
  • 1/2 teaspoon ground cumin
  • 1/4 teaspoon ground corriander
  • 1/4 teaspoon ground cinnamon
  • 1/4 teaspoon red pepper flakes
  • 1/4 cup chopped cilantro
  • salt and pepper to taste
DIRECTIONS 

Heat the oil in a large saucepan over medium-high heat. Add the onions, bell peppers and chile peppers.Saute, stirring frequently, until the onions and peppers are cooked down and wilted, about 8 minutes. Add the garlic, ginger, curry powder, cumin, coriander and cinnamon. Cook until fragrant, another 5 minutes.

Stir in the tomatoes, red pepper flakes and bring to a boil. Reduce heat to medium-low and simmer for about 5 minutes. Add the brown sugar and 1 teaspoon kosher salt and 1/2 teaspoon ground, black pepper. Taste and add more salt or pepper, if needed. Remove from heat and stir in the cilantro. Let the chakalaka stand for 10 to 15 minutes before serving. Serve either hot or cold. You can keep in the fridge for up to 4 days.

Wednesday, May 22, 2013

Swiss Onion Tart


I have come to the conclusion that I don't like Gruyere...I freakin' LOVE it! What's interesting to me is that this cheese has always been around me, I just never really, really tasted it, nor really cared for it unless it was in fondue or some melty casserole.

But then last week I found out that my daughter actually has documented Swiss heritage--it's on Ancestry.com, I checked!--and, well, of course, this explains why she is a cheese aficionado and a chocoholic and loves everything leche. So, then her preschool teacher told me last week that their school is having a multicultural fair and Stella's classroom is representing Switzerland. Hello?!?!!??

Of course you know I was going to try to find a Swiss recipe to test and then bring to her class. And besides cookies and chocolate or pancakes or muesli or recipes using Swiss chard--really?--it was really hard to find a true, authentic savory, Swiss recipe. Finally I came upon a caramelized onion and Gruyere turnover recipe that I was sure I could make for my daughter's school.

One thing I did is omit the homemade pastry and used ready-made puffed pastry instead. Also, I only used  6oz of Gruyere since I wasn't sure how much Gruyere little preschoolers could take. Lastly, I added a small amount of mozzarella and the entire egg/milk mixture was my own addition to make the tart more creamy and kid-friendly. If you don't want to make two tarts, you can totally cut the recipe in half. It still works!

I'm really hoping the kids and parents like my Swiss Onion Tart tomorrow. Auf Wiedersehen!

INGREDIENTS (makes 2 tarts)

The onion mixture:
  • 6 large yellow onions, thinly sliced
  • 2 Tbsp. olive oil
  • 3 Tbsp. Butter
  • Kosher Salt
  • Fresh ground Pepper
  • 1/2 tsp dried thyme
  • 1/2 tsp Sugar
The Tart:
  • 1 package puff pasty (Pepperidge Farm), thawed
  • 6 oz. Gruyere cheese, shredded
  • 2 oz. shredded mozzarella
  • 4 eggs
  • 1/2 pint heavy cream
  • 2 Tbsp. chopped fresh parsley
  • Fresh ground pepper
DIRECTIONS

First, make the caramelized onions: You can do this the day before (I did!) then just store in the fridge, up to 4 days, until ready to use.

Get yourself a really large, heavy bottomed pan, and heat to medium-high. Add 3 tablespoons butter and 2 tablespoons olive oil. Add the onions and mix well with the oil and butter then just wait...this is going to take about 35 to 45 minutes.

At first the onions will just sweat and seem like nothing is happening, but after 10 minutes add 1/4 tsp kosher salt and 1/2 tsp dried thyme, continue cooking and mixing another 15 minutes, then add 1/2 tsp. sugar and a few grinds of fresh ground black pepper. Continue cooking and mixing and about 10 minutes more (approximately the 35th to 45th minute mark) your onions will just start to caramelize instantly. Don't let them caramelize too much, you want a deep golden, brown color. Once you get there, remove from heat and let them cool completely to room temperature.

Heat oven to 350 degrees.

Make the filling:

In a large bowl add 4 eggs, 1/2 pint of heavy cream, the Gruyere and mozzarella cheese, 2 tablespoons fresh chopped parsley and several grinds of ground black pepper. Beat well with a fork or whisk. Add the cooled caramelized onions and beat until combined. Set aside.

Place a piece of parchment paper on two sheet pans and lightly spray with PAM or butter it.

On a lightly floured surface, roll out one sheet of puff pasty at a time to 9" x 13" rectangle. The fold in each side about 1/2" in. Dock (aka poking) the inside of the pastry, but not the edges, with a fork.


Then place a piece of lightly oiled foil inside pastry and add beans or baking weights.


Blind bake the pastries for 15 minutes. Remove from oven and let cool slightly. Carefully remove foil and beans.

Next, divide the onion-cheese filling and pour into each crust. Bake at 350 degrees for 20-25 minutes more. Check after 20 minutes and if filling is set and doesn't jiggle, it's ready.

Remove from oven. Let cool completely. Cut into squares and serve right away or at room temp or cold. No matter which temp you serve them, they are divine!

You can half the recipe and only use one puff pastry sheet and it comes out the same--I tried it!

Saturday, April 13, 2013

Jimmy Jam's Buttermilk Pancakes


Stella and I fell in love with these pancakes when we visited her Minnesota grandparents last Thanksgiving. Grandpa Jim (who Stella affectionately calls, Jimmy Jam) has been making these pancakes forever. I finally got the recipe and I was astonished as to how many of these pancakes my little girl can chow down. As Jim told me, "the trick to pancakes is minimal mixing...just enough to almost get dry ingredients wet. And don't forget to add the love!"

INGREDIENTS (adapted from Fanny Farmer)

In a large bowl sift together:
  • 1 cup flour
  • 1/2 tsp. salt
  • 1/2 tsp. baking soda
  • 1 Tbsp. sugar
In a 2 cup measuring cup blend:
  • 1 cup buttermilk
  • 1 egg
  • 2 Tbsp. melted butter
DIRECTIONS
Add the buttermilk mixture to dry ingredients and minimally mix. Do not over stir! The batter will be slightly thick, but don't be tempted to add any more milk. Let stand 10 minutes.


Meanwhile, heat a lightly oiled griddle or frying pan over medium high heat. Scoop the batter onto the hot griddle, using approximately 1 heaping tablespoon (or more depending on how big you want your pancakes). Brown on both sides and serve hot.


Monday, April 01, 2013

Holy Coconut Cake, Batman!

First and foremost, if you've never opened a real coconut, go online and check out the YouTube video how-to's because I seriously felt like I was in a Tom and Jerry cartoon when I was trying to open my coconut for this recipe. Once I went online, I was like a pro at opening it.

Second of all, USE A REAL COCONUT. For my peeps in the West Coast, I know we can find coconuts pretty much every where specially in the Asian or Mexican markets. I know this may not be possible in other parts of our country and in that case, use unsweetened coconut flakes and a good, plain coconut water--these are sold pretty much in every grocery store now.

Lastly, don't give up. This cake is a labor of love and you need some time management. If you're a busy person, like me, this is what I did: I grated the coconut three days before, then made the cake two days before and the frosting the day of--which was Easter.

This cake was, simply, quite spectacular. The recipe came straight from my Saveur magazine, which I am so happy to be subscribed to, really! Of course, I did a few changes, but they were minor. I basically just reduced the amount of sugar to both cake and frosting. Still, the cake was fabulous and this is definitely one of those special occasion cakes. Happy baking!

INGREDIENTS (serves 10 - 12)

FOR THE CAKE:
  • 16 tbsp. unsalted butter, softened, plus more for pans
  • 2 1/2 cups cake flour, plus more for pans, sifted
  • 1 tsp. baking soda
  • 1 tsp. kosher salt
  • 1 cup buttermilk
  • 1 tbsp. vanilla extract
  • 1 1/2 cups sugar (original recipe calls for 2 cups)
  • 5 eggs
FOR THE FROSTING:
  • 4 egg whites
  • 1/2 tsp. cream of tartar
  • 1 1/2 cups sugar (original recipe calls for 2 1/4 cups)
  • 1/4 cup light corn syrup
  • 1 tsp. kosher salt
  • 2 tsp. vanilla extract
  • 3/4 cup fresh coconut water
  • 3 cups freshly grated coconut
DIRECTIONS
  1. Make the cake: Heat oven to 350°. 
  2. Butter and flour two 9″ cake pans, and set aside. 
  3. Whisk together flour, baking soda, and salt in a bowl; set aside. Whisk together buttermilk and vanilla in a bowl; set aside. In the bowl of a stand mixer fitted with a paddle, cream butter and sugar on medium-high speed until pale and fluffy, about 3 minutes. Add eggs one at a time, beating well after each addition. On low speed, alternately add dry ingredients in 3 batches and wet ingredients in 2 batches. Increase speed to high, and beat until batter is smooth, about 5 seconds. 
  4. Divide batter between prepared pans, and smooth top with a rubber spatula; drop pans lightly on a counter to expel large air bubbles. Bake cakes until a toothpick inserted in middle comes out clean, about 35 minutes. Let cakes cool for 20 minutes in pans; invert onto wire racks, and let cool. Using a serrated knife, halve each cake horizontally, producing four layers; set aside.
  5. Make the frosting: Place egg whites and cream of tartar in the bowl of a stand mixer fitted with a whisk, and beat on medium-high speed until soft peaks form; turn mixer off. 
  6. Bring sugar, syrup, salt, and 1/2 cup tap water to a boil in a 2-qt. saucepan over high heat, stirring to dissolve sugar; attach a candy thermometer to side of pan, and cook, without stirring, until thermometer reads 250°, 4–5 minutes. 
  7. Turn mixer to medium speed, and very slowly drizzle hot syrup into beating egg whites. Add vanilla, and increase speed to high; beat until meringue forms stiff peaks and is slightly warm to the touch, about 3 minutes.
  8. To assemble, place one layer on a cake stand, drizzle with 3 tbsp. coconut water, spread with 1 1/2 cups frosting, and sprinkle with 1/2 cup grated coconut; top with another cake, drizzle with 3 tbsp. coconut water, spread with 1 1/2 cups frosting, and sprinkle with 1/2 cup coconut. Place another cake over frosting, drizzle with 3 tbsp. coconut water, spread with 1 1/2 cups frosting, and sprinkle with 1/2 cup coconut; top with remaining cake and drizzle with remaining coconut water. Cover top and sides with remaining frosting, and cover outside of cake with remaining coconut, pressing it lightly to adhere; chill cake to firm frosting. Serve chilled. 

Sunday, March 03, 2013

Baba Ganoush


When life gives you eggplants, make baba ganoush!

I can not express how good this recipe is. In the original recipe I found here, you're supposed to grill the eggplant first then bake it in the oven for 15 minutes. Since it was a perfect day here in San Diego, I was not going to turn the oven on and I forgot to refill the fuel tank for the gas grill, so I ended up blistering the eggplant in my favorite cooking tool, my comal. The coriander, paprika and vinegar are my tweaks to this recipe, but you can omit them and just use fresh lemon juice if you rather not use the vinegar. Make sure to taste after you season the baba ganoush and then whiz in the processor until you get the consistency you desire.

INGREDIENTS (makes about 1 cup)


  • 1 large eggplant
  • 1 tablespoon tahini, plus more as needed
  • 3 garlic cloves, chopped
  • Juice of one fresh lemon, plus more as needed
  • 1/4 tsp. red wine vinegar
  • 1/2 tsp. ground cumin
  • 1/4 tsp. ground coriander
  • 1/4 tsp. ground sweet paprika, plus more for sprinkling
  • salt and pepper, to taste
  • 1 tablespoon extra virgin olive oil
  • Fresh flat-leaf parsley, for garnish


DIRECTIONS

Heat a comal or a large cast iron skillet on medium-high. Add 1/2 teaspoon canola or vegetable oil to pan and with a folded paper towel, swipe the oil making sure to coat the comal or skillet.

Add the eggplant and cook, turning frequently, until the skin blackens and blisters and the flesh just begins to feel soft, about 15 to 20 minutes.

Transfer the eggplant to a bowl and set aside to let cool slightly. When cool enough to handle, peel off and discard the skin.

Place the eggplant flesh in a food processor and add 1 tablespoon tahini, the garlic, lemon juice, red wine vinegar, cumin, coriander and paprika and buzz for 5 seconds. Season with salt and pepper and buzz 5 more seconds then taste and add more tahini and/or lemon juice, if needed. Then buzz until you get your desired consistency.

Transfer the mixture to a serving bowl and spread with the back of a spoon to form a shallow well. Drizzle the olive oil over and sprinkle with a little more paprika and garnish with parsley.

Serve at room temperature with pita bread.

Saturday, January 05, 2013

Salted Caramel Sauce

This Christmas I decided to make homemade gifts to give out to family and friends. I wanted to create something different than cookies or jams or baking mixes. So, I made salted caramel sauce instead. I saw the recipe on Food and Wine magazine and I couldn't believe how easy it was. I followed the recipe as it was written, but my only change is that I used gray salt instead of fleur de sel. Don't worry if your salt doesn't completely melt. I think that's what I like most about this sauce because small, salt crystal stay suspended in the sauce and they make love to your mouth once you eat it straight out of the jar or warmed up and drizzled over some vanilla ice cream.


INGREDIENTS (makes 2 cups)


  • 2 cups sugar
  • 1/2 cup water
  • 1 vanilla bean, split, seeds scraped
  • 1 cup heavy cream
  • 1/2 teaspoon fleur de sel

DIRECTIONS

Put the sugar in a large saucepan and pour the water all around. Add the vanilla bean and seeds and cook over moderately high heat, stirring, until the sugar is dissolved.


Using a wet pastry brush, wash down any crystals from the side of the pan. Cook without stirring until a deep-amber caramel forms, about 5 minutes. Gently swirl the pan to color the caramel evenly.

Remove the pan from the heat and add the cream. When the bubbling subsides, bring the sauce to a boil and cook over moderate heat, stirring, until the hardened caramel is dissolved. Discard the vanilla bean. Stir in the fleur de sel and let cool.


After it cooled, I poured the sauce into clean, sanitized half pint Ball mason jars and closed the lid very tightly. Then I created a custom labels and gave it out as gifts. I'm such a DIY mom!!!