Showing posts with label cooking club. Show all posts

Monday, January 26, 2009

Chicago Style Italian Beef

I made this delicious Italian beef a few weeks ago, and although it may not be exactly the same as Al's #1 Italian beef from Chicago, this meal is so delish and full of flavor and you can feed an army with it! This, again, is one of those dishes you need a couple of days to prepare, but it's worth it because the meat gets juicy and da gravy is so good. One suggestion I do have is for you to purchase (or borrow) a meat slicer because you want to slice the beef as thin as you possibly can. Don't forget to dip the sandwiches in da gravy (au jus) to make it an authentic Italian beef.

INGREDIENTS (serves 8 people)

Da Beef

  • 5 lb beef rump roast
  • 1/2 teaspoon garlic powder
  • 1/2 teaspoon dried oregano
  • 1/2 teaspoon coarse-grind black pepper
Da Gravy
  • 2 1/2 cups boiling water
  • 2 cups beef broth
  • 2 teaspoons dried oregano
  • 1 teaspoon dried thyme
  • 1/2 teaspoon coarse-grind black pepper, to taste
  • 1 teaspoon Tabasco sauce
  • 8 cloves garlic, minced (yes, 8!)
  • 2 tablespoons Worcestershire sauce
  • salt, if needed
  • Giardiniera, for relish
DIRECTIONS

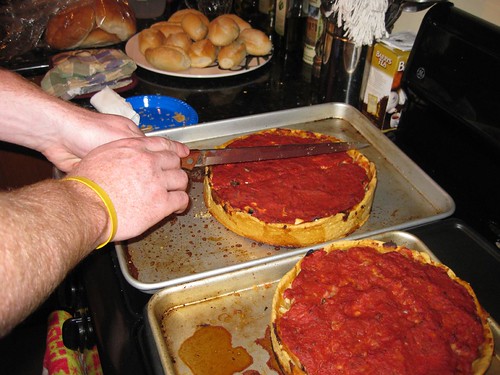
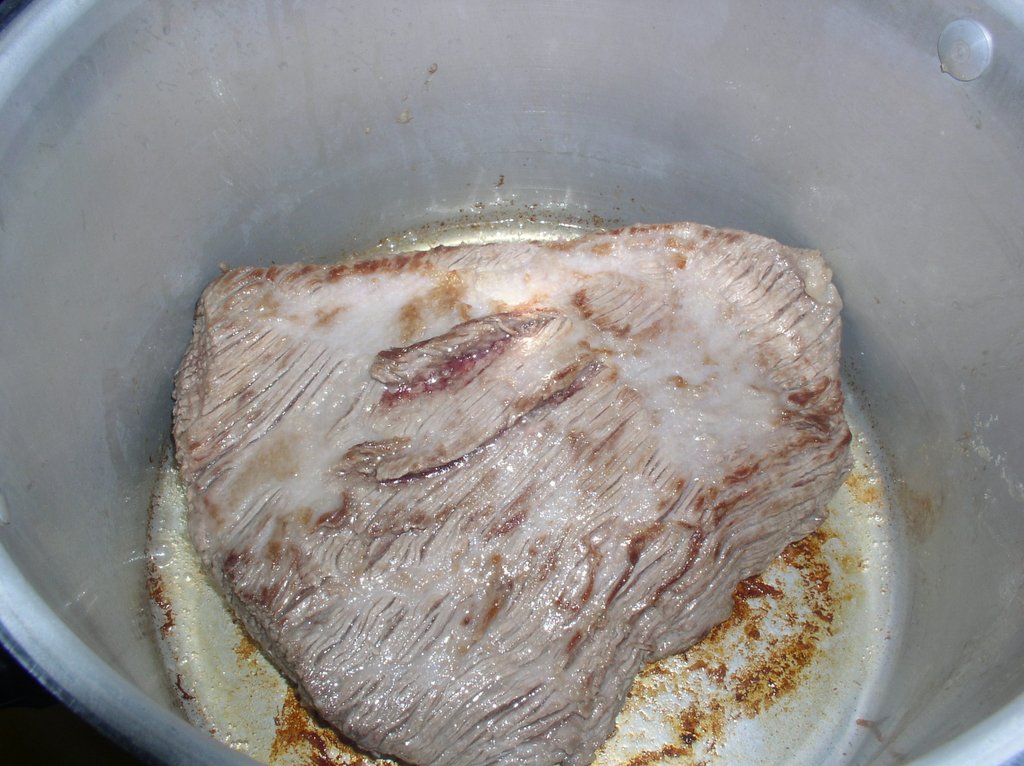
Preheat oven to 325 degrees F.

Sprinkle the roast with garlic powder, oregano and pepper. Rub it all over and place roast in a dutch oven or shallow baking pan. 
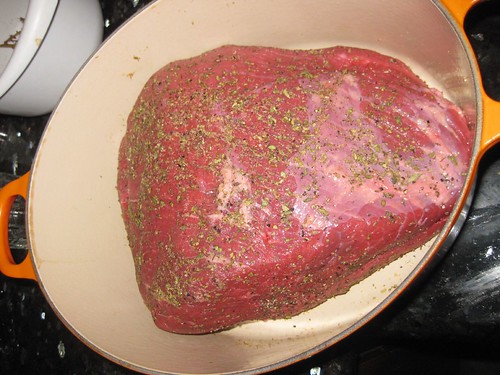
Bake, uncovered, for 1 1/2 hours. (The roast will be rare -- don't overcook it!)

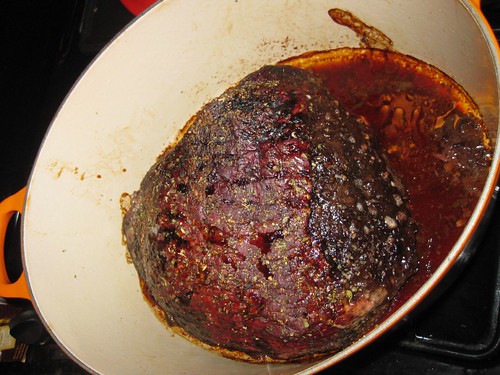
Remove roast from pan and let it cool slightly, then thinly slice with meat slicer.

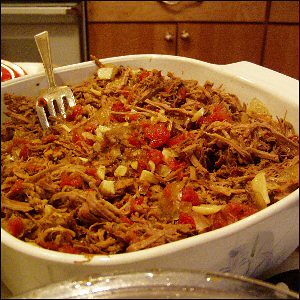
For da gravy: To the roasts pan drippings add the boiling water, beef broth, oregano, thyme, pepper, Tabasco sauce, garlic and Worcestershire sauce. 
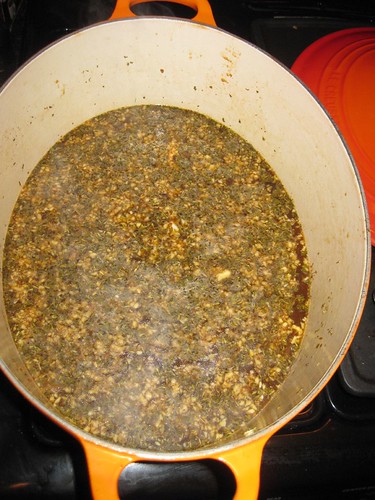
Bring to a boil then simmer for 20 minutes, scraping up the browned bits at bottom of pan. Taste for seasoning and add salt, if needed (I didn't add any). Remove da gravy from heat and then add the add the sliced beef into da gravy.

Cover and marinate the beef in da gravy overnight. Reheat the next day and serve in crusty Italian sandwich rolls; put some giardiniera as relish on sandwiches and enjoy. Da Bears!!!

Thursday, January 22, 2009

Chicago Deep Dish Pizza

Last week I started my cooking club again. After a long hiatus, we all decided it was time to bring it back. Many of the cooking club members got married, or had kids, or had changes in their lives, so it was difficult for us to get together. But I decided to start 2009 with a kick and bring back our cooking club.

Our theme this time was "What Would Obama Eat?" My brother-in-law, Tim, who lives in Chicago, made deep dish pizzas, I made Italian beef sandwiches, and we had mini Chicago dogs and other excellent appetizers other cooks brought. All in all, it was a fun and successful cooking club. Everyone had a lot of fun and below are a few pics of our "meeting" and recipe for the deep dish pizza. Mmmmm....

INGREDIENTS

Pan Dough

  • 1 cup warm tap water (110-115 degrees)
  • 1 1/4 ounces active dry yeast
  • 1 tsp. sugar
  • 3 1/2 cups flour
  • 1/2 cup course ground cornmeal
  • 1 teaspoon salt
  • 1/4 cup vegetable oil
Pizza Toppings
  • 1 lb mozzarella cheese, sliced thin
  • 1 lb Italian sausage, removed from the casing and crumbled
  • 1 (14 1/2 ounce) can diced tomatoes, drained
  • 2 garlic cloves, peeled and minced
  • 5 fresh basil leaves, chopped fine
  • 4 tablespoons grated Parmesan cheese
DIRECTIONS

Pour the warm water into a large mixing bowl, add the sugar and yeast and dissolve the yeast and sugar with a fork. Let it sit for a couple of minutes then add 1 cup of flour, all of the cornmeal, salt, and vegetable oil, and mix well with a spoon.

Continue stirring in the rest of the flour 1/2 cup at a time, until the dough comes away from the sides of the bowl. Flour your hands and the work surface and knead the ball of dough until it is no longer sticky.

Let the dough rise in an oiled bowl, sealed with plastic wrap, for 45-60 minutes in a warm place, until it has doubled in size.

Punch it down and knead it briefly. Press it into an oiled 15-inch deep dish pizza pan until it comes 2 inches up the sides and is even on the bottom of the pan.

Let the dough rise 15-20 minutes before filling.

Preheat the oven to 500°F.

While the dough is rising, prepare the filling. Cook the sausage until it is no longer pink and drain the excess fat. When the dough has finished its second rising, lay the mozzarella cheese over the dough shell. It's ok to overlap.

Distribute the sausage and garlic over the cheese. Top with the tomatoes and sprinkle on the seasonings and Parmesan cheese.

Bake for 15 minutes at 500°F, then lower the temperature to 400°F and finish baking for 25-35 minutes longer.

Lift up a section of the crust from time to time with a spatula to check its color. The crust will be golden brown when done. Serve immediately.

Tuesday, January 16, 2007

Ropa Vieja

Ropa Vieja I just came back from my dentist appointment and guess what? My dental assistant and the dental hygienist are both foodies like me! We started talking about slow-cooked foods and this scrumptious recipe came up: Ropa Vieja. The recipe below is my version of the one I found in the Oprah Magazine and DON'T LET THIS RECIPE SCARE YOU. I know it seems like a lot of work and ingredients, but here are a few tips that helped me:
  1. First, cut all the veggies ahead of time and set them the fridge. I only used red and yellow peppers.
  2. Secondly, I only used one thinly sliced onion.
  3. Third, I didn't used the can of whole tomatoes. Instead, I used a one (7 oz) can of El Pato tomato sauce. I ommited the olives and;
  4. The big secret: I used a 1-1/2 pound brisket instead of flank steak that I cooked the day before and shredded and set in the fridge. On the day of the party, I just finished the rest of the recipe. You can find the original Ropa Vieja recipe I used on Oprah.com, however my tweaked recipe below came out just as good.
INGREDIENTS
  • 1-1/2 to 2 pound Brisket
  • kosher salt
  • 3/4 tsp. freshly ground black pepper
  • 2 Tbsp. of flour
  • 5 Tbsp. extra virgin olive oil
  • 4 cups homemade chicken stock or low-sodium chicken broth
  • 2 bay leaves
  • 1 Tbsp. whole black peppercorns
  • 1 large Spanish onions, thinly sliced
  • 1 red bell pepper, cored, seeded and thinly sliced
  • 1 yellow bell pepper, cored, seeded and thinly sliced
  • 1-1/2 tsp. ground cumin
  • 2 large garlic cloves, thinly sliced
  • 1 Tbsp. tomato paste
  • 1 (7-1/4 ounce) can of El Pato Tomato Sauce
Season brisket with 1/2 teaspoon salt and 1/2 teaspoon pepper. Lightly dust it with the flour.

In a heavy-bottomed 5- to 6-quart pot, heat 2 tablespoons oil over medium-high heat. Add the brisket to pot and cook until well browned, about 2 minutes per side. Add chicken broth, bay leaves, peppercorns, 1 tsp. of the cumin, and 1/2 teaspoon salt (you can also add any leftover veggies like onions, peppers or carrots). The brisket should be just covered with broth; pour in additional broth or water, if necessary. Bring to a boil; reduce heat to low and simmer, covered, until steak is fork-tender, 2-1/4 to 2-1/2 hours. Remove pot from heat and let brisket cool in broth for 30 minutes.

Transfer brisket to a plate. Strain cooking liquid through a sieve set over a bowl; Let liquid stand 5 minutes, then skim off and discard any fat. Set cooking liquid aside. Cut the brisket in half then shred the brisket by pulling off string-like meat. Tip: You can do these steps the day before, set it in the fridge and continue with the rest of the recipe the next day.

In the same pot, heat 2 tablespoons oil over medium heat. Add thinly sliced onions, red and yellow peppers, garlic, 1/2 teaspoon cumin, 1/2 teaspoon salt, and 1/4 teaspoon pepper. Cook, stirring frequently, until onions and peppers soften, 15 to 20 minutes.

Stir in tomato paste until vegetables are coated. Stir in the shredded brisket meat and the tomato sauce, until all is coated. Add in 2 1/2 cups of the reserved cooking liquid, and 1/4 teaspoon salt. Bring to a boil; reduce heat to low and simmer until slightly thickened, about 20 minutes.

Taste and adjust seasoning with additional salt and pepper if necessary. If not serving immediately, cool, cover, and refrigerate for up to 2 days; flavor will only improve upon standing. Serve with Moros y Cristianos or platanos maduros. Ropa Vieja

Thursday, August 17, 2006

Peace in the Middle East!

Michelle's falafelOur friend, Bill (who is single, by the way!) hosted our cooking club for this month. The theme: Peace in the Middle East. Our cooking club tries to get together once every 2 months and we choose a theme. Then we all cook food from scratch and share the food with each other. Of course, in the end we tend to get drunk since we all like to drink our alcoholic libations. Israeli Couscous

Anyhoo, my sister-in-law made delicious hummus with soft, warm pita bread. Michelle, her co-worker from the Eye of Mordor (Omni Hotel) made us all falafel from scratch; they also made a refreshing yogurt-cucumber Lamb kabobssauce.

Thank goodness Bill (did I mention he is single, ladies, and he's 33 and drives a Honda Accord?) has a deep fryer. Michelle went to town on that thing frying up the falafel. Bill made us all cinnamon-spiced lamb kabobs and potato latkes. I made Israeli couscous and Lebanese meatballs in a tomato sauce--everything was delicious. Lebanese meatballs

Our friends, Scott and Benni, brought Witch Creek wine. It's from Carlsbad, California and it's a really good wine. Matthew and I also brought local wine from Belle Marie winery in Escondido. If you guys are ever in Carlsbad or Escondido, you should check out these wineries. Their wines are surprisingly yummy and I think in a few more years they are only going to get better.

Lindsey, Michelle, Benni and Vonda

The girls of the cooking club.

The boys smoking their cigars

Finally, the boys ended the feast with some faux-Cuban cigars. Bill is the one with the extremely red shirt!