Showing posts with label asian. Show all posts

Sunday, August 15, 2010

Sesame Noodle with Chicken and Asparagus


Today was a really long day for Stella and me. We got up at 6:30am, did our daily mama/baby routine and at 2pm we were at the mall for Stella's first professionally done photo shoot. Amazingly, it all went so well, but almost 3 hours later, she had not napped, I only had a hot dog-on-a-stick in my tummy and we were both tired and hungry when we got home.

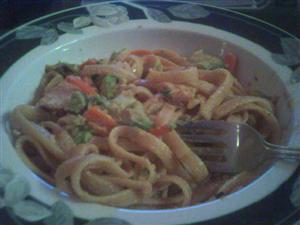
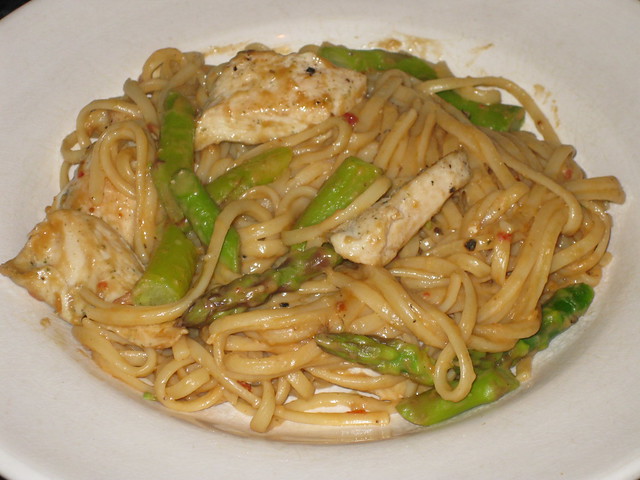
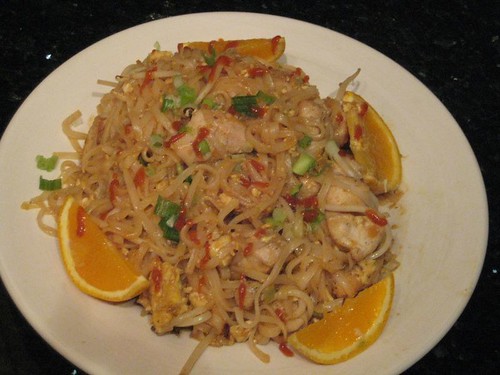
She got her formula, of course, and went to bed. I, on the other hand, did not have the chance to go grocery shopping so all I had in the fridge were asparagus and some chicken tenders I had defrosted the night before. Luckily, I received a "free trial" of Cook's Country magazine and found this super easy, super fast, super yummy recipe. It's just the meal you want when you're tired and hungry because it's filling, it's nutritious, it's a little spicy and it's got a great peanut-sesame taste. 

INGREDIENTS (serves 4)
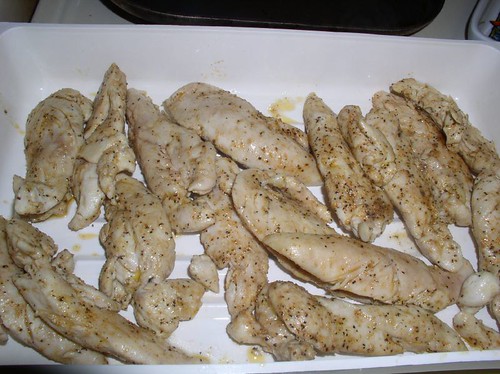
  • 2 boneless, skinless chicken breasts (about 12 ounces) cut crosswise into 1/4-inch pieces
  • Salt and pepper, to taste
  • 1 Tablespoon vegetable oil
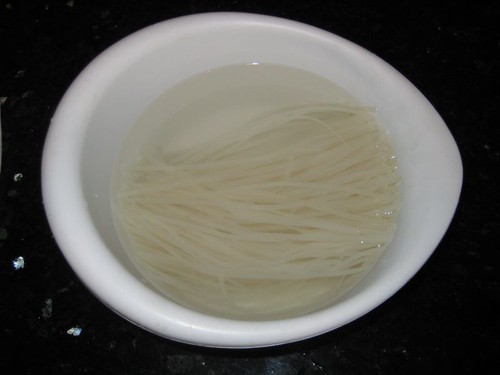
  • 1 pound linguine (or fettuccine or spaghetti)
  • 1 pound asparagus, trimmed and cut into 1/2-inch pieces
  • 1/3 cup peanut butter
  • 5 Tablespoon rice wine vinegar
  • 1/4 cup oyster sauce
  • 2 teaspoons chili-garlic sauce
  • 1-1/2 teaspoon grated fresh ginger
  • 1-1/2 Tablespoon toasted sesame oil
DIRECTIONS 

Bring a large pot with water to a boil. Pat chicken dry with paper towels and season with salt and pepper. Heat the vegetable oil in a large skillet over medium-high heat until just smoking. Cook the chicken until it's not longer pink inside, about 2 to 3 minutes per side. Transfer to a plate.

Add a large pinch of salt to the boiling water then add pasta and cook until just beginning to soften, about 8 minutes. Add the asparagus to the pot and cook until bright green and the pasta is al dente, about 4 minutes more. Reserve one cup of pasta water. Drain pasta and asparagus and return to the pot.

In a medium bowl, whisk peanut butter, vinegar, oyster sauce, chili-garlic sauce, ginger, sesame seed oil and 1/2 cup of the reserved pasta water until smooth.

Add the cooked chicken to the pot with the pasta and asparagus, then add the peanut butter mixture and toss to combine.

Add more of the reserved pasta water, if needed. Serve immediately!

Friday, July 17, 2009

Edamame Hummus

Edamame Hummus

Elaine and my mom and Lindsey are throwing me a baby shower next month and when they were talking about what food to serve, it reminded me of a wonderful dip I once had at my friend's shower a few years ago. This is an absolutely great dip. I looks like guacamole, but the taste is completely different. Nowadays you can find tahini in the Asian food section of your grocery store or at any Middle Eastern supermarket. Serve with pita chips or sliced cucumber, celery sticks and olives. I'm telling you, if you're into soy and healthy eating, you're going to enjoy this dip.

INGREDIENTS (makes about 1-1/2 cup)

  • 1/2 pound frozen shelled edamame (green soy beans)
  • 1/4 cup tahini
  • 1/4 cup water
  • 1/2 teaspoon freshly grated lemon zest
  • 1 lemon (about 3 tablespoons), juiced
  • 1 clove garlic, minced
  • 3/4 teaspooon kosher salt
  • 1/2 teaspoon ground cumin
  • 1/4 teaspoon ground coriander
  • 3 tablespoons extra-virgin olive oil
  • 1 tablespoon chopped fresh flat-leaf parsley
  • Suggested serving: pita chips, sliced cucumbers, celery, and olives
DIRECTIONS

Boil the beans in salted water for 4 to 5 minutes, or microwave, covered, for 2 to 3 minutes.

boiling the edamame

In a food processor, puree the edamame, tahini, water, lemon zest and juice, garlic, salt, cumin, and coriander until smooth. With the motor running, slowly drizzle in 2 tablespoons of the olive oil and mix until absorbed.

all the ingredients in the food processor

Transfer to a small bowl, stir in the parsley and drizzle with remaining oil. Serve with the suggested vegetables, or refrigerate, covered, up to 1 day.

Recipe courtesy of Food Network Kitchens

Saturday, July 04, 2009

Chicken Salad with Peanut Dressing and Toasted Sesame Seeds

As you can see, I haven't been cooking much and that was due to the "sick" I had. But now I'm over it and my appetite is back on...now more than ever specially since I'm almost 7 months pregnant. I'm still having issues with red meat, but I know I need to get protein in my system so I combined the peanut dressing from one recipe with some roasted chicken I had and came up with this salad. The peanut dressing is actually for hot pasta (like spaghetti or fettuccine) and it makes about 2 cups of dressing. Since I only needed a few tablespoons for one salad, I'm saving the leftover so that I can make this Crunch Noodle Salad tomorrow.

INGREDIENTS

  • Mixed greens
  • Cooked chicken, cut into bite sized chunks
  • Peanut dressing (recipe below)
  • 1/2 tablespoon toasted sesame seeds or chopped peanuts
Peanut Dressing
  • 1 cup vegetable oil
  • 1/4 cup rice wine vinegar
  • 1/3 cup soy sauce
  • 3 tablespoons dark sesame oil
  • 1 tablespoon honey (I added a little more than a tablespoon)
  • 2 garlic cloves, minced
  • 1 teaspoon grated fresh ginger
  • 2 tablespoons toasted white sesame seeds, divided
  • 1/2 cup smooth peanut butter
DIRECTIONS

Make the dressing: Whisk together the vegetable oil, rice wine vinegar, soy sauce, sesame oil, honey, garlic, ginger, 2 tablespoons sesame seeds and peanut butter in a medium bowl.

To make salad (for one): place enough mixed greens on plate and top with chopped chicken. Drizzle some of the peanut dressing over the salad then top with toasted sesame seeds or toasted chopped peanuts.

Monday, January 12, 2009

Vegetarian Wontons

I have a friend, Kristen Piotrowski, who is from Buffalo, NY and she now lives here in San Diego. One would think that Kristen's absolute favorite food are Buffalo wings, but I was completely shocked when she told me she's a vegetarian. So, now that I am resurrecting our cooking club I'm on a mission to make good, tasty vegetarian dishes. This wonton recipe is very tasty and they make great appetizers for a large party. If you're allergic to peanuts, you can use vegetable oil, but again be careful with the hot oil.

INGREDIENTS (makes about 30 wontons)

  • 1 package wonton skins (about 30 - 35)
  • Hoisin sauce, for dipping
  • 3 tablespoons oil for stir-frying
  • 2 cups peanut oil for deep-frying
Filling:
  • 1 tablespoon peanut oil
  • 1/4 cup carrots, finely shredded
  • 1/2 cup cabbage, finely shredded
  • 1/4 cup bean sprouts
  • 2 tablespoons finely chopped garlic
  • 1 tablespoon dark soy sauce
  • 3 tablespoons mashed bean curd
  • 1 teaspoon sugar
  • 1/2 teaspoon salt
  • 1 teaspoon sesame oil
  • 1/2 teaspoon freshly ground black pepper
DIRECTIONS

For the filling: heat a wok or large frying pan and add 3 tablespoons oil. When moderately hot, add the carrots, cabbage, bean sprouts, and garlic and stir-fry for 1 minute. Set aside to cool thoroughly.

Combine the cooled vegetables with the rest of the filling ingredients and mix well. Using a teaspoon, put a small amount of filling in the center of each wonton skin. Bring up 2 opposite corners, dampen the edges with a little water, and pinch them together to make a triangle. Fold over the bottom 2 corners so they overlap, and press together. The filling should be well sealed in.

Heat the 2 cups of peanut oil in a deep fat fryer or large wok until hot. Deep-fry the filled wontons in several batches. Drain on paper towel. Serve at once with hoisin sauce.

Saturday, September 13, 2008

Chicken Pad Thai

Not too long ago I found a Thai restaurant near my work called Thai Chadda. The restaurant is in the food court where a lot of us from work go to eat, and they make the food quite fast. It's not one of the best Thai places, but their chicken pad Thai is quite good. It's tangy, spicy and lightly sweet. So, after searching for recipes for this great dish, I finally decided on this one I found on About.com, because it was actually the less difficult one. Anyway, my pad Thai came out fabulous and almost as good as restaurant quality.

INGREDIENTS (serves 2-3)

  • 8-10 oz. thin Thai-style rice noodles - look for linguini-size rice noodles (made in Thailand) at Asian/Chinese stores
  • 1 to 1 1/2 cups raw chicken breast or thigh meat, sliced
  • 2 tsp. cornstarch dissolved in 2 Tbsp. soy sauce
  • 4 cloves garlic, minced
  • 3 cups fresh bean sprouts
  • 3 spring (green) onions, sliced
  • 1 cup fresh cilantro
  • 1/3 cup crushed or roughly chopped peanuts
  • 1/2 cup chicken stock
  • 1/4 tsp. freshly ground black pepper
  • Lime or orange wedges for serving
  • oil for stir-frying
PAD THAI SAUCE:
  • 3/4 Tbsp. tamarind paste dissolved in 1/4 cup warm water (look for tamarind at Asian/Chinese or Indian food stores)
  • 2 Tbsp. fish sauce
  • 1-3 tsp. chili sauce (depending how spicy you want it)
  • 3 Tbsp. brown sugar (not packed)
DIRECTIONS
  1. Place noodles in a pot of water and place on the stove. Bring to near a boil, then remove from heat. Allow to sit while you prepare the other ingredients (about 10 minutes).
  2. Make the Pad Thai Sauce by combining the sauce ingredients together in a cup. Stir well to dissolve both the tamarind paste and the brown sugar. Set sauce aside.
  3. Place chicken slices in a small bowl. Pour the marinade (2 tsp. cornstarch dissolved in 2 Tbsp. soy sauce) over the chicken. Stir well and set aside.
  4. Check the noodles. Note that you will be frying the noodles later, so you don't want to over-soften them at this point. Noodles are ready when they are soft enough to be eaten, but are still firm and chewy. Drain and rinse through with cold water. Set aside.
  5. Warm up a wok or large frying pan over medium-high heat. When the wok/pan is hot, add 1-2 Tbsp. oil plus garlic. Stir-fry until fragrant (30 seconds).
  6. Add the chicken (together with the marinade). Stir-fry until the wok or pan becomes dry (30 seconds to 1 minute).
  7. Now begin adding some of the chicken stock. Add only a few Tbsp. at a time, enough to keep the chicken frying nicely. Continue until all the chicken stock has been added and chicken pieces/strips are cooked (about 5-8 minutes).
  8. Add the noodles, and pour the Pad Thai sauce over the noodles. Using two spatulas, wooden spoons, or other utensils, quickly stir-fry the noodles. Use a "lift and turn" method (almost as though you were tossing a salad) instead of the usual stir-frying motion, or the noodles with break apart.
  9. Fry the noodles in this way for 1-2 minutes. If you find your wok/frying pan too dry, push noodles aside and add a little more oil to the bottom (but no more broth, or the noodles will become soggy).
  10. Add the bean sprouts and sprinkle over the ground black pepper. Continue "tossing" for 1 more minute, or until noodles are cooked. Noodles are done to perfection when they are no longer "hard" or transulcent. They should be opaque and chewy-sticky wonderful!
  11. Taste-test the noodles for seasoning, adding more fish sauce as needed (I usually end up adding up to 1 more Tbsp. fish sauce, as I like mine on the salty side). Toss well to incorporate.
  12. To serve, lift the noodles onto a serving plate. Top with generous amounts of fresh coriander, spring onion (green onion), and crushed or chopped nuts. Add fresh orange slices or lime wedges (lime is great squeezed overtop), and serve with a bottle of Thai chili sauce on the side, for those who like it extra spicy. ENJOY!

Thursday, February 14, 2008

Beef Stir-Fry

My husband loves flat iron beef and Iowa Meat Farms here in San Diego sells one of the best cuts of this meat, however it's quite spendy—I believe that they dry age it or something. So, I made this stir fry for him with the half pound he bought and it was quite delish. Usually beef stir-fry contains broccoli, but I was too lazy to go buy it the day I made it, so I omitted it, but you can definitely add about 1/2 cup of broccoli florets if you want.

INGREDIENTS (serves 2)

Marinade

  • 1 tsp. McCormick's Montreal Seasoning
  • 1 Tbsp. Soy Sauce
  • 1 Tbsp. olive oil
  • 1 garlic clove, finely chopped
  • 1/2 lb. flat iron steak or flank steak, sliced against the grain into stir fry strips
Stir Fry
  • 2 Tbsp. vegetable or canola oil
  • Half an onion, sliced into half moons
  • 1 tsp. fresh ginger, finely minced
  • 1 garlic clove, finely chopped
  • 1/4 cup julienned carrots
  • 1 green bell pepper, seeded and sliced into strips
  • 1/4 tsp. dried red pepper flakes
  • 1/2 cup bean sprouts
  • 1 to 1 ½ Tbsp. Soy Sauce
  • 1 tablespoon cornstarch mixed with 2 tablespoons cold water
  • Steamed, white rice
DIRECTIONS

In a bowl or large zip-loc bag, mix first 4 marinade ingredients, then add the flat iron steak. Marinate 30 minutes, up to 4 hours in the fridge.

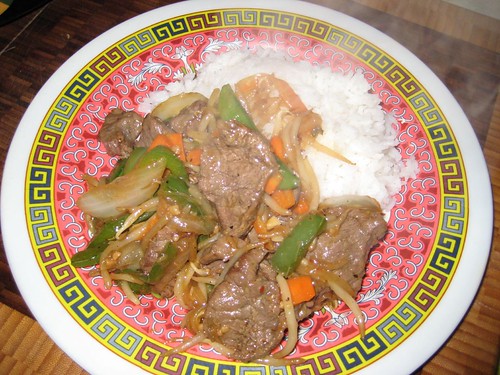
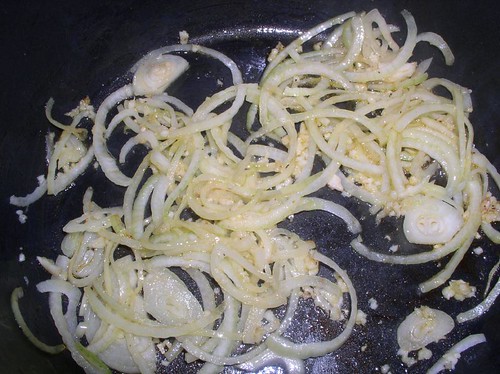
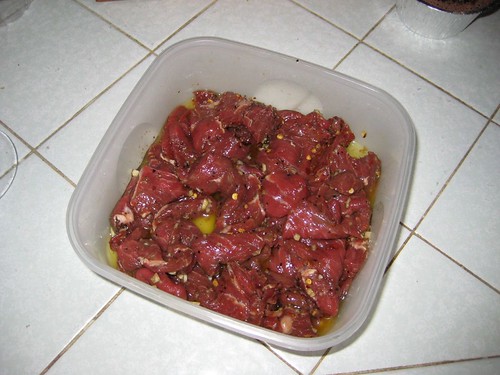
In a large skillet with 3" sides or higher, or a wok, heat 1 tablespoon Vegetable or canola oil over medium-high heat. Add the marinated beef and the marinade and stir fry for 2 minutes. Quickly remove beef from skillet with a slotted spoon and set aside.

Add remaining 1 tablespoon oil to skillet and add the onions. Stir fry for 2 minutes. Add ginger, chopped garlic, carrots, green bell pepper and red pepper flakes. Sauté 2 to 3 more minutes or until green bell pepper is tender crisp. 
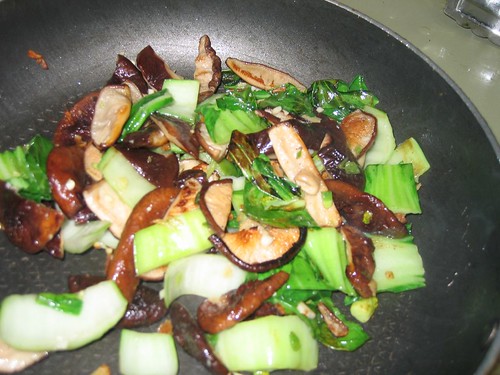
Add the beef and its juices back into the skillet and stir fry 3 minutes or until lightly browned.

Finally, add the bean sprouts, soy sauce and cornstarch mixture and stir constantly. Bring to a boil; reduce heat to medium and cover. Cook for 2 more minutes. Serve beef stir fry over white rice.

Tuesday, October 30, 2007

Asian Steak and Noodle Salad

Mise-en-place is my new favorite culinary term. I never knew that that's what I did pretty much every time I cooked; basically it means to have all your ingredients chopped and ready to go before you even begin to cook, this way your cooking is more enjoyable and you can finish fast. Mise-en-place is specially necessary when cooking any type of Asian dishes, as most of them are cooked quickly. You can lallygag a little with this recipe as the salad tastes better at room temperature or even cold. Mmmm....

INGREDIENTS (Serves 2)

For steak

  • 2 tablespoons Asian fish sauce
  • 1 tablespoons finely chopped peeled fresh ginger
  • 2 garlic cloves, finely chopped
  • 1 tablespoons soy sauce
  • 1 tablespoons sugar
  • 1 lb flank steak
For salad
  • 1/4 cup fresh lime juice
  • 3 tablespoons water
  • 3 tablespoons sugar
  • 3 tablespoons Asian fish sauce
  • 1 teaspoon dried hot red-pepper flakes
  • 1 thinly sliced shallot
  • 8 oz dried vermicelli rice-stick noodles
  • 1 medium Granny Smith apples
  • Baby lettuce salad mix (enough for two portions)
  • About 6 fresh mint leaves, torn into pieces if large
  • About 6 fresh Thai basil leaves, torn into pieces if large
  • 1/4 cup salted roasted peanuts, chopped
DIRECTIONS

Marinate and grill steak: Whisk together fish sauce, ginger, garlic, soy sauce, and sugar in a small bowl until sugar is dissolved. Pour marinade into a large sealable plastic bag. Pat steak dry and place in bag, then press out excess air and seal bag. Turn bag over 2 or 3 times to coat meat, then place in a shallow dish (in case of leaks) and chill at least 4 hours and up to 8. Bring steak to room temperature 30 minutes before grilling.

Prepare grill for cooking over medium-hot charcoal (moderate heat for gas). Remove steak from marinade (discard marinade) and pat dry with paper towels. Grill, uncovered unless using a gas grill, over direct heat, turning over once, until medium-rare, 12 to 14 minutes total. Note: I cooked my steak over the stove to medium rare.

Transfer steak to a cutting board and let stand, uncovered, about 15 minutes.

Assemble salad while steak rests: Whisk together lime juice, water, sugar, fish sauce, and red-pepper flakes in a bowl until sugar is dissolved, then stir in shallots.

Cook noodles in a 5-quart pot of boiling salted water until just tender, 4 to 5 minutes. Drain in a colander, then rinse under cold water and drain well. Transfer to a bowl and toss with 2 tablespoons of dressing. Working around core of each apple, cut thin slices (about 1/8 inch thick) with slicer, then stack slices. Cut slices lengthwise into 1/4-inch-wide matchsticks.

Combine apples, greens, mint and basil in a large bowl. Add 1/4 cup of dressing and toss well to coat.

Thinly slice steak across the grain.

Arrange noodles on a large platter and mound greens on top of noodles. Arrange steak slices on greens and sprinkle with peanuts. Serve at room temperature with remaining dressing on the side. Modified recipe from Gourmet, June 2006

Friday, August 17, 2007

Thai Iced Tea Latte

I was addicted to iced coffee for a while, until I had a Thai iced tea latte several years ago. The tea flavor is fabulous, especially that cardamon flavor, and the sweetened condensed milk just totally works for me! Anyhoo, the first thing you have to do is purchase Thai tea. I'm very lucky that I live near a store that sells Thai tea, but if you don't have that luxury, you can purchase it at importfood.com or templeofthai.com. If you're too lazy to make it, go to your favorite Thai restaurant and order this refreshing drink. You'll probably get addicted to it, too!

INGREDIENTS

  • Thai tea
  • Sweetened condensed milk
  • Ice
DIRECTIONS

Bring 6 cups of water to boil. Add 1-1/2 cups Thai tea to a large pitcher and pour over the hot water. Stir well for about half a minute until the liquid is dark brown. Stain the tea into another pitcher using either a traditional Thai cloth tea strainer or a fine sieve. A large coffee filter would work also. Cool at room temperature.

To serve, pour tea over a full glass of ice. Top with sweetened condensed milk (if you want just regular iced-tea, you can skip this) and serve with a straw. Oh ma gawd, it's sooo good....

Sunday, July 08, 2007

Sticky Rice With Mango

I first had sticky rice with mango at Spices Thai restaurant in San Diego. I was very pleasantly surprised. I'm not a big rice pudding type of person, but this dessert was perfect. It's not too overly sweet and the sweet, ripe mangos make a great accompaniment to this recipe. This is definitely a summer dessert when wonderful mangoes are in season.

INGREDIENTS (serves 4)

  • 1 cup uncooked Jasmine Rice
  • 1 can Coconut Milk
  • 2/3 cup sugar
  • 1/2 teaspoon salt
  • 2 ripe mangoes
DIRECTIONS
  1. In a medium saucepan bring 1 - 3/4 cups of water to a boil. Add the rice and briefly stir. Reduce heat to low and cover. Simmer 20 minutes or until water is just absorbed.
  2. Meanwhile in a small saucepan, combine coconut milk, sugar and salt. Boil for 3 minutes, stirring frequently. Remove from heat.
  3. Add the hot coconut milk sauce to the cooked rice. Stir until mixed.
  4. Lightly press plastic wrap onto mixture in saucepan to cover. Let rest 30 minutes at room temperature.
  5. Peel and slice the mangoes. With large spoon or ice cream scoop, spoon the sticky rice onto plates and garnish with mango slices.

Wednesday, March 28, 2007

Garlic Broccoli

In exactly 30 days from today my friend, Kerry, will be getting married to Mr. Sean, and my hubby and I are going to their wedding in Boston. Kerry is actually one of the original members of our now-defunct cooking club, which we called Boston Bites. She is currently attending culinary school at Johnson & Wales University and I totally admire her for that. Hopefully one day I'll be able to go to culinary school, too.

Anyhoo, I bought a fabulous dress to wear to her wedding...unfortunately it's a size too small! So, in an effort to lose 10 pounds within the next month, I've been cutting down on pasta--which I absolutely love--and I'm making healthier versions of recipes. For example, this garlic broccoli dish is stupendous. I absolutely love garlic and I could probably eat this every day. I only use the most minimum amount of oil and butter, so if you're not on a diet, you can add a bit more if you prefer.

INGREDIENTS (serves 4, but you'll probably eat the entire thing yourself)

  • 1 bunch of fresh broccoli florets, about 12 ounces
  • 6 garlic cloves, chopped
  • 2 teaspoons olive oil
  • 1/2 tablespoon butter
  • 1/4 teaspoon salt
  • A pinch of black pepper
  • 2 tablespoons water
  • 1/4 teaspoon red pepper flakes (optional)
DIRECTIONS

Wash broccoli and cut into small florets (they also now sell bags of fresh broccoli florets already washed).

Place broccoli in a microwave safe bowl and add 2 tablespoons of water. Microwave for 2 minutes or until broccoli is barely tender and still bright green. Make sure you don't overcook it. Remove from microwave and drain and set aside.

Add olive oil and butter in a large skillet over low heat. Add the chopped garlic and sauté, stirring frequently, just until the garlic starts to soften and it begins to slightly turn golden. Raise the heat just a little and caramelize, NOT BURN, the garlic. It will turn into a golden light-brown color. Quickly remove the garlic with a slotted spoon and set aside, but leave the oil and butter in the skillet. **The oil will be slightly dark because the butter will be caramelized, too.

Add the steamed broccoli, black pepper, salt and red pepper flakes to the skillet and sauté for one minute. Lastly, add the caramelized garlic and sauté for 30 seconds until it's all heated through and combined.

Place the broccoli in a serving bowl and serve and enjoy.

Friday, February 09, 2007

Garlic Prawns, Oahu Style

Well, as you know I was in Oahu last week and I totally fell in love with Romy's garlic prawns over in the North Shore. Anyhoo, my recipe is as close as I could get to the real thing, but if you're ever in Oahu I highly recommend you visit Romy's Kahuku Prawns and Shrimp and give these babies a try. They are truly out of this world!

INGREDIENTS (serves 2)

  • 2 tbsp chopped garlic, divided
  • 2 oz magarine (yes, margarine!)
  • 1-1/2 lbs pounds prawns (about 10 to 15), unshelled (you can use extra-large shrimp if you can't find prawns)
  • 1/2 tbsp coarse sea salt
  • The juice of one lemon
  • Steamed white rice
DIRECTIONS

In a large sauté pan over medium-high heat add the margarine and sauté half the garlic until translucent and fragrant, about 30 seconds.

Add the prawns and salt. Toss to coat the prawns with the margarine and cook for one minute. Add remaining garlic and keep tossing just until the prawns are pink, approximately 4 more minutes. Add the lemon juice. Give it one more toss and remove from heat.

Arrange the prawns on top of steamed, white rice, top with the margarine, toasted garlic and lemon juice left in pan. Serve with a side of Soy-chili sauce.

CHILI SAUCE
  • 1/4 cup vegetable oil
  • 1 tablespoon red chili sauce
  • 1 tablespoon soy sauce
Whisk all ingredients together and serve.

Thursday, February 08, 2007

Crispy Tofu with Noodles

crispy tofu with noodles

Every time I fly I like to buy a cooking magazine to get new ideas for my culinary experiments. I saw this recipe in the new issue from Food and Wine magazine. It comes courtesy of Chef Pino Maffeo from restaurant L in Boston. Of course, I halved the recipe and it still came out pretty good. The only thing I changed is that I added more hoisin sauce than oyster sauce, and I added a few dashes of soy sauce at the very end of cooking. I really like the fried tofu, too.

INGREDIENTS (serves 4)

  • 7 ounces dried udon noodles
  • 1/2 cup plus 1 teaspoon canola oil
  • 1 cup panko (Japanese bread crumbs)
  • 6 ounces firm tofu, cut into 1-inch squares
  • 1 egg yolk
  • 3/4 pound mixed mushrooms, such as oyster, hen-of-the-woods and stemmed shiitake, thickly sliced (I only used oyster mushrooms)
  • 1 tablespoon minced fresh ginger
  • 1 garlic clove, minced
  • 3/4 pound baby bok choy, cut into 3/4-inch pieces
  • 2 tablespoons oyster sauce (I only used 1 tablespoon of oyster sauce)
  • 1 1/2 tablespoons hoisin sauce
  • A few dashes of soy sauce (optional)
DIRECTIONS

Bring a saucepan of water to a boil. Add the udon and cook until tender, 5 minutes; drain. Toss with 1 teaspoon of the canola oil. Meanwhile, put the panko in a large, resealable plastic bag and crush into fine crumbs. In a shallow bowl, gently toss the tofu with the egg yolk. Transfer the tofu to the bag and coat with the panko.

Heat the remaining 1/2 cup of oil in a wok until just smoking (I don't have a wok, so I used my large saute pan). Add the tofu and stir-fry over high heat until crisp, 2 to 3 minutes. Using a slotted spoon, transfer to a paper towel-lined plate.

Pour off all but 1/4 cup of the oil and return the wok to high heat. Add the mushrooms and stir-fry until lightly browned, about 3 minutes. Add the ginger, garlic and bok choy and stir-fry for 5 minutes. 
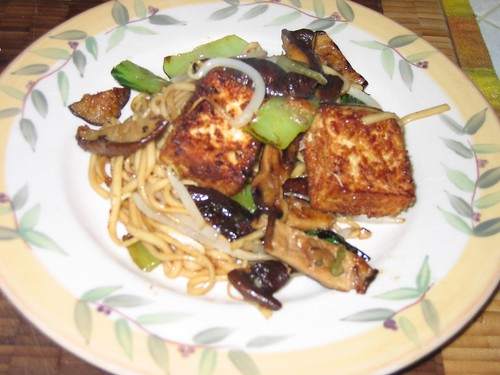
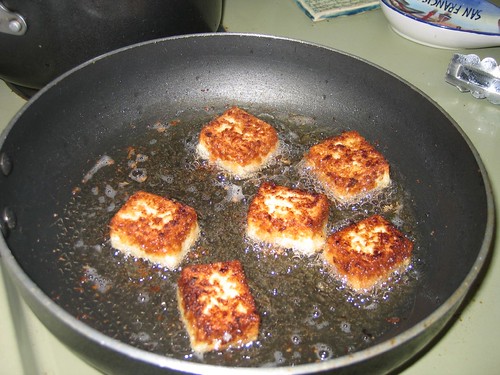
Add the udon and oyster and hoisin sauces and stir-fry for 2 minutes. Add the tofu, a few dashed of soy sauce and toss. Transfer to a bowl and serve.

Wednesday, February 22, 2006

Spicy Chicken and Cashew Nuts

This chicken and cashew dish is a one pot wonder. You basically only need a large 4 quart pot or Dutch oven and voila, you're done! As always, most of your time will be consumed in chopping and getting the ingredients ready, but once you start cooking your dish will be done in about 15 minutes. Try to get roasted and unsalted cashews and use pure maple syrup; this is the secret ingredient!

INGREDIENTS (serves 4)

  • 2 TBSP. Olive oil
  • 1 TBSP. butter
  • 2 lb. chicken tenders
  • Your favorite dry rub or McCormick Montreal seasoning
  • 1 onion, thinly sliced
  • 4 garlic cloves, minced
  • 1 red bell pepper, thinly sliced
  • 1 cup frozen green peas
  • 1 small can water chestnut slices, drained
  • 1 TBSP. Tamari or dark soy sauce
  • 1 tablespoon ground cumin
  • 3 to 4 TBSP. chipotle in adobo, chopped (use less if you don't want it spicy)
  • 2 TBSP. honey
  • 1/4 cup pure maple syrup
  • 1 cup whole cashews, roasted and unsalted
  • 4 TBSP. cilantro, chopped
  • Salt
  • Cooked Jasmine or White rice
  1. Season the chicken tenders with your favorite dry rub or with McCormick Montreal seasoning. Cover with plastic and let it marinate in the refrigerator 15 to 30 minutes.
  2. Meanwhile get all your ingredients out and cut your veggies.
  3. In a large 4 to 6 qt. pot or Dutch oven heat 2 tablespoons olive oil and 1 tablespoon butter on medium-high. Add the chicken tenders and cook in batches for about 2 to 3 minutes per side. Remove the chicken from pan and set aside.
  4. In the same pot (do not drain oil) add the sliced onions and sauté for 4 minutes. Then add the garlic and sauté 2 more minutes. 
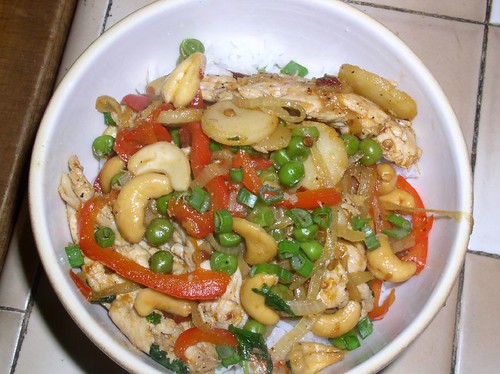
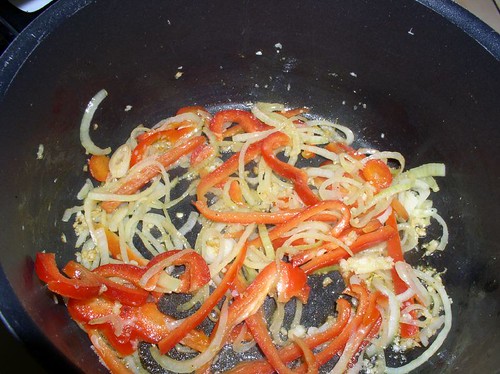
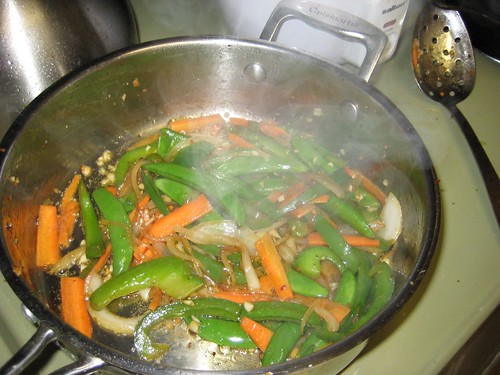
Add the sliced red bell pepper and cook for 2 more minutes.
  5. Now add the frozen green peas, water chestnuts, tamari (dark soy sauce) and cumin. Add the cooked chicken tenders back into the pot and the chipotle in adobo sauce. Raise the temperature to high. Cook, mixing it gently for 2 more minutes.
  6. Lastly, add the honey, maple syrup and cashews and cook for 3 more minutes. Taste for seasoning and add salt, if needed. Remove from heat and add the chopped cilantro last and mix well.
  7. Serve the chicken and cashew with a side of cooked Jasmine or white rice. If you want, sprinkle a few chopped scallions over each serving.
Recipe modified from Everyday with Rachel Ray.

Wednesday, January 25, 2006

Dinner for One: Noodles with Peanut Sauce

I will be sans husband this week as he is Minnesotta to get the land ready for the Blaha vineyard! Since I'll be cooking for myself, I'm dedicating this week to meals for one. It kind of brings me back to my college days...I whipped this up last night in about 20 minutes. I had some leftovers which I'll have for lunch today. This is the type of meal that tastes better the next day.

INGREDIENTS

  • A handful of snow peas, sliced in half
  • Half of a carrot, julienned
  • Half of a celery rib, finely sliced
  • 1/4 lb. fetuccini noodles
  • 1 small garlic clove, crushed through a garlic press
  • 1/2 teaspoon grated fresh ginger
  • 1 teaspoons sesame oil
  • 2 Tablespoons peanut butter
  • 1 Tablespoons low-sodium soy sauce
  • 1 Tablespoon rice vinegar
  • Fresh ground pepper
  • A pinch of red pepper flakes
  1. In a large pot, bring 3 quarts of water to a boil. Make sure you add a good pinch of salt to the water. Add the snow peas and carrots and boil for 2 minutes. Remove the vegetables with a slotted spoon and run them under cold water.
  2. Add the noodles to the pot and boil until al dente, according to the package directions.
  3. Meanwhile, in a large bowl, combine the garlic, ginger, sesame oil, peanut butter, soy sauce, and rice vinegar and whisk until smooth. If it's too thick, you can thin it out with a little water.
  4. Drain the cooked noodles and place them in the large bowl with the peanut sauce. Add the par boiled vegetables and the celery, pepper and red pepper flakes and toss to blend. This is best served cold or at room temperature. It's even better the next day as leftovers!
PS: My pictures will be low quality as I have to take them with my mobile phone. My husband took the camera with him!

Wednesday, December 07, 2005

Grilled Salmon Teriyaki

I just love Teriyaki sauce but sometimes the bottled stuff is either too sweet or too salty for me. I learned how to make homemade teriyaki sauce when I was in college and have been a big fan of it ever since. Making your own terikayi is quite easy and once you get the hang of it, you'll be making it all the time. You can also baste chicken and beef in this wonderful sauce or use it as BBQ sauce.

INGREDIENTS

  • 2 Salmon fillets 1/2" thick, with skin on
  • Kosher Salt
  • Pepper
  • 2 tbsp sake (rice wine)
  • 4 tbsp soy sauce
  • 4 tbsp mirin (sweet rice wine)
  • 2 tbsp sugar
Prepare the teriyaki sauce: Place the soy sauce, mirin, sake and sugar in a small pan and simmer on medium-low heat, stirring constantly, until it becomes slightly sticky. Set aside

Prepare the salmon: Season the salmon with salt and pepper on both sides. Get your grill pan or a large, non-stick skillet and place it on a medium heat. Place the salmon, skin side up, on your grill pan or skillet and cook for 6 to 8 minutes then turn the fish over. Brush the top of the salmon with 1/3 of the teriyaki sauce and cook for 2 minutes. Keep brushing salmons until you use up all the sauce, about 4 more minutes.

Serve the salmon with a side a sticky rice and steamed broccoli.

Friday, December 02, 2005

Snobby Wine, Capital Sushi!

http://www.winesellarandbrasserie.com/I am addicted to wine tastings. I don't know why, but my husband and I spend way too much money on wine and wine paraphenelia. Last night was no exception. The Brasserie and Wine Sellar was hosting a Honig wine tasting for $10 bucks, which consisted of two whites, three reds and one late harvest. Honig Winery is Napa Valley's premier producer of exceptional Sauvignon Blanc, but their cabs were our favorites.

serving us more wine! Matthew and I both gave their 2001 Honig Cabernet Stagecoach Vineyard ($65) two snaps, a wink and a divaspank!

Honorable mentions also go to their 2002 Napa Valley Cabernet Sauvignon ($33) and their 2004 Late Harvest Sauvignon Blanc ($50). These are expensive wines, so buy them for a Honig Cabernetspecial occasion. Matthew didn't like the Brasserie too much because he felt the people were stuck up and snobby. I didn't really notice it, but then again I was just focusing on the wine.

Big Fish above the barTo make my hubby feel better, I took him out to our favorite sushi restaurant, Ono Sushi. This ain't your regular sushi joint. It's hip, it's happening, and it's loud. The restaurant has a huge menu and they have tons of specialties, but we like the sushi platter for two ($37), their miso soup ($2.50),and they make killer lemon drop martinis ($8).

Miso Yummy, sushi. Cali and Tuna rolls

Platter for two with tuna, salmon, yellow tail, red snapper, surf clam, scallops, octopus and unagi sushi and California and Tuna Rolls.

All their food is freshly prepared and we like to sit at the sushi bar and watch one of the many talented chefs create their masterpieces. The decor of the place is eclectic, for lack of a better word. Anyone from an AARP member to a drag queen will feel comfortable here. If you're squirmish about trying sushi, I recommend this place. All their fish is fresh outta the water and they have incredible specialties like the Volcano Roll ($12) or the Ono Sushi Roll ($13) which are bound to convert any sushi hater into a sushi lover.

Mmmmmm...sushi Ono Sushi is pricey, of course. But it's well worth it. If you're on a business trip, bring your clients here. It's a great restaurant with a good ambiance and on Wednesdays they have $1 and $2 dollar sake specials!!!

All photos taken with my Samsung mobile phone.