Sunday, August 23, 2009

Braised Beef Short Ribs in Red Wine

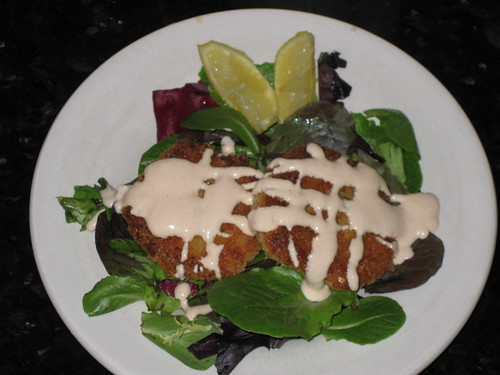
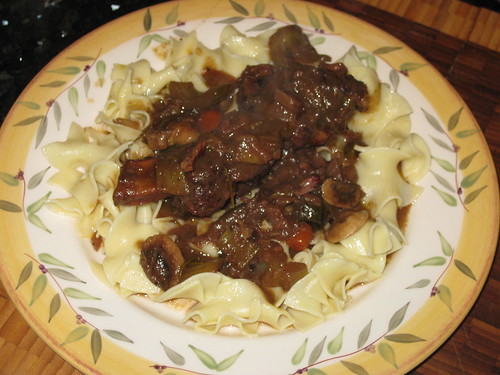
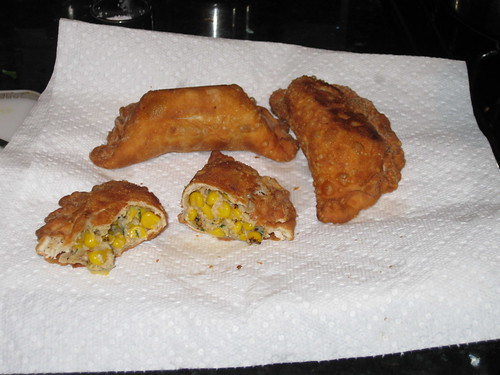
I'm a sucker for sales, especially with groceries. About a month ago I saw a package of big, beautiful short ribs on sale at Albertson's and I just couldn't pass it up. I put them in the freezer in hopes that I would cook them for my hubby when he came home, and that's what I did last night. It was pretty much an all-day task, but I think it was worth it. I served the short-ribs over egg noodles, but mashed potatoes or even a side of spatzl would have been a good side dish. Since I can't drink right now, I think a good bottle of Burgundy or an Italian table wine will pair up nicely with this meal. You don't want a big, bold California red wine to overpower this dish.

INGREDIENTS

  • 6 beef short ribs, trimmed of fat
  • kosher salt & freshly ground black pepper
  • 1/4 cup olive oil
  • 1 1/2 cups chopped onions (2 onions)
  • 4 cups large-diced celery (6 large stalks)
  • 2 carrots, peeled and large-diced
  • 1 small fennel, fronds, stems, and core removed, large-diced
  • 1 leek, cleaned and large-diced, white part only
  • 3 garlic cloves, finely chopped
  • 1 (750 ml) bottle Burgundy wine or dry red wine
  • fresh rosemary sprig
  • fresh thyme sprig
  • 6 cups beef stock
  • 1 tablespoon brown sugar
DIRECTIONS
  1. Preheat the oven to 400 degrees F. Place the short ribs on a sheet pan, sprinkle with salt and pepper, and roast for 15 minutes. Remove from the oven. Reduce the oven temperature to 300 degrees F.
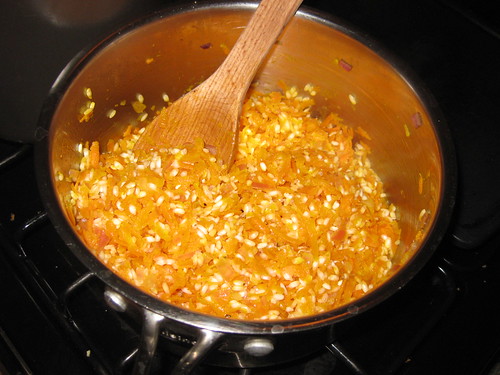
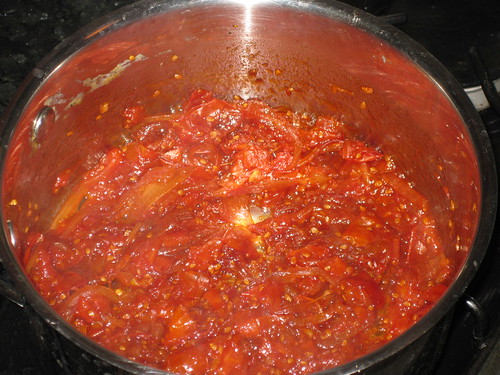
  2. Meanwhile, heat the olive oil in a large Dutch oven and add the onion, celery, carrots, fennel, and leek and cook over medium-low heat for 20 minutes, stirring occasionally. Add the garlic and cook for another 2 minutes. Pour the wine over the vegetables, bring to a boil, and cook over high heat until the liquid is reduced by half, about 10 minutes. Add 1 tablespoon salt and 1 teaspoon pepper. Tie the rosemary and thyme together with kitchen twine and add to the pot.
  3. Place the roasted ribs on top of the vegetables in the Dutch oven and add the beef stock and brown sugar. Bring to a simmer over high heat. Cover the Dutch oven and bake for 2 hours or until the meat is very tender.
  4. Carefully remove the short ribs from the pot and set aside. Discard the herbs and skim the excess fat. Cook the vegetables and sauce over medium heat for 20 minutes, until reduced. Put the ribs back into the pot and heat through. Serve with the vegetables and sauce.

Wednesday, August 19, 2009

Parmesan-Carrot Risotto

I bought a bag of carrots a week ago and I had only used two. So I was looking for a recipe to use up some of the carrots and I stumbled upon this recipe from Martha Stewart. I have to admit I haven't cooked a lot of her recipes, mainly because I don't subscribe to her magazine and I've always thought of Martha's magazine more of a craft and decorating type. Anyway, this dish came out quite yummy, and yes, I did do a few modifications, but only to make the risotto creamier.

INGREDIENTS (serves 4)

  • 4 cups reduced-sodium chicken broth
  • 2 tablespoons butter
  • Olive oil
  • 1 medium red onion, finely chopped
  • 6 medium carrots, grated (I only used 4 carrots)
  • Coarse salt and ground pepper
  • 1 1/4 cups long-grain white rice (I used Arborio rice; I'm not entirely sure why Martha Stewart has long-grain white rice in her recipe, though)
  • 1/2 cup dry white wine
  • 1/4 cup grated Parmesan
  • 2 wedges of Laughing Cow Original Swiss spreadable cheese product, room temperature
  • 2 tablespoons finely chopped parsley
DIRECTIONS
  1. In a saucepan, bring broth to a bare simmer over medium heat.
  2. In a large saucepan, melt 1 tablespoon butter and 1 tablespoon olive oil over medium heat. Add onion and carrots; season with salt and pepper. Cook, stirring occasionally, until softened, 5 to 7 minutes. Stir in rice and coat all grains and cook 1 more minute. Add wine; cook, stirring, until absorbed, 1 to 2 minutes.
  3. Add 2 cups hot broth; simmer over medium-low, stirring frequently, until mostly absorbed, 10 to 12 minutes. Continue to add broth, 1 cup at a time, stirring occasionally, until absorbed before adding more. Cook until rice is creamy and just tender, about 20 minutes (you may not need all the broth).
  4. Add the two wedges of cheese product and gently stir to melt and combine with rice.
  5. Remove risotto from heat. Stir in Parmesan, remaining 1 tablespoon butter, and chopped parsley and season with salt and pepper.

Tuesday, August 11, 2009

Humitas: Creamy Corn Empanadas

I love, love empanadas, but I just hate making them. It's not so much the process, but more of the frying part. I've had pretty bad accidents frying foods (scars on my fingers and wrists), so I stay away from this cooking method. However, I made an exception because my mother-in-law was in town and my husband also made a surprise appearance. Definitely be careful when frying. Make sure you slowly drop the empanadas in the hot oil and fry one or two empanadas at a time. And never, NEVER, put or accidentally drop water into the oil. My battle scars have lived to tell the tale!

INGREDIENTS (makes 8)

  • 4 tablespoons butter
  • 1/4 cup all-purpose flour
  • 1 cup milk
  • 1/4 teaspoon smoked paprika
  • Kosher or fine sea salt and freshly ground pepper
  • 2 cups frozen corn, defrosted (I used Trader Joe's fire roasted frozen corn)
  • 1 heaping tablespoon chopped flat-leaf parsley
  • 8 (6-inch) store-bought empanada wrappers, preferably red (I just used the plain kind)
  • Vegetable or canola oil
DIRECTIONS

Make the filling: Heat the butter in a small saucepan over medium heat. Add the flour and cook until smooth and bubbly, about 3 minutes. Add the milk slowly while whisking constantly. Bring to a simmer, stirring constantly, paying special attention to the corners of the saucepan. Add the paprika and salt and pepper, to taste. Stir in the corn and parsley, return to a simmer. Scrape the filling into a bowl and cool completely before filling wrappers. To Form: Moisten the edges of 1 of the empanada wrappers with a fingertip dipped in warm water. Center a generous 1/3-cup of the filling on the wrapper. Bring the sides of the wrapper together to meet over the filling and pinch the sides together to seal and form a half-moon shape. Lay the half-moon flat on the work surface. Work you way around the edges, bringing about 1/2-inch of the bottom layer of dough up and over the top layer, to make a mini-pleat. Press as you go to seal the pleats. If you don't want to mess with crimping, just seal the edges all the way around with the tips of the tines of a fork.

Fry the Empanadas: Pour enough vegetable or canola oil into a large heavy skillet to fill about 3/4-inch up the sides. Heat over medium heat until the tip of the handle of a wooden spoon immersed in the oil gives off a lively sizzle, about 375 degrees F. Carefully slip as many of the empanadas into the oil as will fit without crowding. Cook until the dough is lightly browned, about 3 minutes. Carefully flip and repeat. Drain briefly on paper towels before serving. Repeat with remaining empanadas.

Serve empanadas with Cilantro Pesto.

Saturday, August 08, 2009

Sopa Marquis

My mother-in-law, Kay, is in town visiting me this weekend and I, of course, had to make something special for her to eat. After I made my homemade chicken broth last week, I froze half of it and made this soup for Kay. It's a Yucatan soup and it's like Mexico's version of the best chicken soup for the soul. I'm sure you can make this soup with store bought chicken broth, but believe me this soup is superb with the homemade stuff.

INGREDIENTS

  • Homemade Chicken Broth
  • 8 stalks celery-large outer and pale inner stalks mixes, cut on the diagonal into 1/2-inch slices (about 3 cups)
  • 4 carrots, peeled and cut on the diagonal into 1/2-inch slices (about 2 cups)
  • 1 pound fideos (thin egg noodles) or angel hair pasta
  • 1 tablespoon olive oil
  • 2 Hass avocados, pitted, peeled, and cut into 1/2-inch cubes
  • 1/2 cup freshly chopped cilantro leaves
  • 1 lime, juiced
  • 1 lime, cut into wedges
DIRECTIONS

Make the broth and strain it. Pluck the chicken pieces out and set them aside until they are cool enough to handle.

When the chicken is cool, pull off the skin and discard, then shred the meat coarsely, getting rid of any fat, gristle, etc. as you go. Set the chicken meat aside.

Heat a large pot of salted water to a boil.

Bring the strained broth, celery, and carrots to a boil in a large pot on medium heat. Taste the broth and add salt and pepper, if necessary. Adjust the heat so the broth is simmering and cook until the vegetables are tender but not mushy, about 10 minutes.

Meanwhile, stir the fideos into the boiling water, crushing each handful to break the noodles up as you go. Cook until tender but with a little bit of a bite, about 4 minutes. Drain the noodles and put them in a bowl. Add the olive oil and toss well.

When the vegetables are tender, stir the shredded chicken, avocado, cilantro and lime juice into the soup. Bring the pot of soup to the table, along with the noodles and lime wedges. Spoon some of the noodles into each bowl and ladle some of the soup over them. (Stir the soup with a ladle so you're sure to get some of each ingredient into each bowl.) Pass the lime wedges separately.

Thursday, August 06, 2009

Tomato Chutney

Our two little tomato vines are still producing fruit. I was very surprised because I thought the season was over. Anyway, I didn't want the tomatoes to rot on the vine so I made this super simple and delicious tomato chutney. I got the recipe from a UK website but I changed it up and didn't add the red chili it asked for or the cardamon seeds. Instead, I substituted with a good pinch of red pepper flakes. How easy is this, you ask? I got up at 6am, started the chutney at 6:30 and it was done by 7:30am. I was able to cool it and jar it and store it in the fridge and still left for work on time!

INGREDIENTS

  • 1 cup red onions, finely sliced
  • 2 cups tomatoes, chopped
  • 1 garlic clove, minced
  • 1/4 tsp. fresh ginger, peeled and chopped
  • 1/2 cup brown sugar
  • 1 ounce red wine vinegar
  • Pinch of red pepper flakes
  • Pinch paprika
  • 1/4 tsp. coarse salt
DIRECTIONS

Place all the ingredients into a large heavy-bottomed pan and bring to a gentle simmer, stirring frequently. Simmer for 1 hr, then bring to a gentle boil so that the mixture turns dark, jammy and shiny. Place into sterilized jars and allow to cool before covering. Will keep for 6 weeks.

Monday, August 03, 2009

Roasted Tomatillo Salsa

After I came back from my Minnesota trip, I found my refrigerator extremely clean. Had the kitchen elves snuck into my house and cleaned it for me? Well, that kitchen elf is actually my mom. She has this "thing" where she likes to clean her kids' houses while they're out on vacation. I don't mind it at all; I actually like it, but I don't like it when she questions my experiments she finds in there like my sourdough starter, and the gin-soaked raisins, and the crazy looking preserved lemons.

Nevertheless, after she cleaned my fridge, she asked me what was I going to do with the tomatillos she found in there, and then I though, "oh, crap! I forgot I bought those." I've been meaning to make tomatillo salsa only because I love it so much poured warm over huevos rancheros, or as a cold salsa for tortilla chips. You can also use it as the verde sauce for enchiladas. This is one of those recipes that should be passed down because it's so common, so good and quite easy. Lastly, I don't seed my Serrano, but you can if you don't want too much heat.

INGREDIENTS

  • 1 pound tomatillos, husked
  • 1 white onion, peeled, sliced, quartered or whole
  • 4 garlic cloves
  • 1 jalapeno or Serrano pepper
  • 1 poblano pepper, seeded
  • 2 teaspoons ground cumin
  • pinch of Mexican oregano
  • 1 teaspoon salt
  • 1/2 cup chopped cilantro leaves
  • 1/2 lime, juiced
  • Water or chicken broth (optional)
DIRECTIONS

Preheat oven to 400 degrees F.

On a baking tray, roast tomatillos, onion, garlic, jalapeno and poblano for 12 to 15 minutes. Transfer the roasted vegetables and any juices on the bottom of the tray to a food processor. Add the cumin, oregano, salt, cilantro, and lime juice and pulse mixture until well combined but still chunky. If you want a more loose sauce, thin it out with a little water or chicken broth, one tablespoon at a time.

Saturday, August 01, 2009

Homemade Chicken Broth, Latina Style

I'm into my 30th week of pregnancy and it is increasingly becoming very uncomfortable for me to sleep. So I find myself waking up at 6 or 6:30am during the weekdays and weekends. Can you believe that? I used to be the sleep-in queen, and now I'm up early enough to do laundry, grocery shop and watch the new episode of Viva Daisy on Food Network all before 10AM! Daisy Martinez from Viva Daisy made this chicken broth and I just had to try it. I followed her directions almost to a "T", the only difference is that I cut my garlic head in half and just added it along with a bunch of cilantro, without placing them in a cheesecloth. The Latina part of this broth is the annatto seeds, the cilantro, and the ham hock which gives this broth a very homemade, almost umami type of taste, just like my abuelita used to make.

INGREDIENTS

  • 1 (5-pound) chicken, cut into 10 pieces or 5 pounds chicken backs, wings, necks and gizzards
  • 2 large Spanish onions (about 2 pounds), left whole and unpeeled
  • 1 large red bell pepper, cored, seeded, and cut into quarters
  • 1 large head garlic
  • 1 large bunch fresh cilantro
  • 2 teaspoons black peppercorns
  • 2 bay leaves
  • 1/2 teaspoons achiote (annatto) seeds
  • 1 ham hock
DIRECTIONS

Put the chicken, onions, and red pepper in a large stockpot. Rinse the garlic heads in cold water, then peel off the papery skin. Break the garlic head into individual cloves. Rinse and cut the roots off the cilantro. Cut a piece of cheesecloth the size of a kitchen towel. Put the garlic cloves, peppercorns, bay leaves, achiote seeds and cilantro on the cheesecloth, bring the ends together to make a little pouch, and tie the loosely with kitchen twine. Give the pouch a couple of good whacks with your kitchen mallet, and add it to the pot. Add enough cold water to cover the chicken by at least 2 to 3 inches. Drop in the ham hock, if using. Bring to a boil over medium-high heat, skimming foam off of the top as it forms. When the water comes to a boil, adjust the heat so the broth cooks at a steady, but not rolling boil. Cook for 30 minutes.

Check to make sure the breasts are cooked through, then remove them from the pan. Cook 15 minutes more, then remove the legs and thighs. Set the chicken aside to make another chicken dish. (If you're using backs, necks, wings, etc., you don't have to remove anything.) Leave the backs, necks and wings in to further flavor the broth.

Cook for 1 hour. Set a strainer over a large bowl and line the strainer with a couple of layers of cheesecloth. Carefully strain the broth through the cheesecloth. (Ladling it is the easiest and safest way.) Add salt, to taste, and let cool before refrigerating.

Monday, July 27, 2009

Linguine with Butter, Pecorino, Arugula and Black Pepper and Seared Jumbo Shrimp

This is one of Giada's recipes I saw on the Food Network about a week ago and it seemed easy enough. The only changes I made was that I used a mixture of Pecorino Romano and grated Manchego cheese, and I used spaghetti instead of linguine. I also cut the recipe in half because it's just me and baby fetus right now. I topped the spaghetti with seared jumbo shrimp that I quickly marinated in a little store bought pesto. This is a quick meal that I whipped up after a full day of travel and it certainly hit the spot and baby Blaha loved it!

INGREDIENTS (4 servings)

  • Salt
  • 1 pound linguine
  • 1/4 cup (1/2 stick) butter, room temperature
  • 1 1/4 cups very finely grated Pecorino Romano
  • 1 1/2 teaspoons freshly ground black pepper
  • 1 cup coarsely chopped arugula
  • 12 Jumbo shrimp, shelled and deveined
  • store bought pesto
DIRECTIONS

Place shrimp in a ziploc bag and add 1/4 cup of your favorite store bought pesto. Marinate in the fridge 15 to 30 minutes.

Bring a large pot of salted water to a boil over high heat. Add the linguine and cook until it is al dente, stirring frequently, about 8 minutes. Drain, reserving 1 cup of the cooking liquid.

Meanwhile, sear or grill the shrimp until just done.

Immediately toss the hot pasta in a large bowl with the butter to coat. While tossing the linguine, gradually sprinkle the cheese, pepper, and enough of the reserved cooking liquid evenly over the linguine to moisten. Add the arugula and toss to combine. Season the pasta, to taste, with salt.

Divide the pasta among 4 plates and place 3 seared shrimps on each plate and serve.

Friday, July 24, 2009

Ham and Brie Sandwich

When I first found out that I wasn't supposed to eat things such as raw fish in sushi, or cold cuts, and certain cheeses such as feta, queso fresco and brie because of the minuscule risk that they may give me listeriosis, well I almost died. Isn't it enough that I couldn't drink for 9 months? I wasn't sure if I was going to make it, but so far so good. It's been 29 weeks and I have been able to deny myself all that food that I love...but I had an insatiable craving for brie the other day. I couldn't stop thinking of the brie sandwich my husband and I shared in Paris almost 3 years ago. But how could I recreate a similar sandwich without potentially contaminating my fetus with listeria? I mean, don't pregnant women in France eat brie? But, to be safe I created this sandwich. It was delicious and it certainly satisfied my craving.

INGREDIENTS (makes 1 sandwich)

  • A demi French baguette
  • Brie
  • Thin sliced deli ham
  • Dijon mustard
  • Mayo
DIRECTIONS

Preheat oven to 350 degrees.

Slice the baguette lengthwise and smear a little mayo on one side and Dijon on the other. Place slices of brie on one slice of bread and top with several slices of the thin sliced ham. Bake the sandwich, open faced, for 5 to 7 minutes, or until brie begins to get melty. Then top the sandwich and squish it a little and bake another 4 to 5 minutes.

Remove from oven and slightly cool before eating with faux red wine, a.k.a. grape juice.

Wednesday, July 22, 2009

Mexican Wedding Cookies

Photo from Kraftfoods.com
These delightful, buttery and flaky cookies are known as Mexican Wedding cookies or Russian Tea Cakes. I was at my friend's wedding last Saturday and she had small favor bags for each guest filled with these cookies. I took 3 and now I wished I would have taken more! These are probably one of my favorite cookies, but I like to receive then rather than bake them only because a couple of years ago I made about 400 of these cookies to give out as favors for my step-dad's retirement party. There are various recipes on the net, but the one below is the one I tried out for the favors and they are so sinfully good, especially when you serve them with tea. Yum!

INGREDIENTS (makes 2 ½ dozen)

  • 1 cup (2 sticks) unsalted butter, at room temperature
  • ½ cup confectioners’ sugar, plus more for coating baked cookies
  • 1 teaspoon vanilla extract
  • 1 ¾ cups all-purpose flour, plus more for dusting hands
  • 1 cup walnuts or pecans, chopped into very small pieces (I usually grind them in my mini-food processor)
DIRECTIONS

Preheat the oven to 275 degrees F.

Using an electric mixer, cream the butter and sugar at low speed until it is smooth. Beat in the vanilla. At low speed, gradually add the flour. Mix in the pecans with a spatula.

With floured hands, shape dough into 1-inch balls. Place, 1-1/2 inches apart, on ungreased baking sheets.Continue to dust hands with flour as you make more cookies. Place onto prepared cookie sheets. Bake for 40 minute, but check them after 30 minutes. My oven cooks very high, so mine were done in 30 minutes. When cool enough to handle but still warm, roll the cookies in additional confectioners' sugar. Cool on wire racks.

Sunday, July 19, 2009

Irish Potato Pancakes

(Photo by Marge Perry / December 21, 2005)
Sadly, the great writer Frank McCourt died today. If you don't know who he is, then I'm sure you've read his book (or watched the movie) "Angela's Ashes." I have to say that I wouldn't have read any of Mr. McCourt's books had it not been for my friend, Amy. When we lived and worked in Boston, she invited me to a reading at the Copley Hotel. I was skeptical, but decided to go because she said there was an open bar.

Anyway, Mr. McCourt was the guest speaker and he was supposed to read from his new book, "'Tis," however all I recall was that he told us stories of his family, of Ireland, of moving to America and just made everyone laugh with his wonderful Irish sayings and his Irish wit. He was a great storyteller and, I think, a great writer.

Here's a great recipe for Irish potato pancakes, a.k.a., latkes. Serve the potato pancakes while crisp. I don't know what they would top these with in Ireland, but I know here in the states we love sour cream or apple sauce on our pancakes. RIP Frank.

INGREDIENTS (makes 6 pancakes)

  • 2 medium potatoes
  • whole egg
  • 4 slices Irish rashers or lean Canadian bacon
  • 1 tablespoon finely diced onion
  • 1 teaspoon chopped parsley
  • 1/4 teaspoon ground pepper
  • 2 tablespoons grated cheddar cheese
  • 3 tablespoons vegetable oil
  • 1/4 teaspoon salt
DIRECTIONS

Peel and grate raw potato; place in a bowl. Beat egg, and add to the potato.

Slice the raw lean bacon into thin strips (julienne). Add to the potatoes along with the diced onion, parsley, salt, pepper, and cheddar. Combine thoroughly.

In a crepe pan, heat oil over medium-high heat. Pour the mix onto the pan. Cook on both sides, until golden brown.

Recipe courtesy of epicurious.com

Friday, July 17, 2009

Rosemary Focaccia Bread

I found this recipe in recipezaar.com and I know what you're thinking: how can I bake in this hot weather? Well, let me tell you something when a pregnant woman wants focaccia bread she's going to get focaccia bread. This is a very easy recipe and I used some of the fresh rosemary I'm growing in the backyard but you can totally make it your own by using your own variations. Instead of the rosemary, you might add fresh chopped sage to the dough with some fresh Parmesan on top; or you can add sliced olives, thinly sliced zucchini or thinly sliced onions and top the bread with such cheeses as grated Parmesan, Asiago, or even Fontina.

INGREDIENTS

  • 1 (1/4 ounce) package active dry yeast
  • 3/4 cup warm water (105 to 110 degrees)
  • 3 cups unbleached all-purpose flour
  • 1 teaspoon salt
  • olive oil
  • 2 tablespoons chopped fresh rosemary, divided
  • coarse salt
DIRECTIONS

Dissolve the yeast in 1/2 cup of the warm water, and let sit 10 minutes until bubbly.

Meanwhile, in a large bowl, combine the flour, 1 tablespoon rosemary, one teaspoon of salt, yeast mixture and remaining water. Mix thoroughly with a wooden spoon and then your hands. (Note: if dough feels dry, add a bit more water a tablespoon at a time until it feels more elastic).

Transfer to a floured work surface and knead by hand for a few minutes or until smooth.

Place in a well oiled bowl, cover with plastic wrap, and let rise until doubled, about 1 1/2 hours.

Preheat oven to 425.

Punch down and place on an oiled baking sheet, forming into an oval or circle or rectangle. If you want, you can sprinkle corn meal on baking sheet instead of oil for a more rustic focaccia.

Dimple the top surface with your finger tips, then prick about 10 to 12 times with a fork and finally brush olive oil and sprinkle with coarse salt and remaining rosemary. Bake about 15 to 20 minutes or until golden. Serve warm or at room temperature.

I usually eat focaccia with slices of brie, but since I'm not supposed to eat fresh brie, I just cut myself a chunk of brie and baked it until it got all melty and paired it with the focaccia. It was heaven!

Edamame Hummus

Edamame Hummus

Elaine and my mom and Lindsey are throwing me a baby shower next month and when they were talking about what food to serve, it reminded me of a wonderful dip I once had at my friend's shower a few years ago. This is an absolutely great dip. I looks like guacamole, but the taste is completely different. Nowadays you can find tahini in the Asian food section of your grocery store or at any Middle Eastern supermarket. Serve with pita chips or sliced cucumber, celery sticks and olives. I'm telling you, if you're into soy and healthy eating, you're going to enjoy this dip.

INGREDIENTS (makes about 1-1/2 cup)

  • 1/2 pound frozen shelled edamame (green soy beans)
  • 1/4 cup tahini
  • 1/4 cup water
  • 1/2 teaspoon freshly grated lemon zest
  • 1 lemon (about 3 tablespoons), juiced
  • 1 clove garlic, minced
  • 3/4 teaspooon kosher salt
  • 1/2 teaspoon ground cumin
  • 1/4 teaspoon ground coriander
  • 3 tablespoons extra-virgin olive oil
  • 1 tablespoon chopped fresh flat-leaf parsley
  • Suggested serving: pita chips, sliced cucumbers, celery, and olives
DIRECTIONS

Boil the beans in salted water for 4 to 5 minutes, or microwave, covered, for 2 to 3 minutes.

boiling the edamame

In a food processor, puree the edamame, tahini, water, lemon zest and juice, garlic, salt, cumin, and coriander until smooth. With the motor running, slowly drizzle in 2 tablespoons of the olive oil and mix until absorbed.

all the ingredients in the food processor

Transfer to a small bowl, stir in the parsley and drizzle with remaining oil. Serve with the suggested vegetables, or refrigerate, covered, up to 1 day.

Recipe courtesy of Food Network Kitchens

Monday, July 13, 2009

The Prado Chipotle Hummus

Picture courtesy of ephemeron.net
I know you've read many posts and many reviews of the various foods Matthew and I have eaten at The Prado. Yes, I can say that The Prado Restaurant in Balboa Park is our favorite restaurant. We have eaten inside the fancy shmancy restaurant, which is great, but our favorite (and my parents, too) is eating outside in the cocktail area and load up on their wonderful appetizers. One thing I don't think I mentioned is that no matter if you eat inside or outside, every table always gets a complimentary hummus and flatbread starter. I was so lucky to have found the hummus recipe from Chef Jeff Thurston. If you love hummus, you'll love this recipe because it has that unexpected chipotle kick in the background.

INGREDIENTS (makes 2 cups)

Source: Chef Jeff Thurston, The Prado, San Diego, California

  • 1 1/2 cups cooked garbanzo beans
  • 3 tablespoons tahini
  • 1 1/2 teaspoons chopped garlic
  • 1 tablespoon plus 1 teaspoon lemon juice, or more to taste
  • 1 tablespoon plus 1 teaspoon lime juice, or more to taste
  • 2 1/2 teaspoons canned chipotle chiles in adobo sauce, chopped
  • 1 teaspoon kosher salt, or to taste
  • 1/8 bunch cilantro, cleaned and chopped
  • 1/2 cup plus 2 tablespoons olive oil blend
  • Salt and pepper, to taste
DIRECTIONS

Put beans through a meat grinder on a medium die, or puree them in a blender or food processor.

In blender or food processor or in bowl of an electric mixer, combine garbanzo puree, tahini, garlic, lemon juice, lime juice, chipotles, kosher salt and cilantro. On low speed, mix ingredients well while adding oil in a slow, steady stream. Season with salt and pepper, and add more citrus juice if needed.

Serve with flatbread for dipping.

Thursday, July 09, 2009

Shrimp Cakes with Sriracha-Lemon Cream

As I mentioned in an earlier post, I was in a cleaning frenzy a few days ago and I started cleaning out the fridge and freezer. Well, lo and behold I found some large, uncooked frozen shrimp tucked way back in the freezer. I thaweded them and made sure they were still good to use (and they were). So I found this shrimp cake recipe but I totally changed it and made it my own. I also came up with the Sriracha-Lemon Cream sauce, although I have to say I was inspired by the orangy-mayo sauce the sushi chefs drizzle over the rolls. Anyway, these were gooood...although kind of spicy hot, which for some reason I'm really craving right now. I made my cakes about the size of a crab cake, but you can make them smaller if you prefer.

INGREDIENTS (makes 6 large or 12 small cakes)

  • 16 uncooked large shrimp (about 1 pound), peeled, deveined
  • 1 smal garlic clove, minced
  • 1 large egg
  • 1 1/2 tablespoons shallot, coarsely chopped
  • 2 tablespoons fresh lemon juice
  • 1 tablespoon Dijon mustard
  • 1 tablespoon minced fresh parsley
  • Pinch of red pepper flakes
  • 1/2 teaspoon salt (I only used 1/4 tsp.)
  • Pinch of ground black pepper
  • 2 cups panko (Japanese breadcrumbs)
  • Oil for frying
Siracha-Lemon Cream
  • 1/4 cup good mayo
  • 1/4 cup plain yogurt, preferably Greek
  • 1 tablespoon sriracha hot sauce
  • 1 teaspoon ketchup
  • 1/2 teaspoon soy sauce
  • Juice of half a lemon
  • Pinch of salt
DIRECTIONS

Corasely chop shrimp and garlic in processor. Add egg, shallot, lemon juice, mustard, parsley, red pepper flakes, salt, and pepper. Blend-in using on/off turns. Add 1 cup panko and blend-in using on/off turns. Form mixture into twelve 3-inch-diameter cakes (I formed mine into 4 to 5 inch cakes for large ones). Roll cakes in remaining 1 cup panko; transfer to waxed-paper-lined baking sheet. Refrigerate 10 minutes. (Can be made up to 4 hours ahead. Cover and refrigerate.) Heat 2 tablespoons oil in heavy large skillet over medium-high heat. Working in batches, fry cakes until cooked through and golden brown on both sides, adding more oil to skillet as needed, about 3 to 4 minutes per side. Place 2 shrimp cakes per plate and spoon some of the Sriracha-Lemon Cream sauce on each and serve immediately.

To make the sriracha-lemon cream: in a small bowl mix all ingredients until well blended and refrigerate 10 to 15 minutes before serving.

Wednesday, July 08, 2009

Cheese Pupusas

Pupusas are similar to corn tortillas, only thicker and stuffed with cheese, beans or meat. The pupusa originated in El Salvador and I personally love them because I enjoy the corn flavor of the masa dough. If you ever have any leftover refried beans, you can use that to stuff pupusas. At my local Salvadorian restaurant they serve pupusas with a curtido, which is a pickled cole-slaw, and salsa roja. However, you can top it with your favorite salsa and even some crema fresca.

INGREDIENTS (makes 5 to 6 pupusas)

  • 2 cups Masa harina
  • 1 cup warm water
  • 1 cup grated quesillo, queso fresco, farmer's cheese, mozzarella, Swiss cheese or a combination of any of these cheeses
DIRECTIONS
  1. In a large bowl, mix together the masa harina and water and knead well. Knead in more water, one tablespoonful at a time if needed, to make a moist, yet firm dough. (It should not crack at the edges when you press down on it.) Cover and set aside to rest for 10 minutes.
  2. Roll the dough into a log and cut it into 8 equal portions. Roll each portion into a ball.
  3. Press an indentation in each ball with your thumb. Put about 1 tablespoon of cheese filling into each indentation and fold the dough over to completely enclose it. Press the ball out with your palms to form a disc, taking care that that the filling doesn't spill out.
  4. Line a tortilla press with plastic and press out each ball to about 5-6 inches wide and about 1/4-inch thick. If you don't have a tortilla press, place the dough between two pieces of plastic wrap or wax paper and roll it out with a rolling pin.
  5. Heat an ungreased skillet over medium-high flame. Cook each pupusa for about 1-2 minutes on each side, until lightly browned and blistered. Remove to a plate and hold warm until all pupusas are done. Serve with curtido and salsa roja.

Tuesday, July 07, 2009

Creamy Bowties with Chicken and Broccoli

I decided to clean out the freezer and I found two chicken breasts, skin on and bone in, in there that were almost three months old. Instead of throwing them out, I thawed them and roasted them. Then I removed the skin and the bones and shredded the chicken. So now I had a couple of of cups of shredded chicken and below is a very simple, yet quite easy dish where I used some of the shredded chicken. I added red pepper flakes to my recipe because I just love the spiciness with broccoli. If you're unable to find the garlic and herb soft-spread cheese, you can use Philadelphia cream cheese instead and add Italian herbs and some garlic to flavor it up.

INGREDIENTS (makes 4 servings)

  • 8 ounces bow-tie pasta
  • 2 tablespoons butter or margarine
  • 1/2 pound boneless, skinless chicken breasts, cut into thin strips
  • 2 cups broccoli florets
  • 1 small red bell pepper, cut into thin strips (I omitted them from this recipe)
  • 1 cup canned low-sodium chicken broth
  • 6.5-ounces garlic and herb soft-spread cheese*
  • Good pinch of red pepper flakes, optional
DIRECTIONS

Bring a large pot of water to a boil over high heat. Add bow ties and cook according to package directions. Drain and set aside.

Melt butter in a large skillet over medium-high heat. Add chicken and cook, stirring, until done, about 5 minutes. Remove chicken and set aside. (I skipped this step as I already had cooked chicken).

Add broccoli, red pepper flakes (if using), red bell pepper strips and chicken broth to skillet. Cover and simmer until broccoli is tender, about 5 minutes. Return chicken to skillet and cook 1 minute. Remove from heat and add the cooked pasta and cheese. Stir until cheese is melted.

* There are several brands of garlic and herb soft-spread cheeses on the market, including Alouette, Rondele, and Boursin.

Saturday, July 04, 2009

Chicken Salad with Peanut Dressing and Toasted Sesame Seeds

As you can see, I haven't been cooking much and that was due to the "sick" I had. But now I'm over it and my appetite is back on...now more than ever specially since I'm almost 7 months pregnant. I'm still having issues with red meat, but I know I need to get protein in my system so I combined the peanut dressing from one recipe with some roasted chicken I had and came up with this salad. The peanut dressing is actually for hot pasta (like spaghetti or fettuccine) and it makes about 2 cups of dressing. Since I only needed a few tablespoons for one salad, I'm saving the leftover so that I can make this Crunch Noodle Salad tomorrow.

INGREDIENTS

  • Mixed greens
  • Cooked chicken, cut into bite sized chunks
  • Peanut dressing (recipe below)
  • 1/2 tablespoon toasted sesame seeds or chopped peanuts
Peanut Dressing
  • 1 cup vegetable oil
  • 1/4 cup rice wine vinegar
  • 1/3 cup soy sauce
  • 3 tablespoons dark sesame oil
  • 1 tablespoon honey (I added a little more than a tablespoon)
  • 2 garlic cloves, minced
  • 1 teaspoon grated fresh ginger
  • 2 tablespoons toasted white sesame seeds, divided
  • 1/2 cup smooth peanut butter
DIRECTIONS

Make the dressing: Whisk together the vegetable oil, rice wine vinegar, soy sauce, sesame oil, honey, garlic, ginger, 2 tablespoons sesame seeds and peanut butter in a medium bowl.

To make salad (for one): place enough mixed greens on plate and top with chopped chicken. Drizzle some of the peanut dressing over the salad then top with toasted sesame seeds or toasted chopped peanuts.

Friday, June 26, 2009

Ultimate Ginger Cookie

So I was home sick today (okay, not really sick, but with a slight case of the shingles and I must be quarantined from all babies and elderly people) and was watching the Barefoot Contessa when I saw this recipe on her show. I said to myself, "hey, I have all those ingredients already!" How do I have crystallized ginger, you ask? Well, it just so happens I had some leftover crystallized ginger my sister in law gave me when I first started getting morning sickness (btw, to any new preggies out there, crystallized ginger really works when you're feeling nauseous and gross. Just suck on a little piece). The cookie result: spicy, gingery, crunchy, chewy, did I mention spicy? I'm sending my Matthew a batch because he loves spicy cookies...hmm, maybe that's why he married me?

INGREDIENTS (16 cookies)

  • 2 1/4 cups all-purpose flour
  • 1 teaspoon baking soda
  • 2 teaspoons ground cinnamon
  • 1 1/2 teaspoons ground cloves
  • 1/2 teaspoon ground nutmeg
  • 1/2 teaspoon ground ginger
  • 1/4 teaspoon kosher salt
  • 1 cup dark brown sugar, lightly packed
  • 1/4 cup vegetable oil
  • 1/3 cup unsulfured molasses
  • 1 extra-large egg, at room temperature
  • 1 1/4 cups chopped crystallized ginger (6 ounces)
  • Granulated sugar, for rolling the cookies
DIRECTIONS

Preheat the oven to 350 degrees F. Line 2 sheet pans with parchment paper.

In a large bowl, sift together the flour, baking soda, cinnamon, cloves, nutmeg, ginger, and salt and then combine the mixture with your hands.

In the bowl of an electric mixer fitted with the paddle attachment, beat the brown sugar, oil, and molasses on medium speed for 5 minutes. Turn the mixer to low speed, add the egg, and beat for 1 minute. Scrape the bowl with a rubber spatula and beat for 1 more minute. With the mixer still on low, slowly add the dry ingredients to the bowl and mix on medium speed for 2 minutes. Add the crystallized ginger and mix until combined. Scoop the dough with 2 spoons or a small ice cream scoop. With your hands, roll each cookie into a 1 3/4-inch ball and then flatten them lightly with your fingers. Press both sides of each cookie in granulated sugar and place them on the sheet pans. Bake for exactly 13 minutes. The cookies will be crackled on the top and soft inside. Let the cookies cool on the sheets for 1 to 2 minutes, then transfer to wire racks to cool completely.

Wednesday, June 24, 2009

Turkey Meatballs

After four tries, I've finally come up with the perfect, flavorful and juicy turkey meatballs. Yes, you heard right: turkey. I believe that the key to these meatballs are fresh breadcrumbs, none of that store bought stuff. I also think that the cheese adds additional creaminess. The recipe is a combination of a Dave Baggs ground beef meatball recipe slightly altered by me. The reason I do turkey instead of ground beef is because there are members in my family that don't eat red meat.

Use these turkey meatballs in a meatball sub and top with your favorite marinara sauce or use them in spaghetti (make it whole wheat spaghetti if you want to add more fiber and protein to your diet) and you will have yourself a really good, hearty meal and you won't even miss the ground beef!

INGREDIENTS (makes 24 to 28 meatballs)

  • 2 to 2-1/2 lb. ground turkey
  • 4 cloves garlic, minced
  • 2 eggs, beaten
  • 2 Tablespoon dried parsley flakes or 4 Tablespoons of fresh parsley, finely chopped
  • 1 teaspoon coarse salt
  • 1/2 teaspoon ground black pepper
  • 2 cups fresh, soft breadcrumbs
  • 1 cup grated mild cheddar cheese
  • 1/2 cup grated mozzarella cheese
DIRECTIONS

Pre-heat oven to 350 degrees.

In a large bowl, mix all the ingredients until they are well distributed. Don't worry about overmixing. Place it in the fridge for 30 minutes to let the breadcrumbs absorb all the flavors.

Form turkey mixture into golf-sized meatballs.

Place them in a greased cookie sheet and bake for 10 minutes. Turn meatballs over and bake another 6 to 8 minutes. Remove from oven and let cool. At this point you can store them and use them the next day (I find that leaving them in the fridge overnight makes the meatballs taste better the next day) or place them in freezer bags and freeze and store whenever you need to use them.

To make fresh breadcrumbs: place 1/2" pieces of French bread or thick white bread in a food processor and whiz until you get your breadcrumbs.

To make a very simple marinara sauce: saute 1 large minced garlic clove in 1 tablespoon olive oil for 30 seconds. Add 1 teaspoon fresh oregano and 1 bay leaf. Let it saute 30 more seconds. Add one (28 oz) can of "6 in 1 Tomato Sauce" and 1/2 teaspoon coarse salt and several grinds of black pepper. Bring to a boil, turn down heat and simmer for 30 minutes. Taste for seasoning and add more salt, if needed.